Sunday, May 31, 2020

How to prepare shower walls for tile (Easy to follow guide)

Bathrooms are spaces that commonly require special care to keep them bright and shiny. Due to the humidity that accumulates in these areas, both the furniture and the elements that cover the walls and the floor can be damaged over time. A place prone to this is the shower. If you think the time has come to update its look, you must keep the tiles, but before replacing them, you must prepare the walls. If you want to save money and do the project yourself, then you need to know how to prepare shower walls for tiles.

Making a waterproofing shower wall depends on the initial installation being adequate. If the base coat is defective, you will be at risk of the water penetrating the cracks and damaging the integrity of the wall.
Stevenson-by-TAS-Construction How to prepare shower walls for tile (Easy to follow guide)
Image source: TAS Construction

Precisely, bathroom walls are made with tiles to avoid humidity, but even this can be a problem in faulty construction. When it comes to showers, then you have to take extra precautions.

With the following guide, you will appreciate how easy it is to make the necessary preparations in the shower to replace the tiles. We guarantee that even someone who is just starting in the construction world can learn this project.

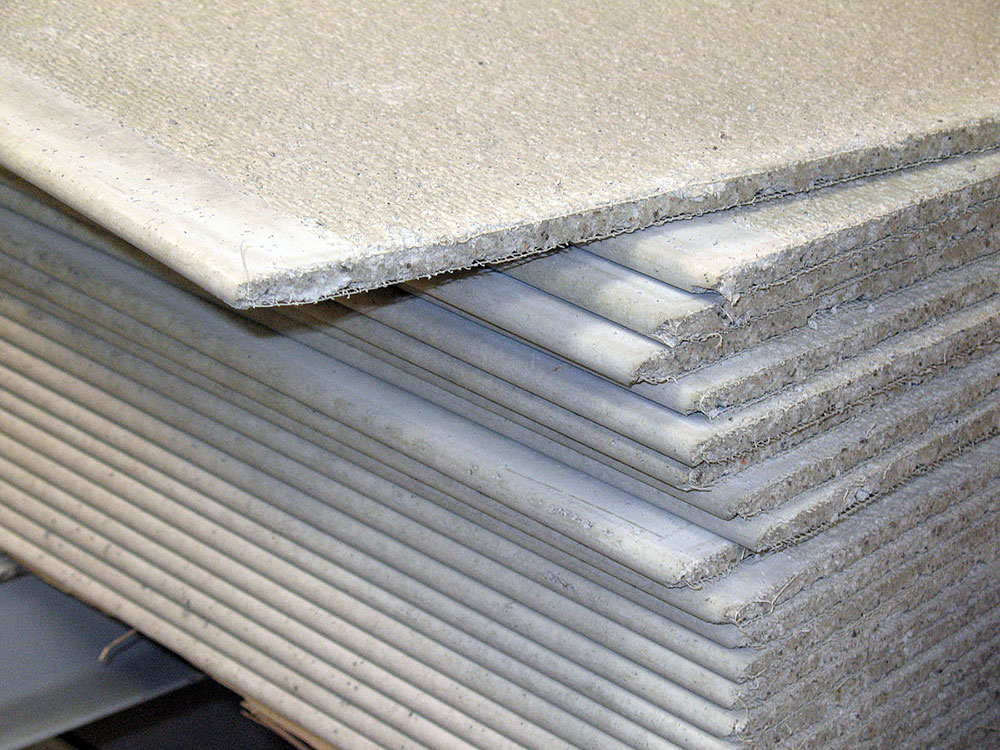
Solid cement board required

cement-board1 How to prepare shower walls for tile (Easy to follow guide)

If you’ve seen drywall installation before, you should know that the process is slightly different when it comes to tile. The internal walls that cover a house do not require a special waterproofing to prevent moisture, but this is a necessary process when it comes to the shower wall.

This is where the cement base comes in. This support is the way to waterproofing shower walls before tiling. The cement provides a layer on which to install the tiles firmly.

To save material, you can limit yourself to building this cement backing exclusively where water will fall. Make sure that the support has a thickness identical to that of the drywall so that the installation is smooth and without imperfections.

After this, the process for laying the tiles is the same as if they were drywall.

Read this before you start

cement-board2 How to prepare shower walls for tile (Easy to follow guide)

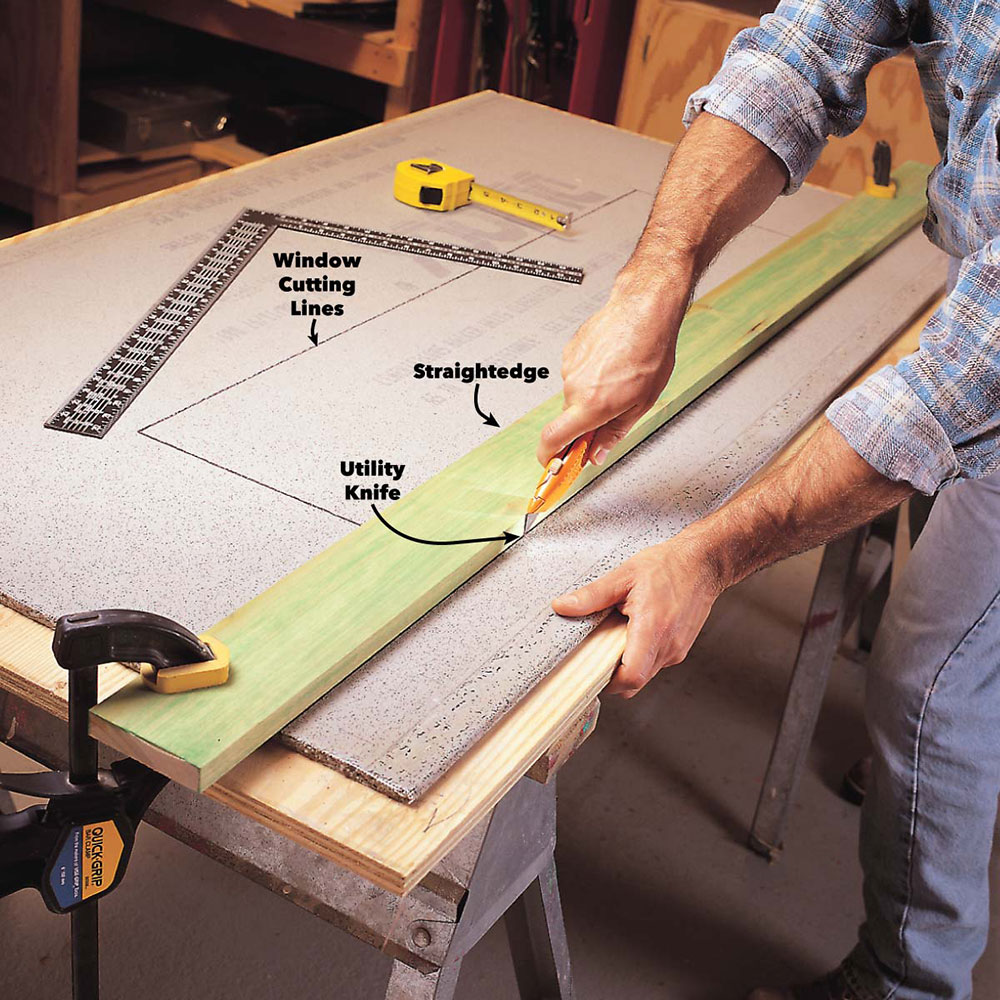
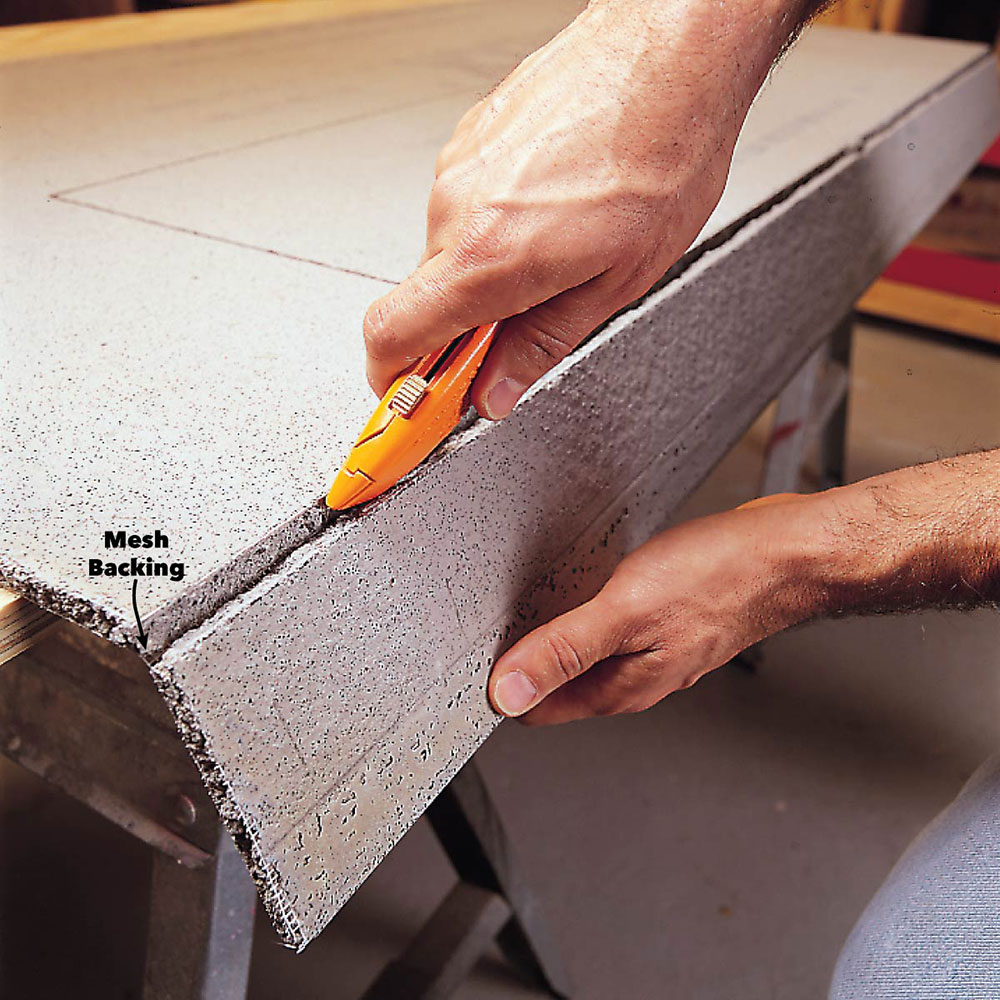
You should know about how to prepare shower walls for tile that you are faced with a meticulous task that requires exact measurements. The cement board must be cut to the exact size to fit on the wall. For this, it is recommended to use a jigsaw.

This support has to be secured to the structure of your home so that it does not move. Cement can be bolted to wood with the use of concrete screws.

wall-board1 How to prepare shower walls for tile (Easy to follow guide)

Other dimensions to be monitored are those of the mortar. This element that makes up the tile wall will determine the amount of material you need for the project.

Installation of the concrete support

cover-with-panel How to prepare shower walls for tile (Easy to follow guide)

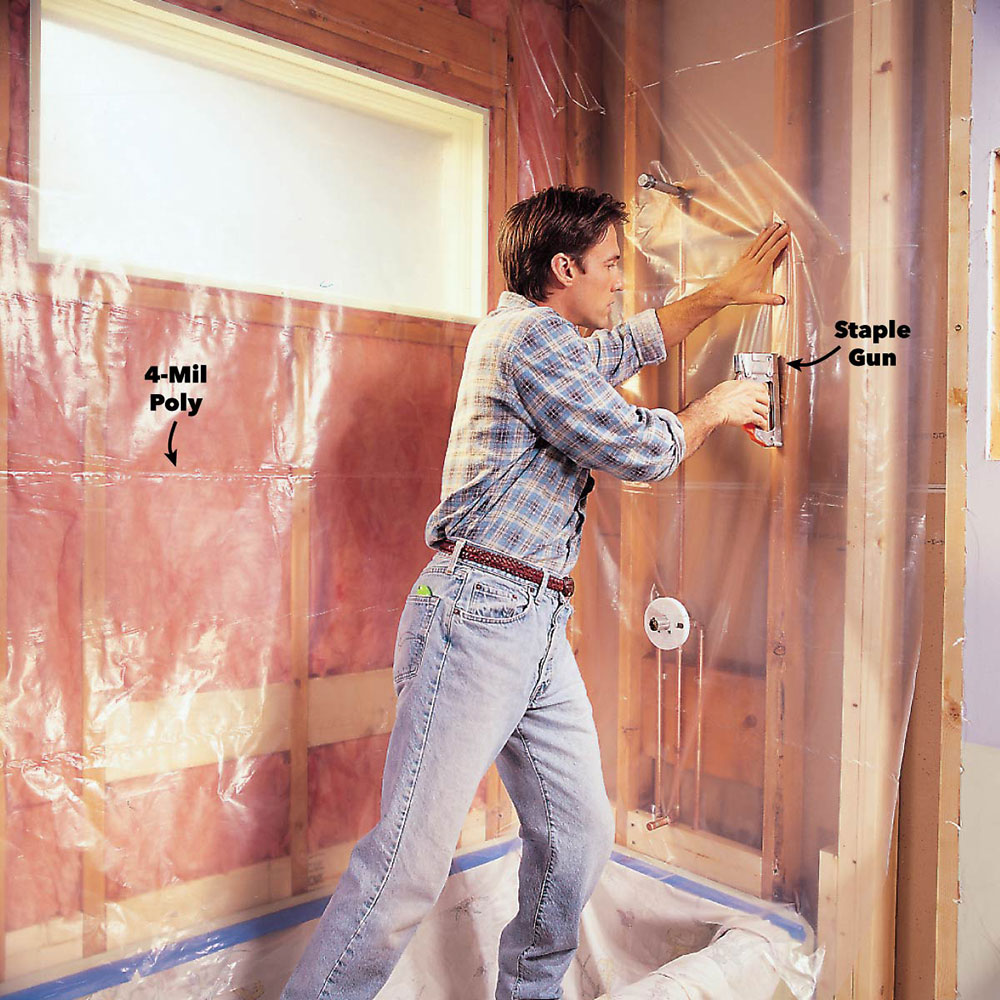
Using multiple plastic sheets, cover the wall studs to obtain a support on which to install the cement panels. Using a knife or razor, cut the plastic sheeting so that it is the correct size. The idea is that the plastic covers the shower tray and goes beyond the flanges on the wall.

To fix them on the frame, use wood staples. These should work even for multiple overlapping plastic layers.

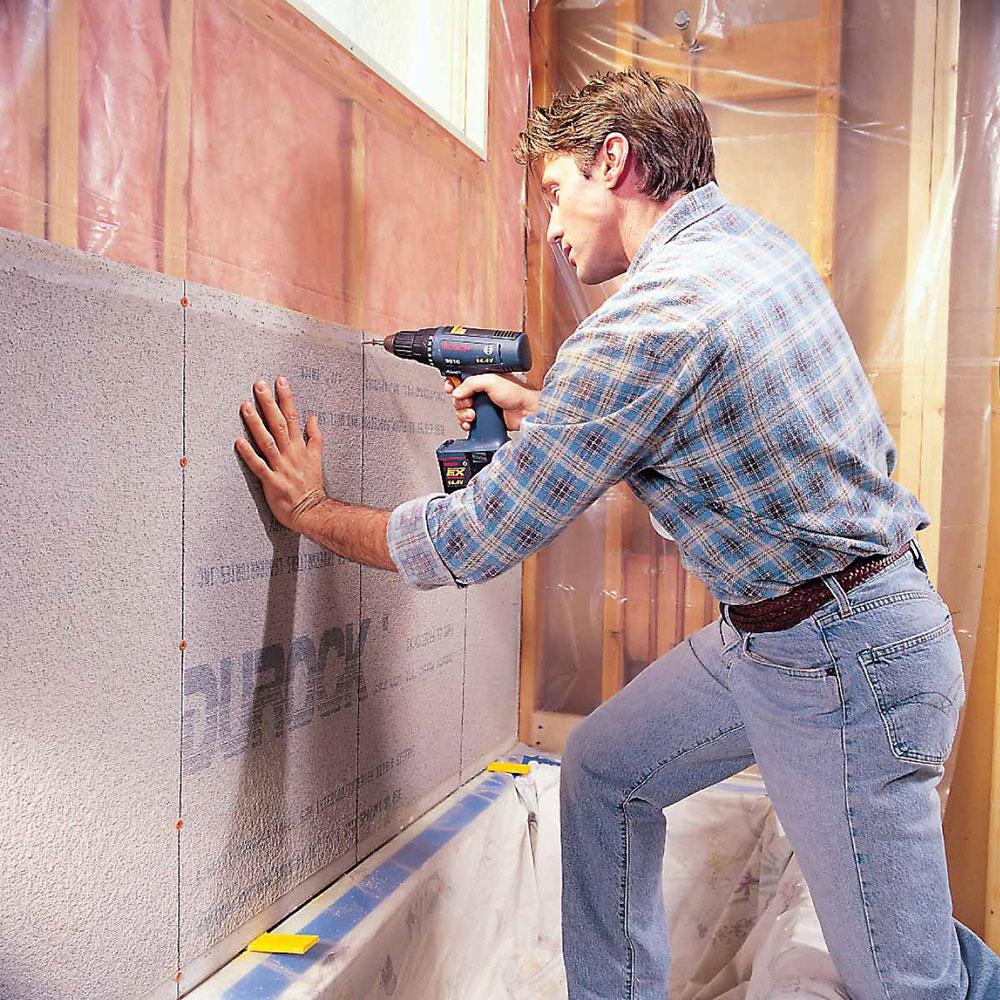
You will now proceed with the installation of the concrete panels. Measure the space on the wall so you can cut them before placing them. Install it directly on the studs, like drywall.

measure How to prepare shower walls for tile (Easy to follow guide)

Two concrete sheets are required at the edges of the vertical studs, so you must divide the structure into two sections.

Continue the process by securing the concrete to the structure using the concrete screws. These should be placed on the structure’s studs so that they do not present problems, such as deformities.

Now you must cover the board’s joints using mortar and a strip of fiberglass mesh tape. Again, you can save material by not covering the end of the shower tray. Similarly, try to make the material smooth when you apply it so that there are no lumps to install the tiles.

cement-board How to prepare shower walls for tile (Easy to follow guide)

If there is a gap between the board and the cement support, cover it with more tape and mortar. Avoid leaving open spaces where water could leak.

Now that you know what goes behind shower walls, you can have a better understanding of the materials you need. Although in the guide we say that it requires concrete boards, the reality is that you can change them as long as the material you use is water-resistant.

You can even install two protective layers before the plaster wall so that water must filter three sheets before reaching the structure. This will depend on your needs and if you have the necessary budget.

Waterproof membrane for shower walls

membrane How to prepare shower walls for tile (Easy to follow guide)

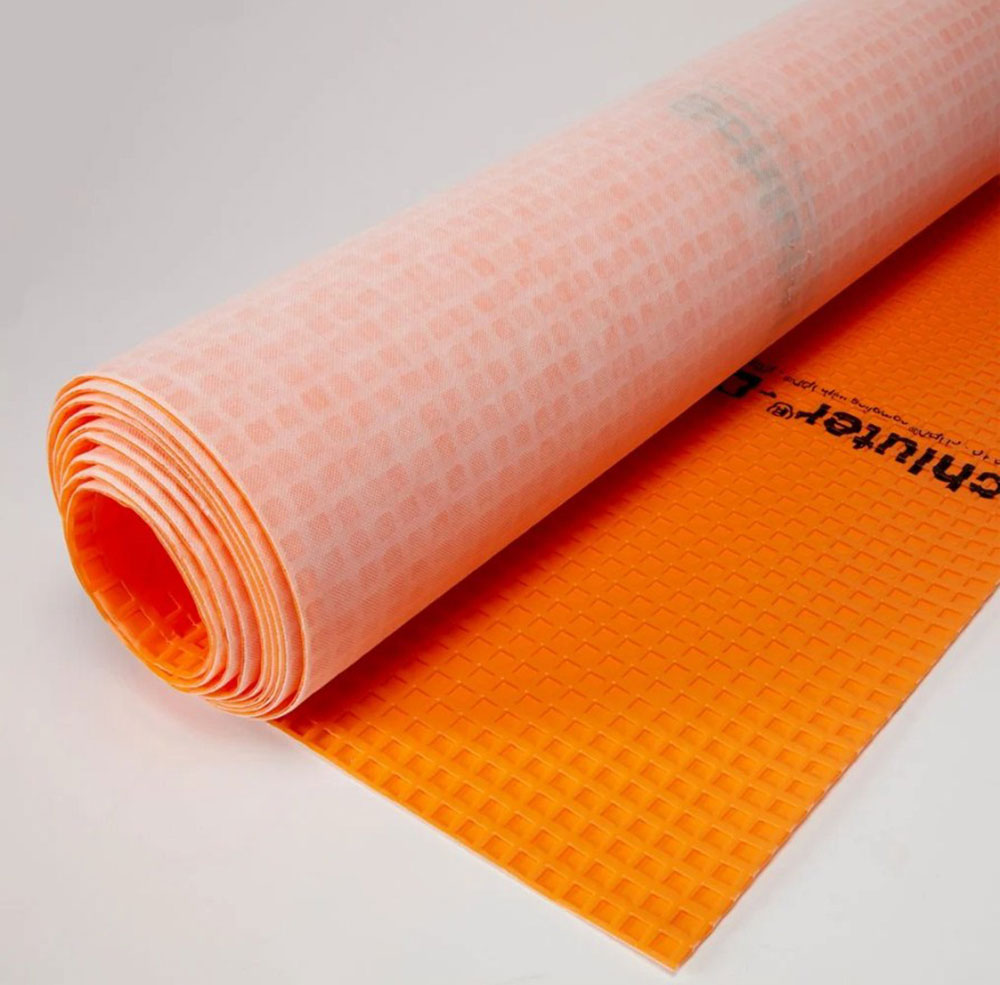
In addition to the concrete sheets that give a support to the wall, you must put a waterproof membrane that, ironically, has to protect the concrete. Although the cement is water-resistant, it does not prevent it from leaking, so it will be damaged if a protective membrane is not placed.

Although only the installation of a waterproof membrane is necessary, you can also install one that retains steam, but this can be behind the concrete boards as a preventive measure.

Install the waterproof membrane

martar How to prepare shower walls for tile (Easy to follow guide)

The next step in how to prepare shower walls for tile includes cleaning the concrete sheets to lay the membrane. Using a damp sponge, clean the board without exceeding the amount of water used.

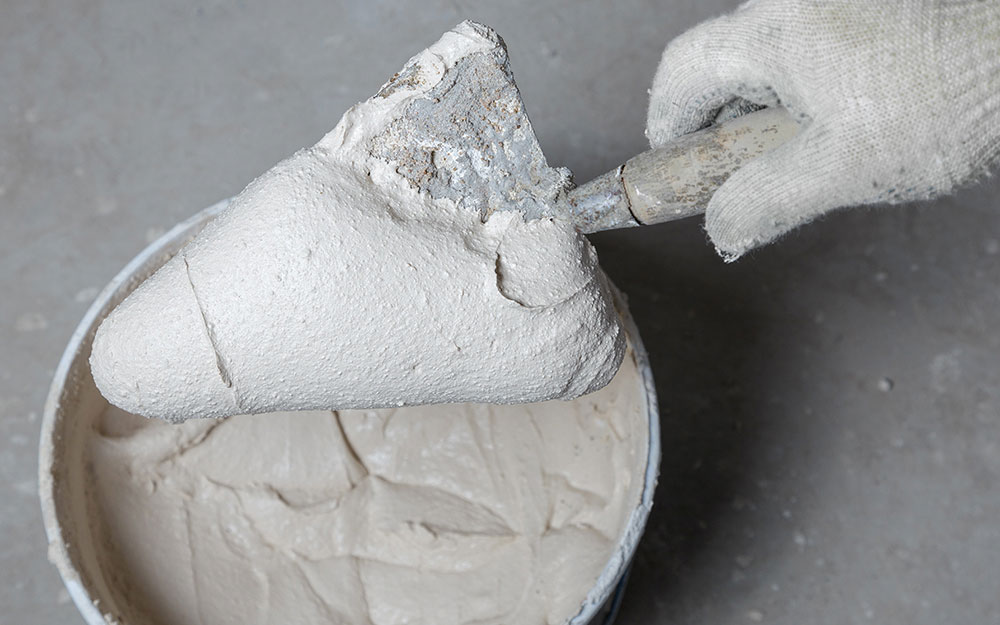
Now apply a mortar layer over the entire surface using a trowel. With the notched side of the trowel, level the mortar so that it is smooth and even in thickness.

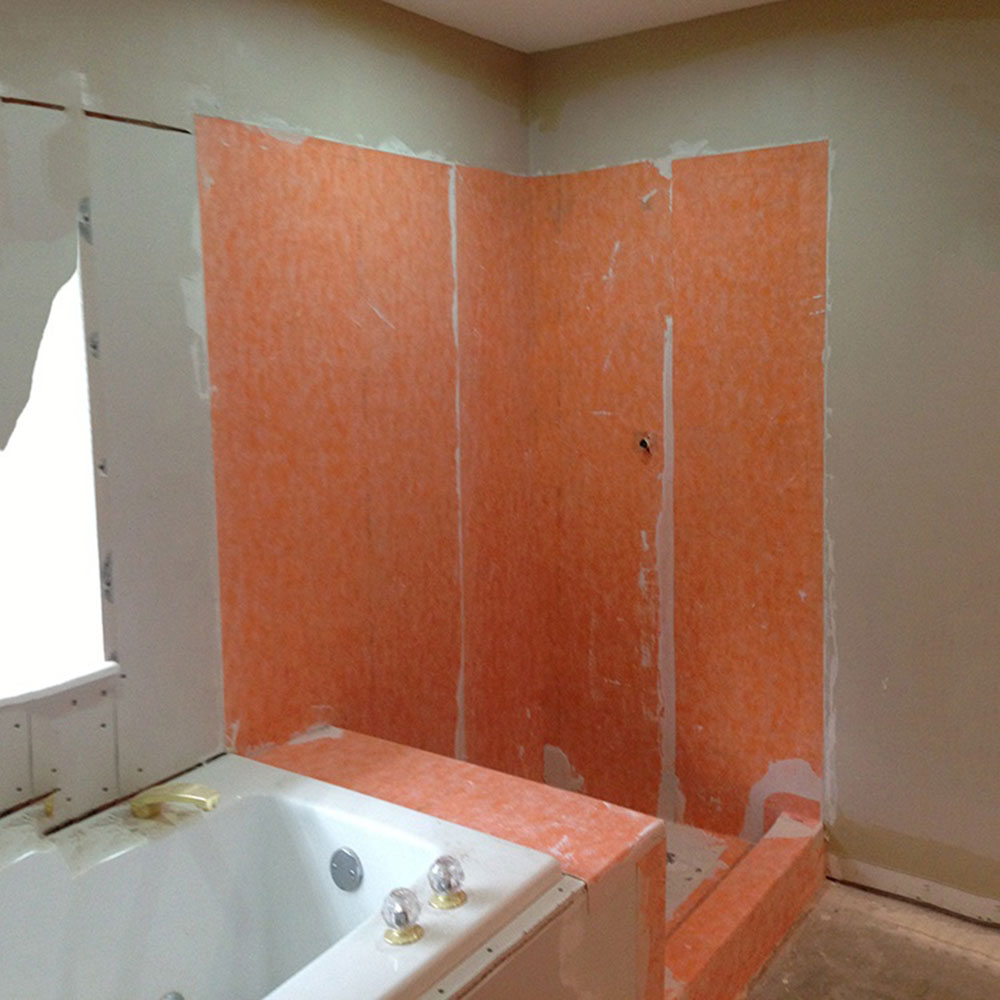
Take advantage of the fact that the mortar is wet to place the protective membrane. Cut an X over the membrane so that the shower valve can pass.

With the trowel, crush the membrane to remove any remaining air bubbles. Repeat these steps until the membrane protects the entire concrete support.

membrane-2 How to prepare shower walls for tile (Easy to follow guide)

The next step in preparing shower walls for tile is to spread the mortar across all corners of the vertical wall. The use of a 10-inch drywall knife is recommended for this task.

Crinkle a 4-inch-wide membrane strip and insert it into the mortar. Do this with the other corners, and remember to smooth them out.

Now you must mark where the drain will be located on the floor; for this simply place the shower tray and with a pencil make a mark. Now, using an electric drill cut the drain hole. By regulation, these types of drains need a minimum diameter of 4 inches for the waste.

Proceed to apply a mortar layer on the ground, and rake it with the serrated part of the trowel. This mortar will work to bond the shower tray to the drain. To adhere to it properly, you will need to walk on it, applying the necessary force.

ground-martar How to prepare shower walls for tile (Easy to follow guide)

Apply mortar to the inside corners of the shower tray. Again, lay membrane strips and smooth them out.

As in the rest of the “how to prepare shower walls for tile” process, you will need to waterproof the seams between the walls and the floor so that the water does not leak.

To finish the waterproofing, cover the drain hole with mortar and adhere it to the corresponding space.

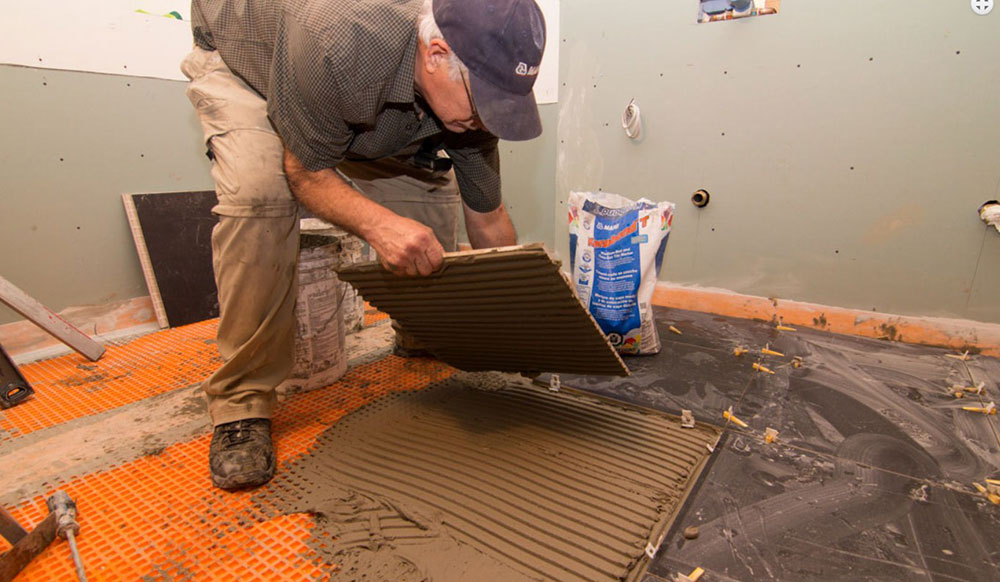
Apply a mortar layer all over the floor and lay a membrane layer on it. This will make the floor tiles have a protective layer. Install the preformed curb, use mortar to stick it, and lay a waterproof membrane strip.

It is tile time

tile How to prepare shower walls for tile (Easy to follow guide)

This is all you need to know about how to prepare shower walls for tile. The process becomes repetitive as you go, making it a chore that can become heavy but is necessary for optimal tile installation.

If you enjoyed reading this article about how to prepare shower walls for tile, you should read these as well:

The post How to prepare shower walls for tile (Easy to follow guide) appeared first on Impressive Interior Design.


source https://www.impressiveinteriordesign.com/how-to-prepare-shower-walls-for-tile/
Saturday, May 30, 2020

How to remove carpet from hardwood floors (Quick guide)

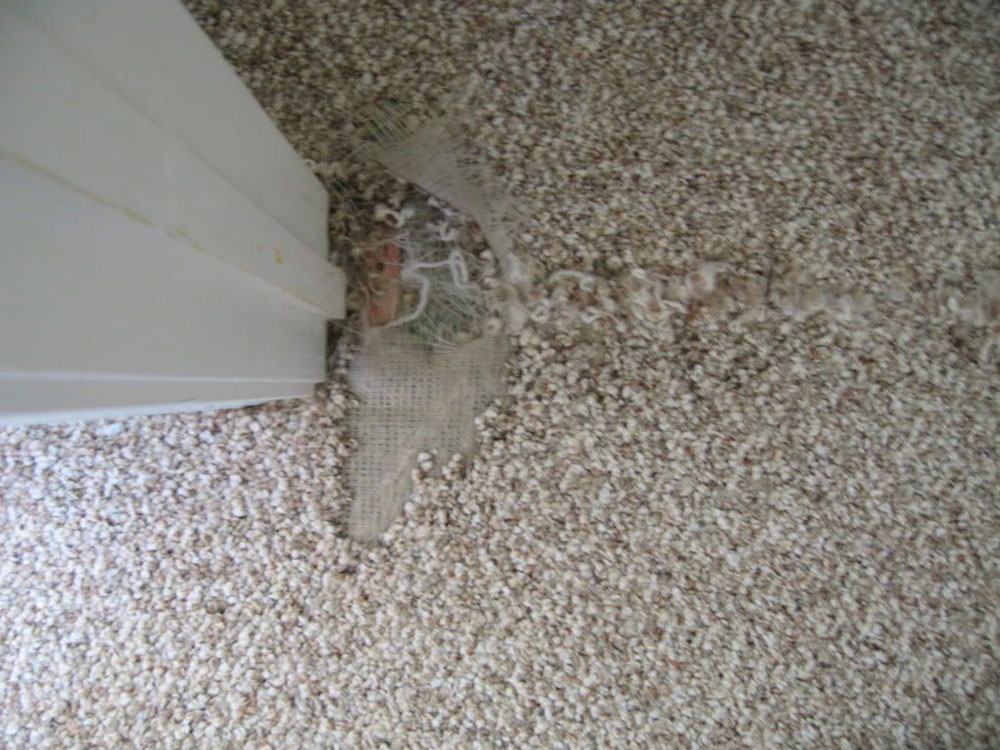
Once the lifetime of a carpet has expired, removing it is the best idea to eliminate a contaminant from your home. However, carpets on wooden floors are installed in such a way that they cannot move from their place, so removing them is not as easy as grabbing it from a corner and rolling it up. The good thing is that you can do this job yourself. If you want to know how to remove carpet from hardwood floors, you came to the right guide.

Generally, people who know how to remove carpet glue will charge something to do this job. It is not about the difficult, but the exhausting of the process. The average of these jobs is between $250 and $500, although a friend of yours could do it for free.

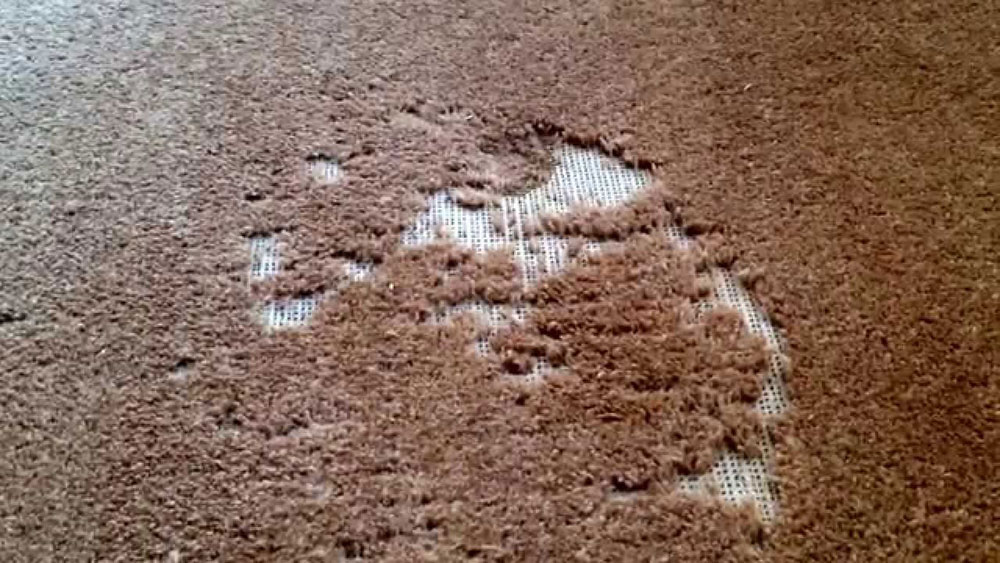
Chances are you want to change your old rug if it has started to lose threads, which could spread through the air causing breathing problems. You may also be making this change because the time has come to remodel your home.

Whatever the case, you cannot install a new carpet over the old one. You’ll be happy to know that you can eliminate the uninstall job from your budget by doing it yourself.

Reasons to remove a carpet

damaged How to remove carpet from hardwood floors (Quick guide)

Although it may not seem logical, there are many reasons why you would remove a carpet from your home. Once it stops being warm and becomes a worn-out mess, the only way to fix your floor is to replace it. Cleaning it will only work up to a point, but after that, the stains won’t come out.

Another common cause for removing a carpet is that the wood floor has started to rot or is cracking, and the only way to fix it is without the carpet.

damaged1 How to remove carpet from hardwood floors (Quick guide)

Finally, there is the standard decision by which people remove a carpet: for aesthetics. There are those who after a while get tired of seeing a carpet in their home, and prefer that the wood be the one that decorates it. This desire is understandable, after all, hardwood looks great on its own.

Besides, in modern styles, there are no spaces for certain types of full-size carpets.

If you are convinced that this is the right decision, then read on to find out how to do it by yourself.

How to remove carpet from hardwood floors – A great project

Tools needed to remove carpets

tools How to remove carpet from hardwood floors (Quick guide)

Do not start without being prepared with all the necessary tools and materials. This will save you a lot of time and you can focus only on the work ahead. Prepare a budget of at least $100 to purchase the following:

  • For your safety: dust mask, kneepads, safety glasses, and leather gloves.
  • To remove the carpet: Locking pliers and a multipurpose knife.
  • To remove filler and tack strips: a pry bar, hammer, floor scraper, and carpet glue remover if the fill is glued.

Is it worth doing it yourself?

carpet-removal How to remove carpet from hardwood floors (Quick guide)

The best way to know if it is worth removing the carpet on your own is to see if the money you save will justify the effort. This can be done by asking installers and friends the price of the project.

You can also express to them your wish that you want to uninstall the carpet on your own, so you can ask them for some advice. Contractors, masons, and decorators also know what to do with the old carpet.

The latter is important to consider, as not all garbage collectors accept carpet rolls. In other cities, however, it is common for the urban cleaning service to take charge of this.

removing-carpet How to remove carpet from hardwood floors (Quick guide)

When it comes to preparation, you should remove the doors that open onto the carpet to make it easier to remove.

Before removing carpet from hardwood floors, be prepared with standard safety implements, such as gloves and glasses. Gloves are essential, as these will prevent you from hurting your hands when removing the carpet. We also recommend that you wear a dust mask because the carpets accumulate a lot of dirt.

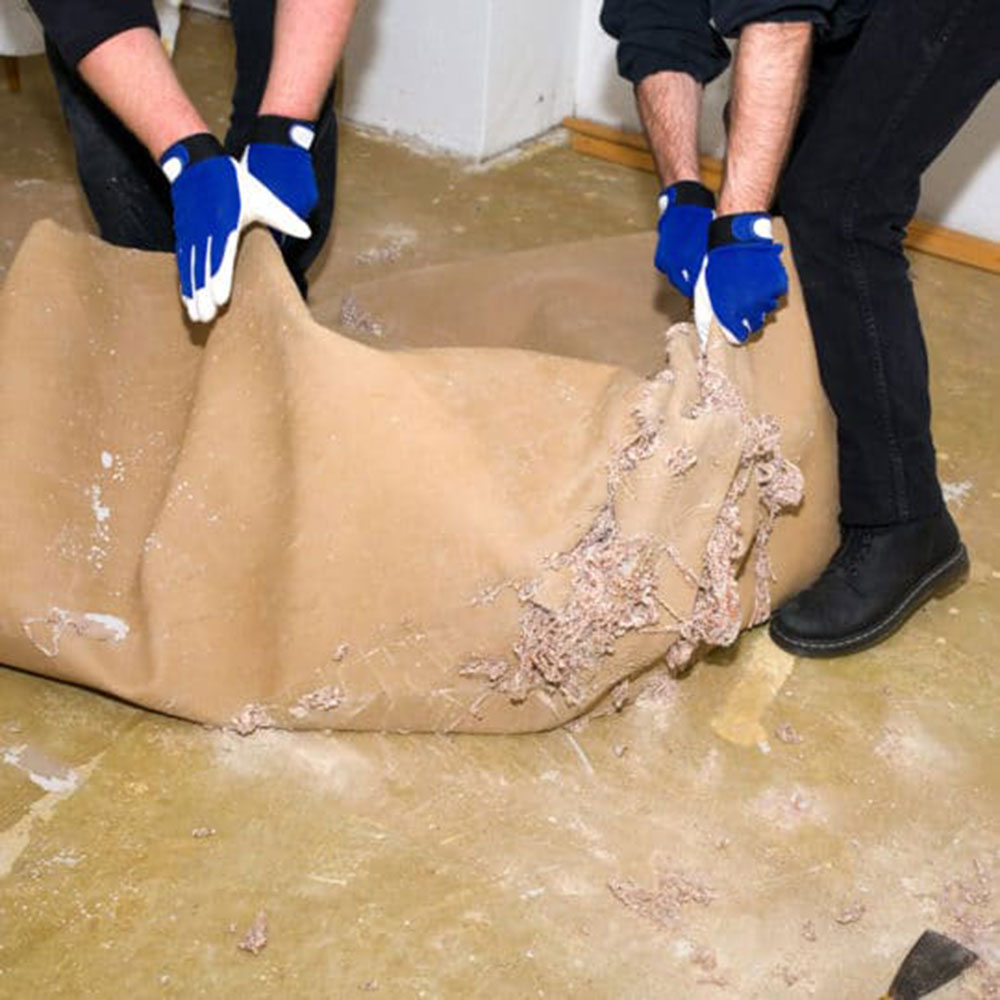
Remove all the furniture from the room, if necessary ask for help with this task. You are now ready to start rolling the carpet.

Start at the corners

corner-carpet How to remove carpet from hardwood floors (Quick guide)

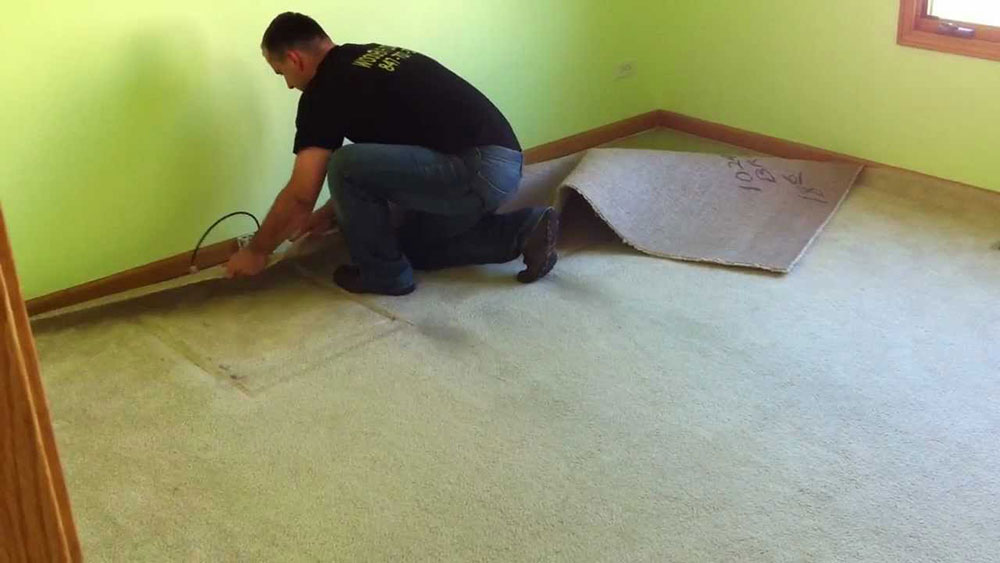
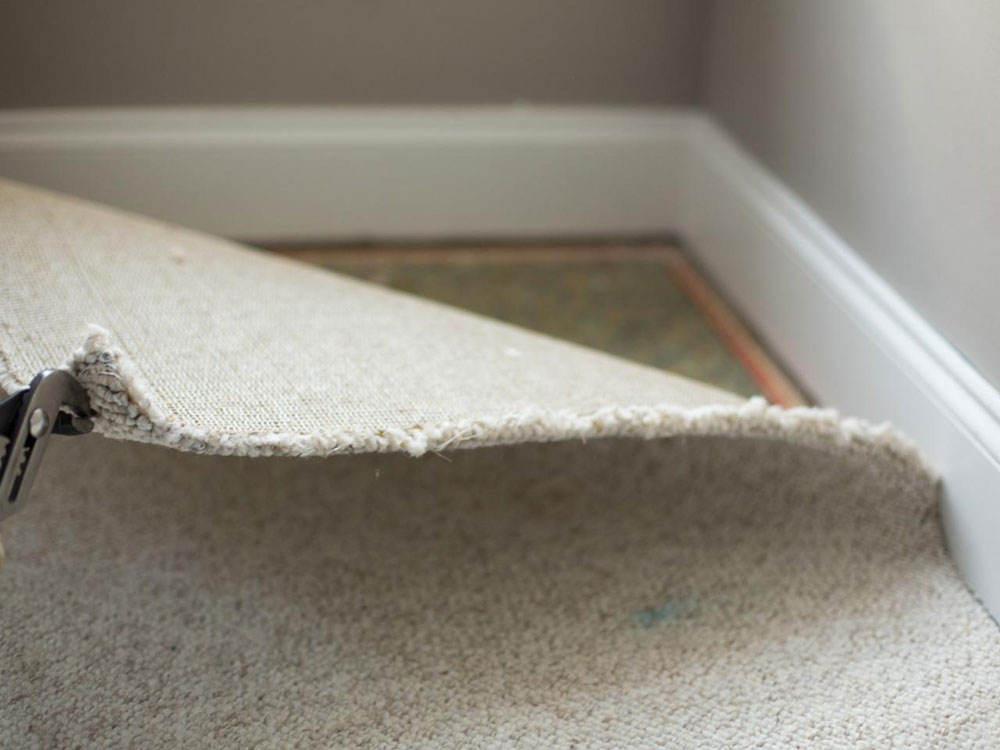
The easiest way to start removing a carpet is from the corners. Rugs are usually installed over baseboards or sockets (the wood or ceramic strips found at the bottom of the wall), so you should have no problem finding a loose corner. If this is not the case, then you must remove the socket to work.

To make the job easier, use a pair locking pliers to grab an edge and insert them between the open spaces. Gradually remove the carpet to avoid damaging the wood.

Strips are easier to remove

strip How to remove carpet from hardwood floors (Quick guide)

If you don’t plan on reusing the carpet then you can cut it without a problem. It is easier to remove long strips than a carpet that covers your entire room.

To trim it, use a utility knife or razor. Using both hands, hold the knife, and cut lengthwise. Long narrow strips can be easily rolled up, and they are lighter.

The thickness of the strips will depend on how much weight you can carry. Thick strips will be much heavier.

Raise the Tack Strips if necessary

tack How to remove carpet from hardwood floors (Quick guide)

A tack strip is, as the name implies, a metallic tape on which multiple tacks or sharp elements are placed that will cross the carpet to be able to keep it firm.

Installing a new carpet will require these strips, so if you are removing an old carpet, and the tacks are in good condition, you can reuse them.

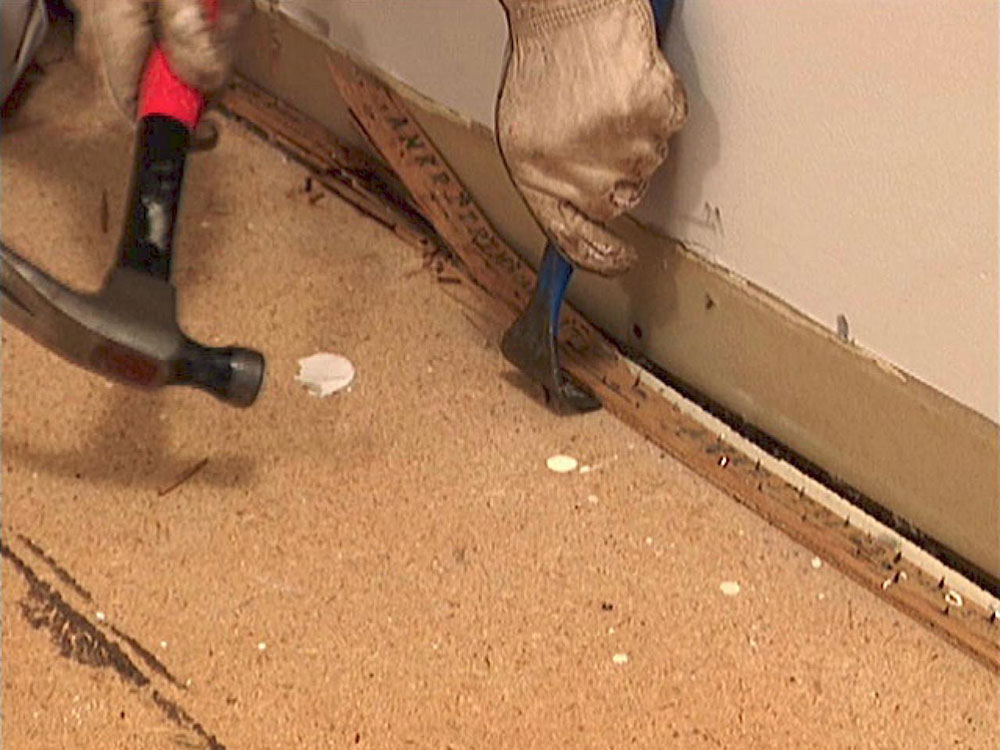
In case you need to install new strips then you should remove the old ones using a pry bar and hammer.

Place the pry bar on one end of the strip and press to release it. Be very careful in this process to avoid accidents. It is recommended that you wear leather gloves so that the iron does not cut you. To get rid of the strips, place them inside the carpet rolls so they don’t break the bags.

You have to remove the filling

carpet-glue1 How to remove carpet from hardwood floors (Quick guide)

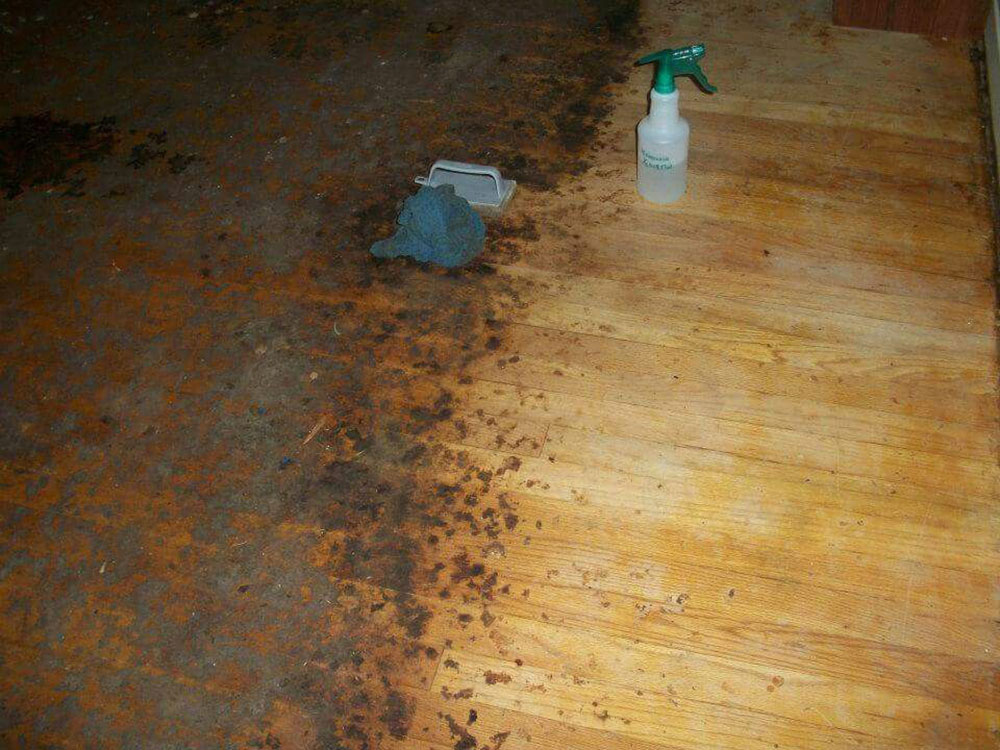
How to remove carpet from hardwood floors includes knowing how to remove the padding under the carpet. This is perhaps the part that carpets owners are most concerned about since the way to make this filling firm on many occasions is with glue on the wood.

For these situations, a carpet glue remover will likely be required to remove all adhesive residue.

staples-remove How to remove carpet from hardwood floors (Quick guide)

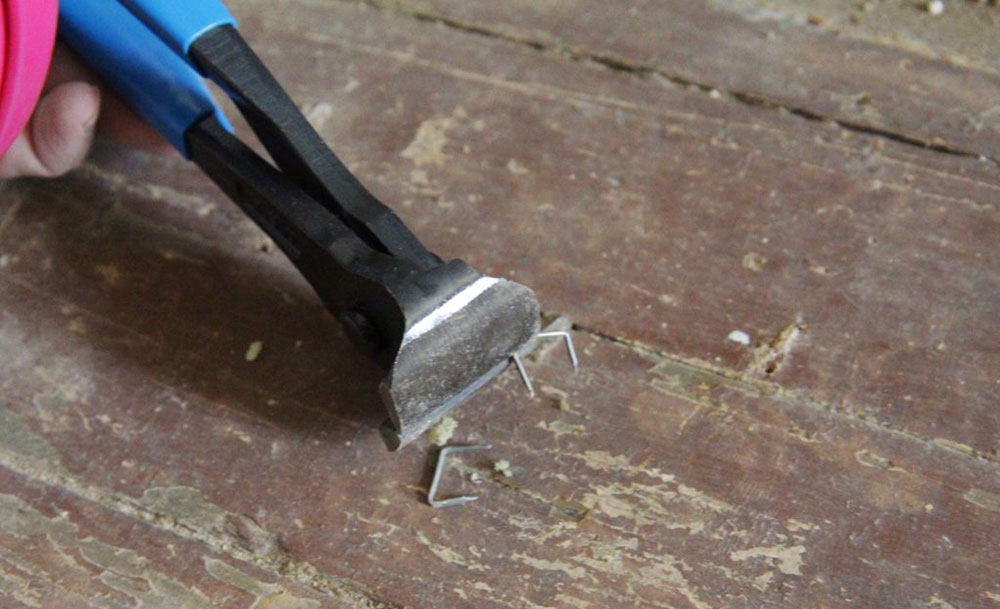
Another option installers have is to use staples in the different filler patches. This method is much easier to remove since it will be enough to grab one of the seams and pull it so that all the staples come out.

Do not do any of the removal processes without wearing gloves. Even staples can be dangerous to remove since depending on the force they could get up and hit your hands.

In the same way, you must roll the filling to get rid of it. This does not need to be trimmed because it is very light. Once you have removed the glue for hardwood floor, or the staples, you can proceed to the next step.

The stairs are somewhat more complex

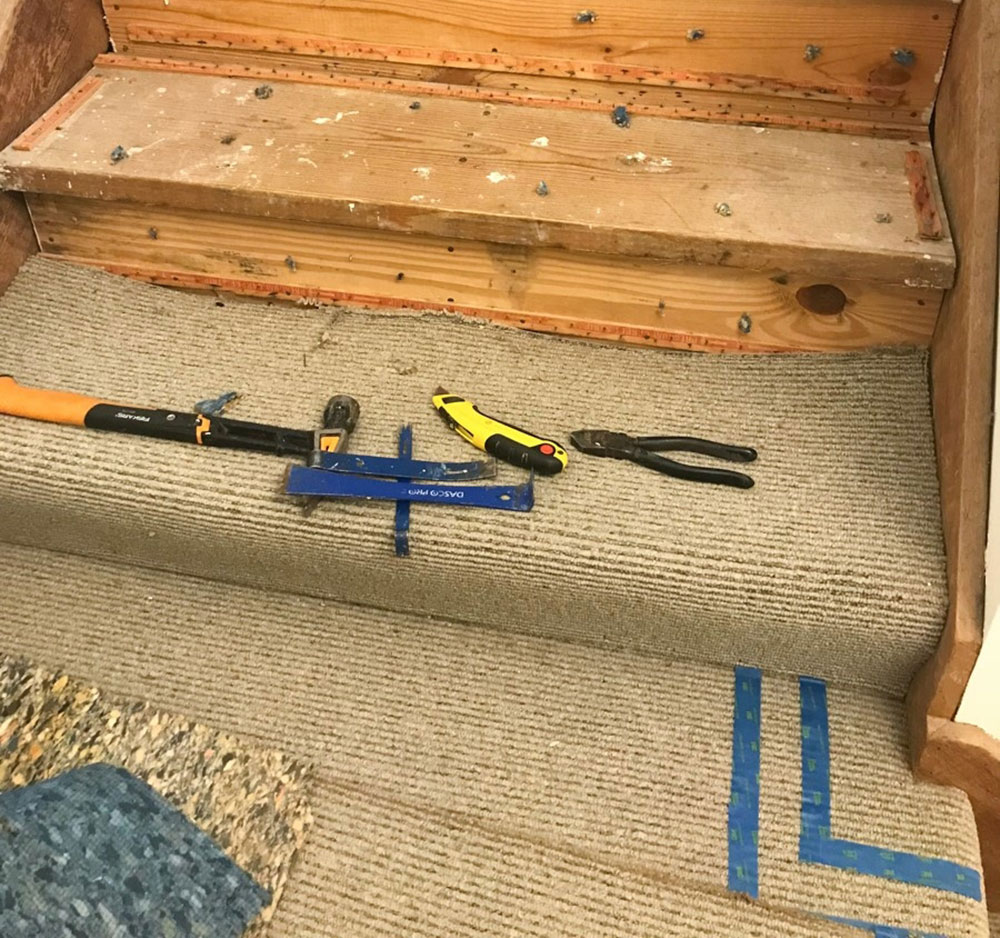
stairs How to remove carpet from hardwood floors (Quick guide)

To remove the mat stuck to a ladder, it will not be enough to lift it from a corner. An opening must be created by cutting at the top edge of one of the risers (the sections that give height to each step).

Some stairs have metal edges at the top of the steps, especially the last one. In these cases, you will not need to make additional cuts in the carpet to start removing it, since you can remove it from here.

stairs1 How to remove carpet from hardwood floors (Quick guide)

The stair mat is also supported by staples and tacks. Here you will also use the pry bar and hammer to remove the strips, but in this case, they will be one by one to prevent them from causing disasters.

If any section refuses to be removed, cut it into a small strip. Remember that the carpet will be heavy if you roll it into very large strips.

With this, you already know everything you need about how to remove carpet from hardwood floors. The time this project will take will depend on the size of your carpet and your dedication, but it may be worth doing it yourself to save a few hundred dollars.

If you enjoyed reading this article about how to remove carpet from hardwood floors, you should read these as well:

The post How to remove carpet from hardwood floors (Quick guide) appeared first on Impressive Interior Design.


source https://www.impressiveinteriordesign.com/how-to-remove-carpet-from-hardwood-floors/
Friday, May 29, 2020

How to paint a bathroom vanity quickly and with no stress

The difficult thing about this type of furniture restoration project is to start it. Once you start, you realize that they are easy and that with pure dedication you can finish them. In most cases, even technical knowledge is not necessary. For example, painting a cabinet seems to be a carpenter’s thing, but even a novice is capable of this task. If the time has come to renovate the look of your home, and you want to know how to paint a bathroom vanity, then keep reading.

Painting a bathroom vanity can be the perfect time to make other adjustments and improvements, such as a change of hinges, knobs, and other elements. You could even change the old faucet for a modern one. However, let’s go step by step and see everything you need.

Necessary preparations

You can’t start without the materials

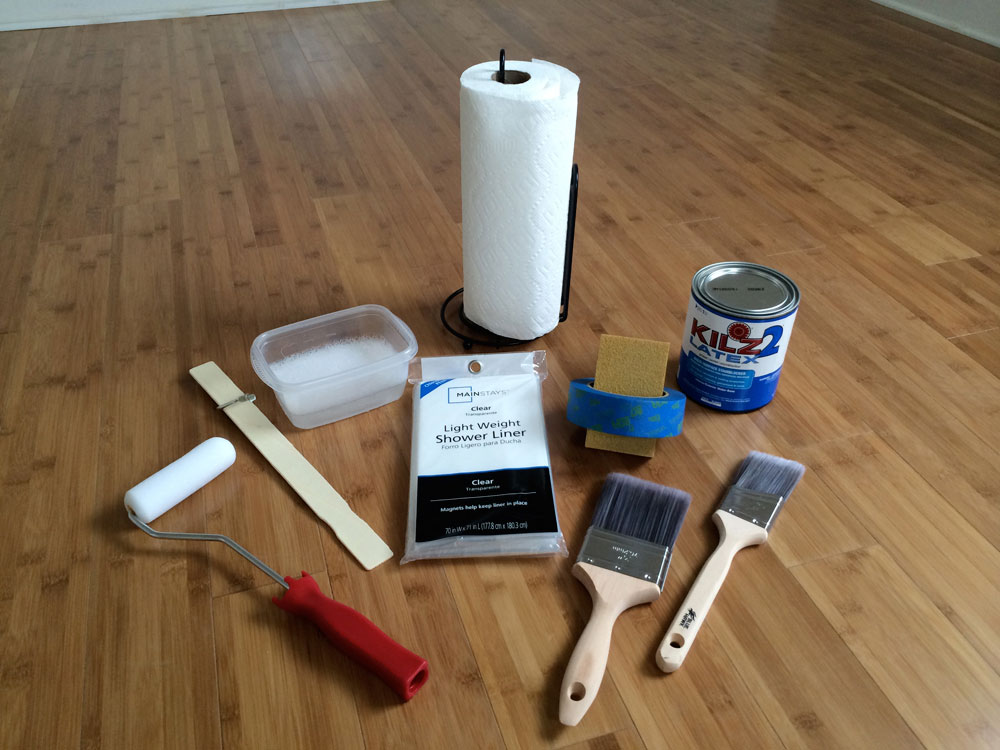
paint-materials How to paint a bathroom vanity quickly and with no stress

Before starting the project, the first thing you should do is to make sure you have all the necessary materials and supplies. Some basic woodworking implements are foam roller, alcohol, primer, household cleaner, sandpaper, latex-based acrylic paint of the color you want, a brush, tape, and newspapers or plastic sheeting to protect the floor

Additionally, you will need other materials depending on the state of your vanity and how you want to approach the project. You might even need a screwdriver, hammer, and a razor if you want to carve the wood.

It’s time to take apart the cabinet

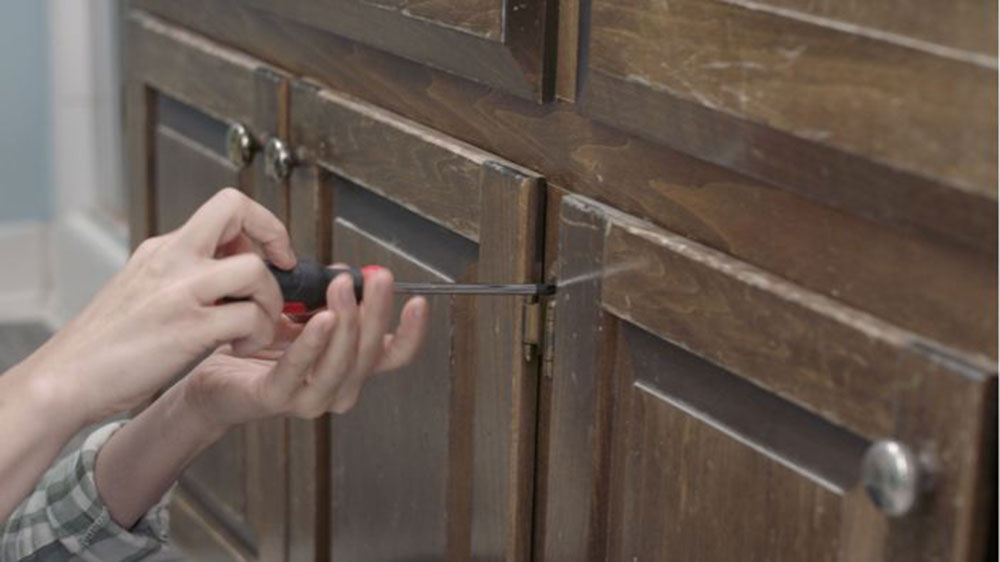
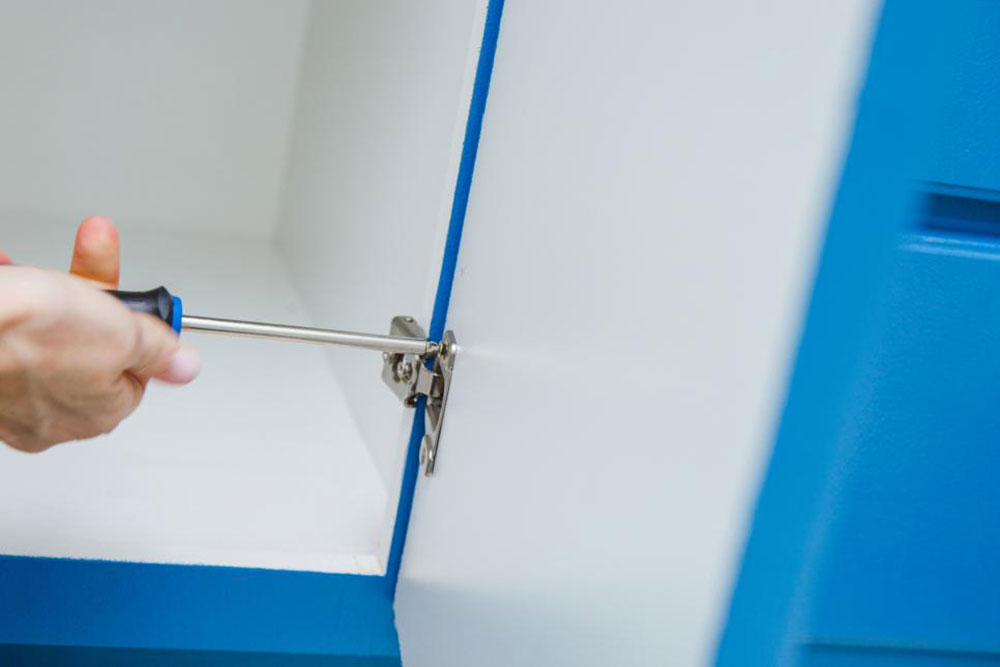
unscrew How to paint a bathroom vanity quickly and with no stress

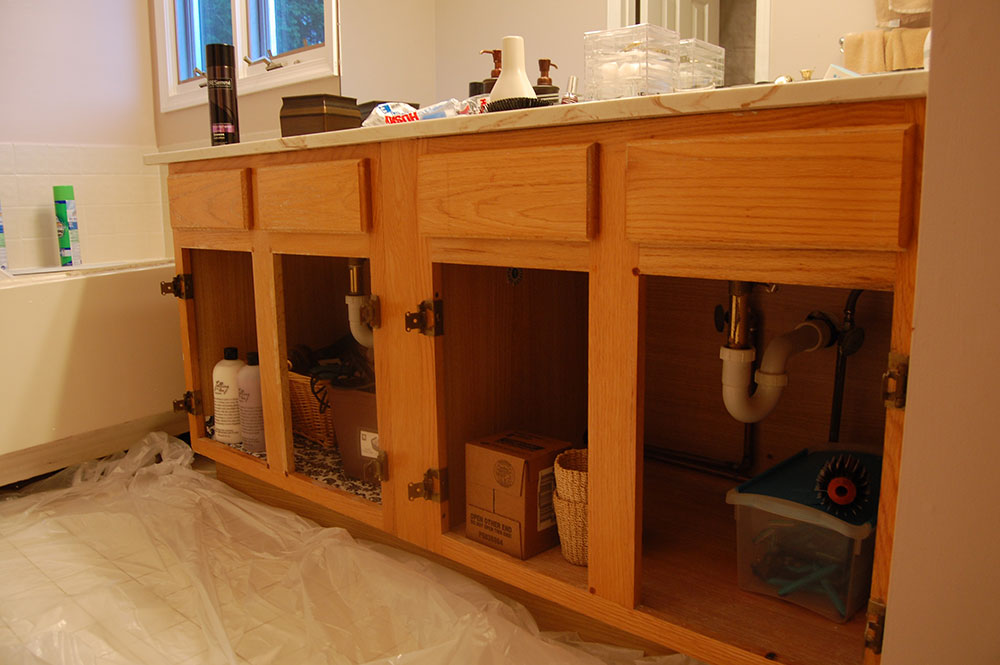
With all the materials prepared, it is time to separate the vanity into pieces. As with other cabinets, to paint a bathroom vanity you must remove the doors and drawers from the mainframe.

It is recommended that you take photos of the drawers to have a reference for later. Additionally, with the painter’s tape, you can label the pieces to know where they are located.

To remove the hinges, just unscrew them from the wood or plastic. Put them in a safe place, such as a rag, to avoid losing them.

remove-door1 How to paint a bathroom vanity quickly and with no stress

You should also remove other items you want to replace, such as taps, as this will make the painting and remodeling job easier.

Some drawers can be completely disassembled, which means that you can remove their front cover. Vanities of this type are much easier to remodel.

If applicable, test if your new faucet fits the vanity’s existing holes. If not, you should cut or fill the sheets depending on the case. Wood putty is perfect for a quick fill, and you only need to make sure to sand it when it’s dry.

If you need new holes, these will be done at the end of the paint job, so now you only have to worry about covering those you no longer need.

You have to clean it thoroughly

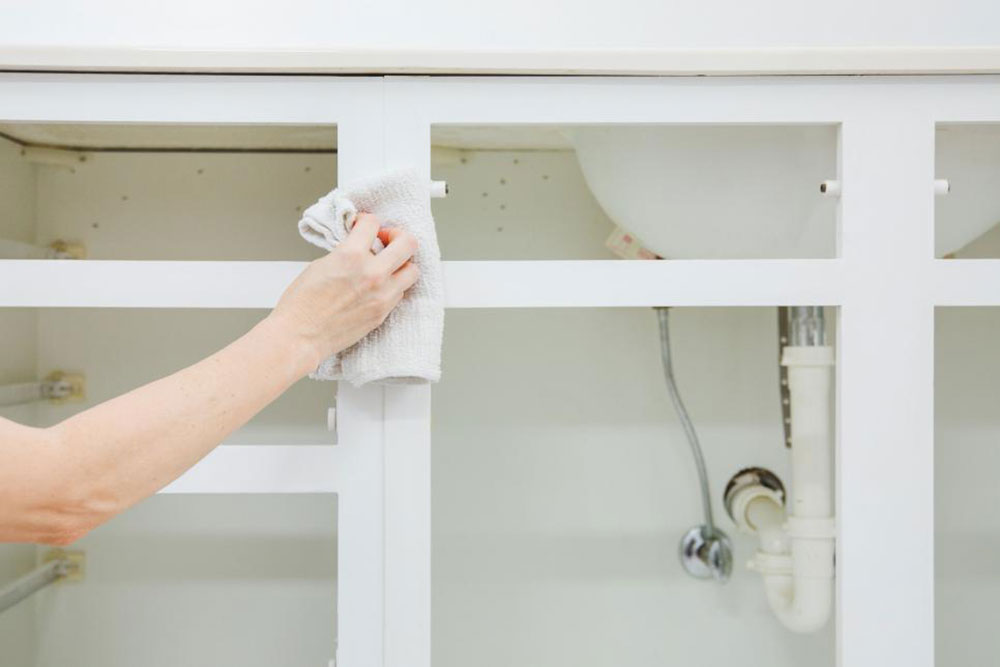
clena-the-cabinet How to paint a bathroom vanity quickly and with no stress

You cannot start painting if your cabinet is dirty. All particles, even those that originate from sanding the drawers, will remain glued when painting, which will give it a rough texture that will break soon after.

Since the materials in bathroom vanities are mostly waterproof, you can superficially wash them using soap and water. Use dish degreaser to remove stubborn stains. Then rinse twice and let dry.

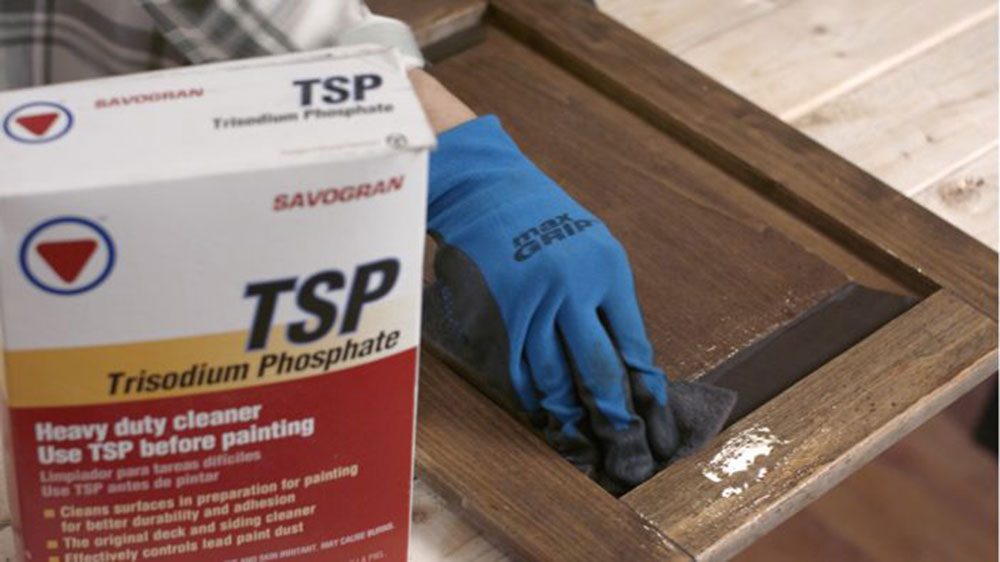
tsp How to paint a bathroom vanity quickly and with no stress

In case you need a stronger cleaning, it is recommended to use trisodium phosphate (TSP). To handle this compound you will need to wear gloves. Dilute a little TSP in water and pour the result into a sponge. This will clean each drawer until stains are removed. Remember to dry your vanity using a dry cloth.

Whenever you sand any item, you should clean the vanity. This microscopic dust can be removed using a vacuum cleaner and a damp cloth. Old paint can be removed with sandpaper, although larger parts can be removed by hand if they are falling off.

Finally, items that are glued with silicone or some other adhesive can leave residues of the glue in the cabinet. This is easily removable with alcohol and the TSP solution.

Repair and prepare the holes

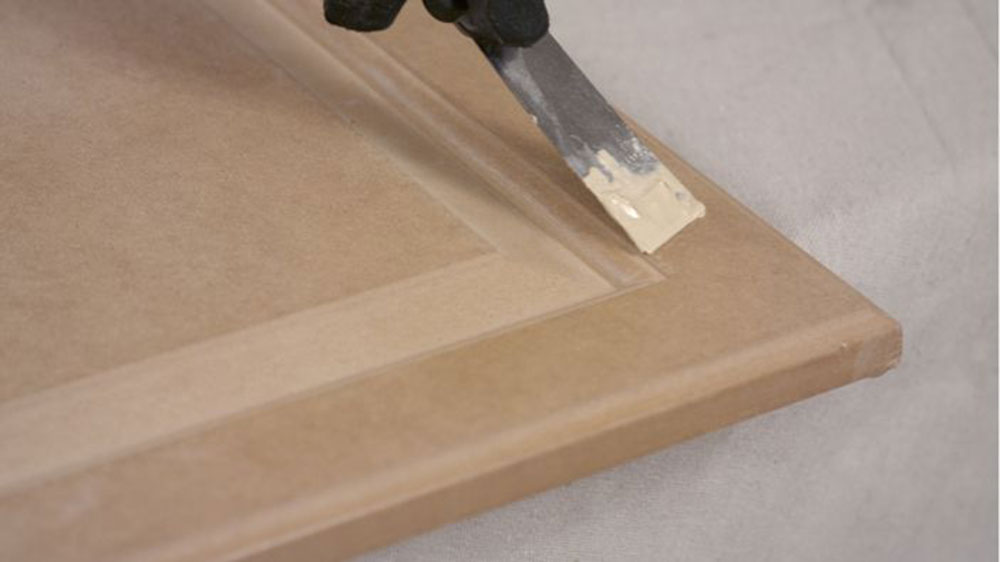
white-putty How to paint a bathroom vanity quickly and with no stress

As we mentioned previously, you may want to make a brand new DIY bath vanity that includes modern faucets. For this, you must first fix a couple of things. If your vanity is scratched and bruised, it’s time to repair these blemishes. If you are changing the faucet or other items, you will need to prepare the holes for its installation.

The bumps can be easily repaired using wood putty. Apply a layer of white putty with a flexible spatula, firmly pushing the compound. When it is compact, remove the excess with the spatula’s edge. The process is similar if you are going to fill pipe holes.

When the filler is dry, you’ll need to sand them down to remove any blemishes.

sand How to paint a bathroom vanity quickly and with no stress

If your cabinet has any protection or primer, you should sand it to create a slightly rustic texture so that the paint has a surface to adhere to. 220-grit sandpaper will work to achieve this finish.

Remember to sand the corners too, leaving them a smooth finish. In the end, you have to clean the generated waste. Now you are ready to get started with decorative workmanship.

How to paint a bathroom vanity: it’s time to be creative

First, the base layer

primer How to paint a bathroom vanity quickly and with no stress

The intention of achieving a slightly rustic surface was to be able to apply a primer coat that will serve as a canvas for your new painting. Your cabinets should already be as good as new after the preliminary preparations.

You must select the type of primer corresponding to the paint to be used. In your hardware store they will guide you to know which combinations work; you just have to remember that if the primer is water-based, the paint must also be.

Knowing how to paint a bathroom vanity is just the beginning. The important thing is to have the pulse for the different layers that you must paint. The primer, for example, must be applied to all the areas you want to paint. A uniform coat should be enough, as its primary function is to help the paint adhere.

Once the primer has dried, sandpaper must be gently brushed to remove air bubbles and excess compound.

The primer should dry for at least 24 hours before you can paint over it. Depending on the manufacturer, this time may be less, so you have to consult the product packaging.

It is good that in this part you place some newspapers or plastic blankets on the floor to avoid staining it.

Painting your bathroom cabinets

paint How to paint a bathroom vanity quickly and with no stress

With the primer dry, wipe off the residues and get ready to paint. First, use a roller to cover large areas. Start with the back and edges of doors and drawers.

paint1 How to paint a bathroom vanity quickly and with no stress

For the front, the one you will see constantly, use a roller for large areas and a brush to paint in detail. Getting a smooth finish is easier with a brush, but it will also depend on whether it is the right one.

With this, you already know how to paint a bathroom vanity, and there is only one step remaining.

Assembling the new vanity

assembling How to paint a bathroom vanity quickly and with no stress

As with the primer, allow the paint to dry overnight. When all the pieces are dry, it’s time to assemble your new vanity. Use the photos and labels to assemble it.

Start by assembling the faucets and pipes (drill new holes if necessary), then install the drawers, and finish with the doors.

Ending thoughts on how to paint a bathroom vanity

Dream-home-by-Timber-Trails-Development-Company How to paint a bathroom vanity quickly and with no stress
Image source: Timber Trails Development Company

We finish this little guide with some tips that can facilitate this process, especially for newbies.

You can carry out all this process directly in your bathroom, although it is recommended to remove the vanity to completely disassemble it.

Remember to wear a mask at all times to avoid inhaling residual particles and strong paint odors. You should work in an area with good ventilation.

There are special paints that do not require a prior primer. Check with the hardware store if they have them available, as this will make the project faster and easier.

If you enjoyed reading this article about how to paint a bathroom vanity, you should read these as well:

The post How to paint a bathroom vanity quickly and with no stress appeared first on Impressive Interior Design.


source https://www.impressiveinteriordesign.com/how-to-paint-a-bathroom-vanity/

Thursday, May 28, 2020

Spray foam insulation vs fiberglass, and which is better

When designing a home, one of the most pressing concerns is the insulation. It’s a crucial component that keeps our house from getting too cold or hot, and it allows us to keep comfortable temperatures.

The importance of insulation extends on the long-term. It helps us conserve energy and money on heating or cooling down, although the initial costs might be slightly higher if we really want an efficient insulation.

Nowadays, the main question is about the type of insulation we choose. There are various kinds of insulation, and each one comes with its pros and cons. But even these smaller differences can be overcome by knowing the specifications of insulation, and how it works.

Spray foam and fiberglass seem to dominate the conversations. When choosing between the two, you need to know the differences between spray foam insulation vs fiberglass. What are the pros and cons of each one, and what long-term implications do both have in store for you. Additionally, there’s a question of how well it fits your overall house design.

In this article, we’ll compare spray foam insulation vs fiberglass and help make your decision slightly easier.

About Spray Foam Insulation

spray-2 Spray foam insulation vs fiberglass, and which is better

First of all, let’s dip our toes into the waters of spray foam insulation.

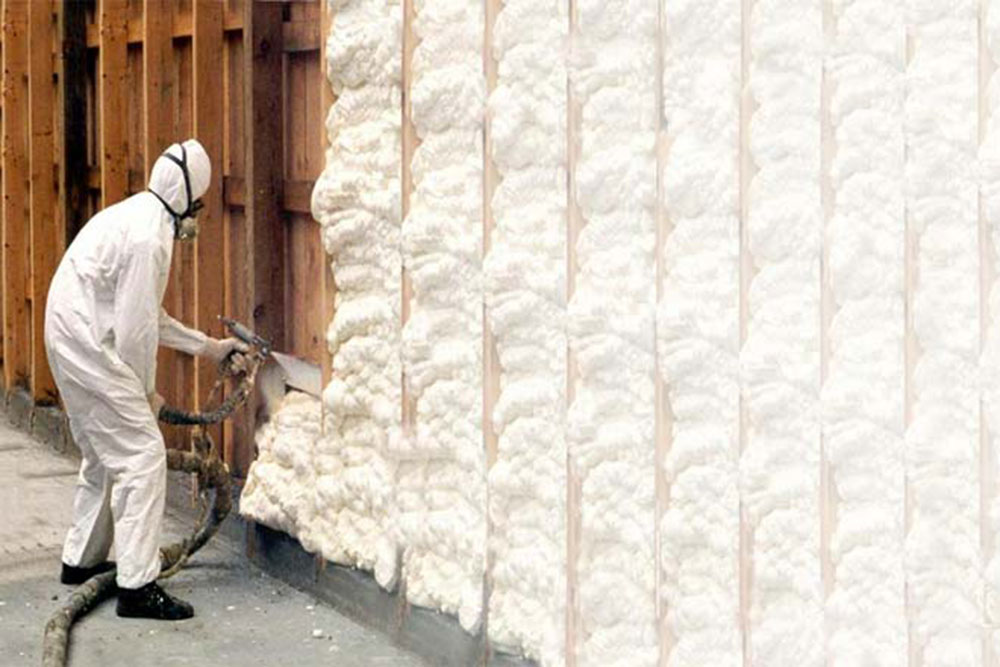
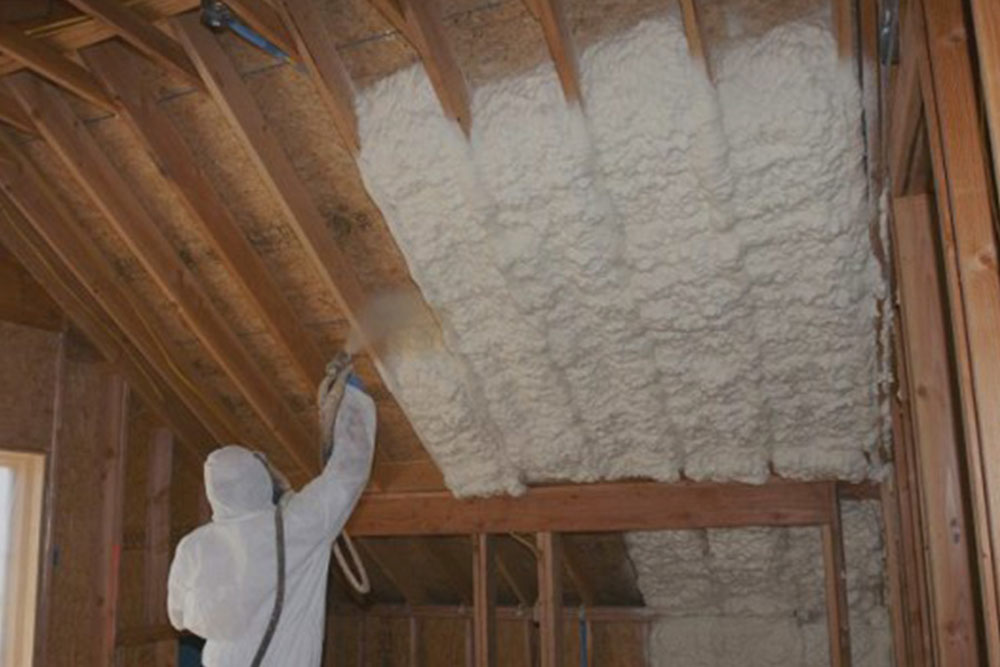
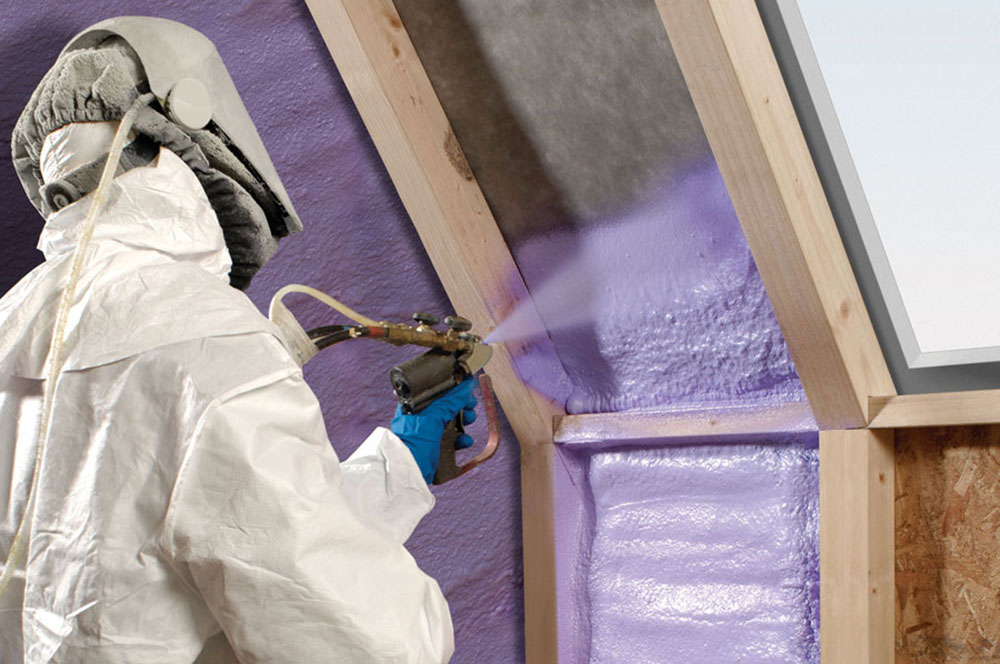
We can safely say that it’s a relatively new form of insulation, at least compared to fiberglass. The main component of spray foam is usually a polymer; polyurethane is the most common one. The way this foam works is that once it’s applied, it tends to expand 40-120 times its original size, which depends on the type of foam.

Then, over time, this foam hardens and toughens, and forms a solid. It will fill the air gaps and pockets that are hardly accessible, which is where the foam shines.

Main Types of Spray Foam Insulation

In essence, we know two main types of spray foam insulation: closed cell and open cell.

Closed Cell Insulation

closed-spray-1 Spray foam insulation vs fiberglass, and which is better

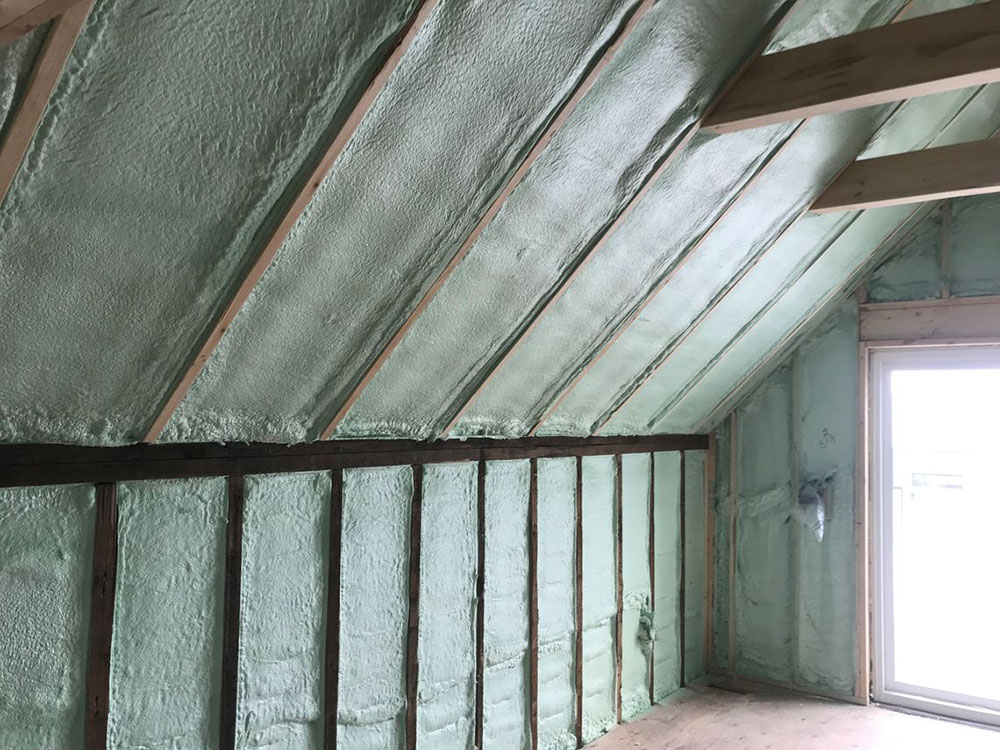
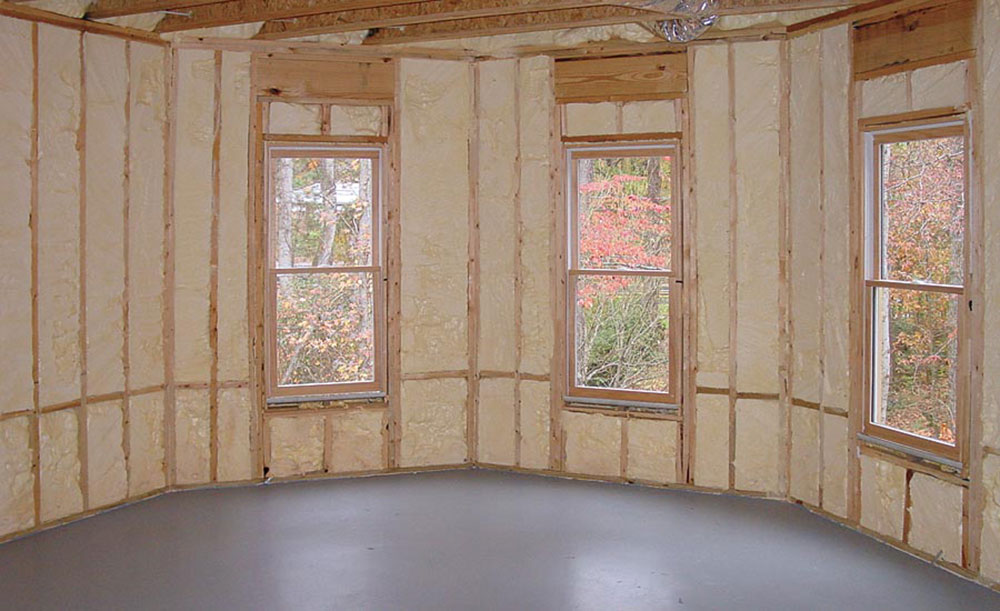
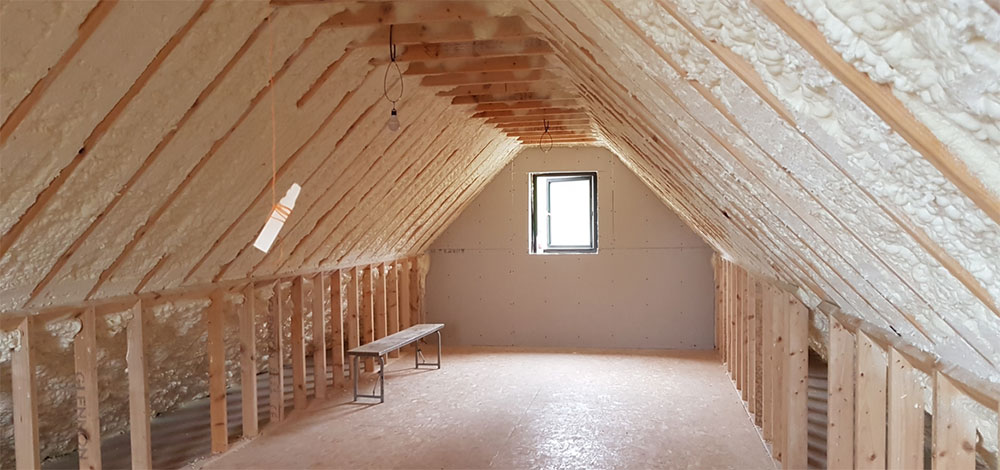
Closed cell insulation is the most common type of spray foam. It’s slightly more expensive than open cell, but also more thorough. It fills the air pockets and gaps completely, leaving little to no air flow into your home. It will also add some structural stability to your home or office. That makes it a great choice for areas with strong winds and other hazards.

Open Cell Insulation

open-foam Spray foam insulation vs fiberglass, and which is better

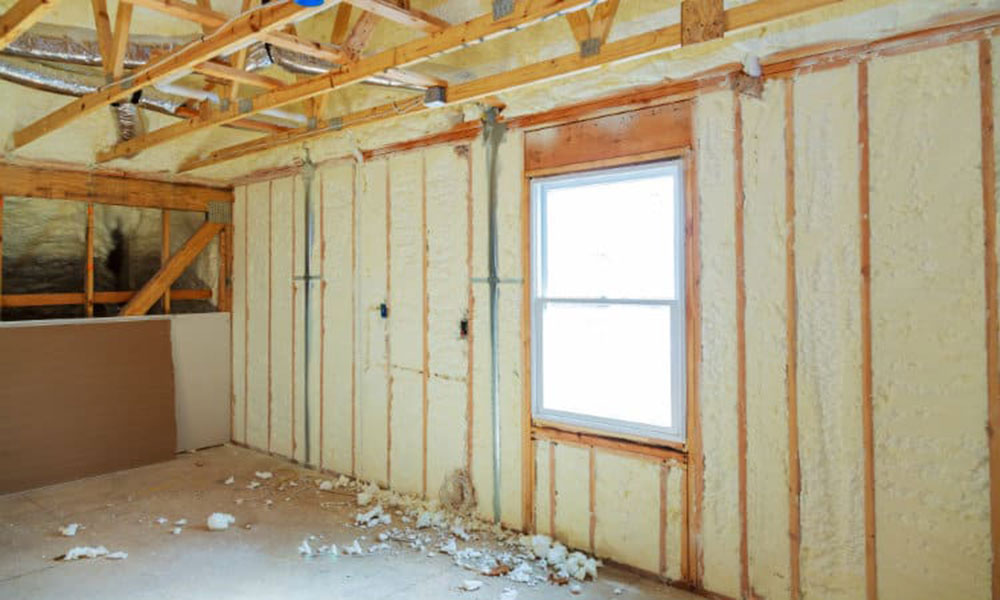
The other common type of insulation is open cell insulation. This one’s slightly more budget-friendly, but you don’t get the structural stability that you get with closed cell insulation. There’s some air left between the air pockets, but the insulation still keeps the warmth or coldness out. This option is considered where there is no need for additional structural stability.

About Fiberglass Insulation

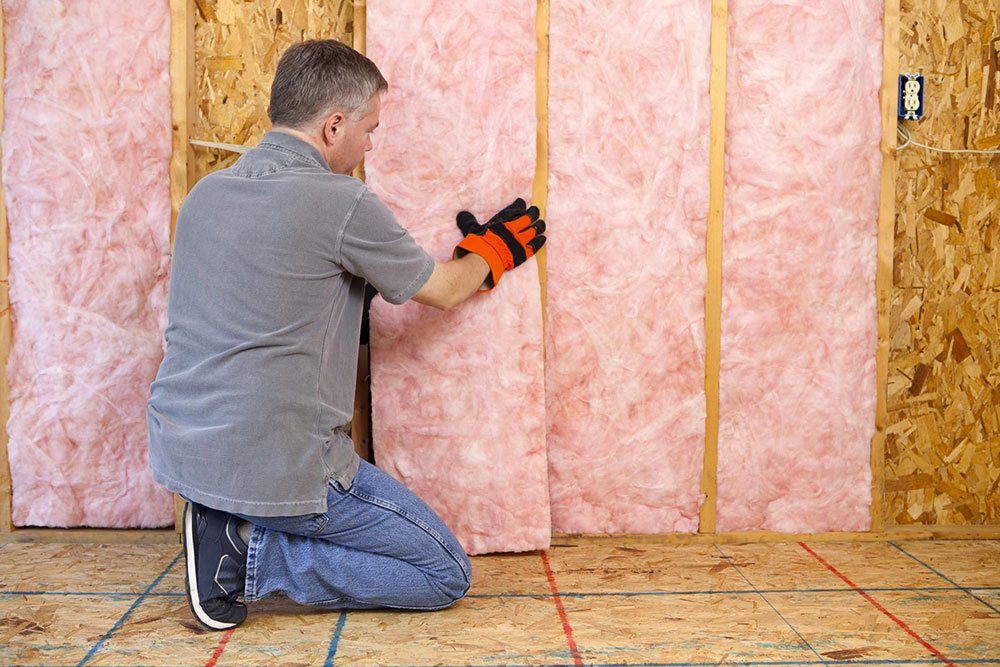
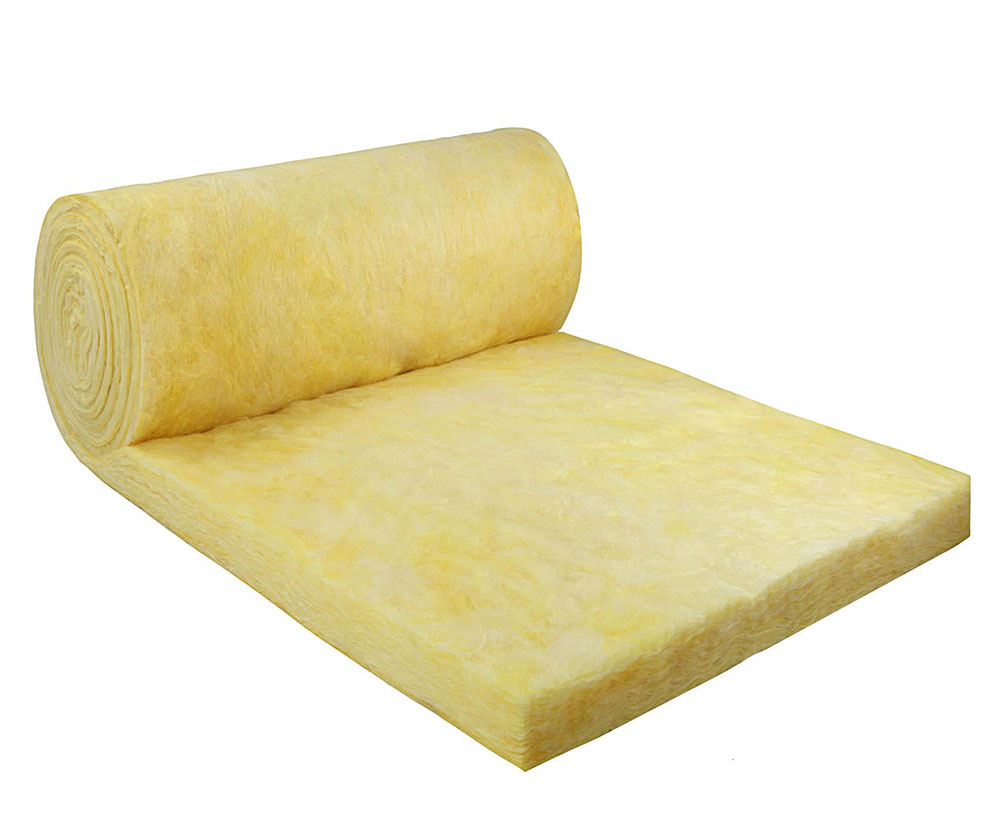
Fiberglass is a more traditional type of material used for insulation. These extremely fine glass fibers are used to keep the heat inside the home. They trap air bubbles, which creates an insulating effect and keeps the heat indoors and the cold outdoors.

Types of Fiberglass Insulation

There are two types of fiberglass insulation: fiberglass blankets and loose-fill.

Blankets

fiber-glass-blankets Spray foam insulation vs fiberglass, and which is better

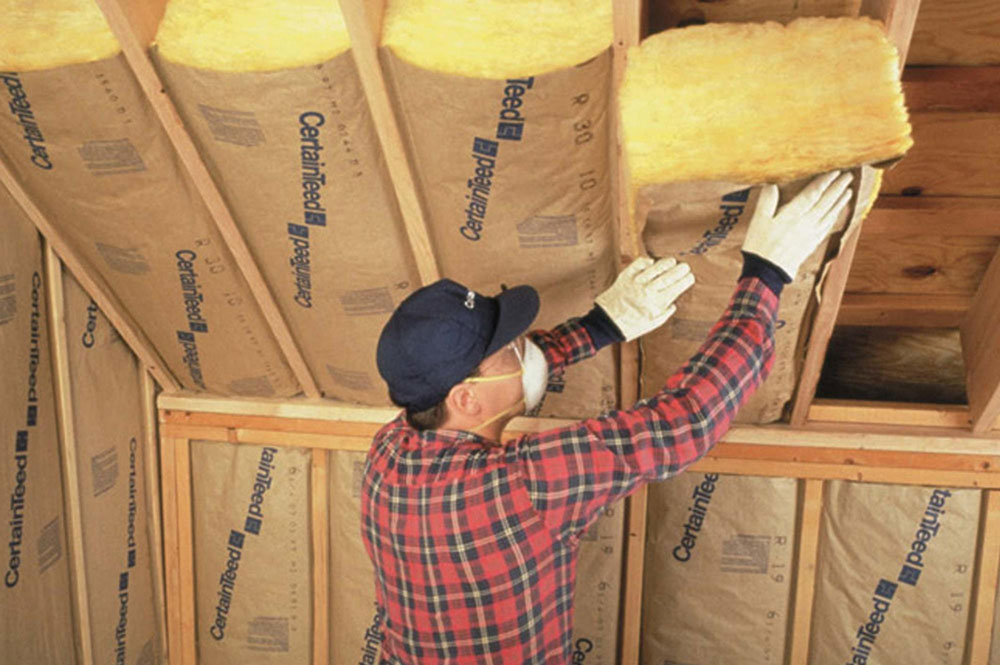
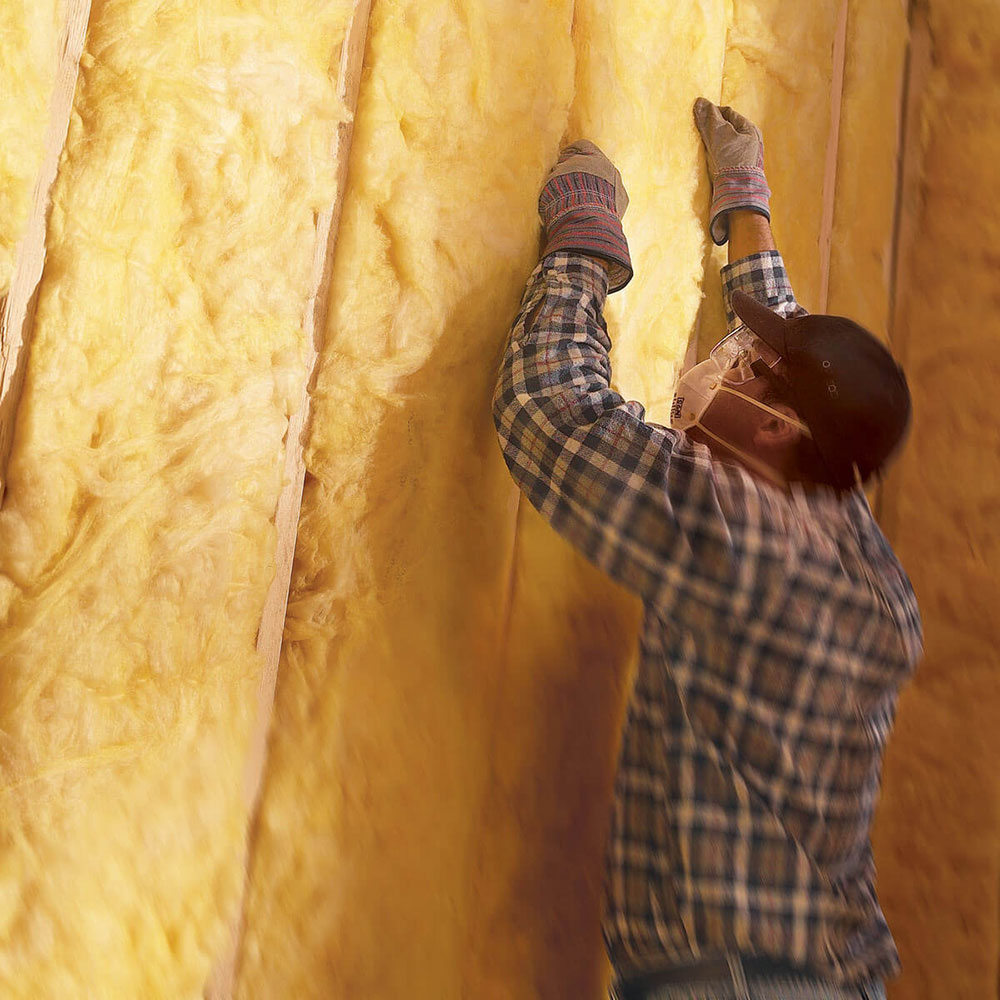
Blankets are great for using it in areas that are relatively easily accessible such as attics. This is usually the case for new constructions, although not necessarily. They do need some skill to use though, as they need to be cut to fit the holes precisely. They are more common than loose-fill.

Fiberglass batts

batts Spray foam insulation vs fiberglass, and which is better

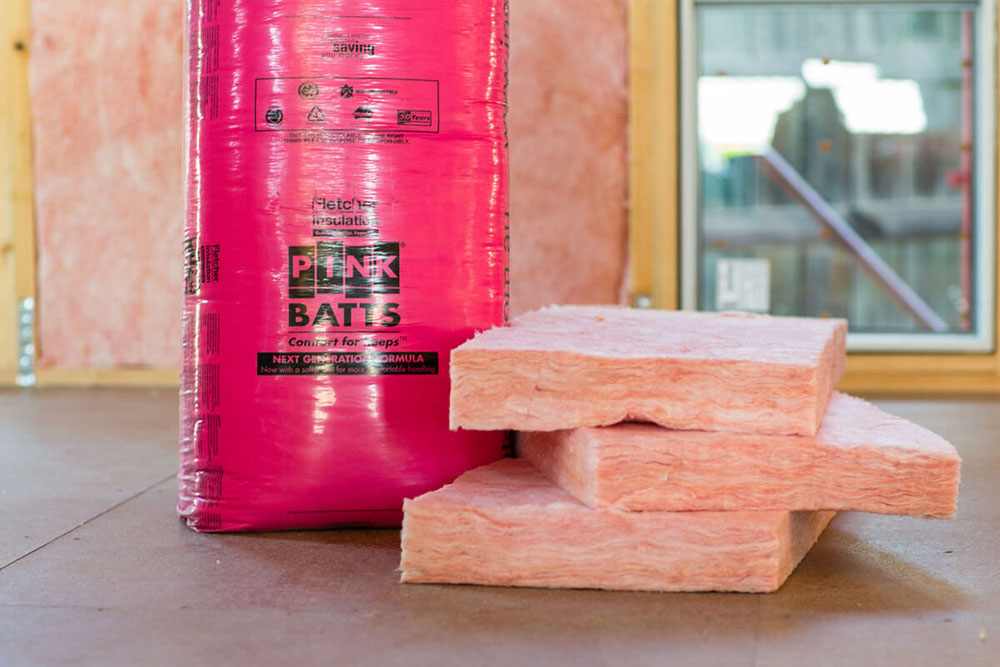
These are sold in different densities. They have varying R-values; this value determines the density, and they range from 3.2 to 3.8 per inch. The higher R-values are those of 4.3 per inch or even higher.

Spray Foam Insulation vs Fiberglass

And now for the meat and potatoes of the article – the comparison between spray foam insulation vs fiberglass.

Thermal Protection

thermal Spray foam insulation vs fiberglass, and which is better

This factor really leans a lot on the quality of installation and the type of insulation used. For spray foam insulation, we can say that it usually has the highest levels of R-value – between 3.6 and 3.8. But what makes it extra effective is the fact that it covers almost everything, as it covers even the tightest of areas.

On the other hand, fiberglass insulation also offers a satisfactory level of thermal protection. Batts and loose-fill can provide R values of up to 4.3. But the problem comes if the insulation is installed improperly, or inaccurately. This means that the insulation will lose efficiency over time, and will require topping up.

The Costs

closed-spray Spray foam insulation vs fiberglass, and which is better

As we already noted, closed cell spray foam usually costs slightly more, but is also the most effective form, in many cases. It will cost about $1 – $1.50 per board foot, while the open cell spray foam will cost between $0.45 and $0.80 per board foot.

Fiberglass, on the other hand, can also be costly if we opt for a higher quality of fiberglass. The standard fiberglass will cost between $0.50 and $1 per square foot of wall, while batts with higher densities tend to cost $1 or more per square foot.

If we compare closed spray foam, which costs about $1.30 to $3.50 per square foot, to fiberglass, we can see that spray foam is slightly more expensive, or at least the closed cell one.

The Quality of the Seal and Air Barrier

Fiberglass Spray foam insulation vs fiberglass, and which is better

This is where the closed cell spray foam shines. It will cover almost everything between the wall and your home, which will prevent the transfer of heat. It’s the most quality and reliable tool, and also reduces the likelihood of mold and increases the energy efficiency.

Fiberglass can be slightly trickier, on the other hand. While it can be very effective, it will also need to be installed properly and professionally, which presents an additional cost. A DIY approach can be tempting, but it might cost you on the long-term.

Length of Life

spray-longlife Spray foam insulation vs fiberglass, and which is better

Fiberglass insulation will last you up to a couple of years, especially when you buy high-quality fiberglass. But you must note that after some time, the fiberglass will deteriorate, which means you’ll need to replace it after some time. And that’s obviously an additional cost.

On the other hand, spray foam can last you a lifetime of a human being. Some types of foam can last all the way up to 80 years. So you can see that foam is a permanent solution. You might have to pay more upfront, but you get quality as well as longevity.

Barrier for Moisture

sprayfoam-installation Spray foam insulation vs fiberglass, and which is better

Spray foam might include vapor barrier, depending on the type of insulation and the quality of installation. It’s best to consult a professional about it, and to install it properly to install a barrier for moisture.

On the other hand, fiberglass won’t provide a vapor barrier, and it will need to be installed separately. This is a big problem, especially for installers that are not experienced.

Sound and Allergy Considerations

sound-proof Spray foam insulation vs fiberglass, and which is better

If you’re looking for an option that will preserve you from heat and cold, but also from sound pollution and allergen protection, then spray foam is the better choice. While it will protect you from heat and cold, it can be a sound barrier, although not as effective as dedicated sound barriers. It will also block allergens such as pollen.

Fiberglass, on the other hand, has a significantly smaller sound-blocking capacity than spray foam. It will block some of it, but just not as much as the open cell spray foam.

Fire Hazards

fire-hazard Spray foam insulation vs fiberglass, and which is better

Both fiberglass and spray foam can be flammable. Spray foam often needs intumescent paint to protect it from fires.

Ending thoughts on spray foam insulation vs fiberglass

If we conclude this article, let’s say that in the end, the final decision is with you. If you’re looking for a slightly more effective solution that will last you longer, spray foam is the better option.

If you’re looking to save some money, then you can consider fiberglass. But know that it won’t last you an eternity, and it will also not be as effective as closed cell spray foam.

If you enjoyed reading this article about spray foam insulation vs fiberglass, you should read these as well:

The post Spray foam insulation vs fiberglass, and which is better appeared first on Impressive Interior Design.


source https://www.impressiveinteriordesign.com/spray-foam-insulation-vs-fiberglass/