Monday, July 27, 2020

How to use a waterfall countertop to make an awesome kitchen

The kitchen is a blank canvas when it comes to decoration. Almost everything is valid within them to create unique and comfortable environments. Beyond requiring certain fundamental appliances, the rest of the kitchen can be customized. Placing center islands, large chrome exhaust fans, finely carved or metal-enclosed cabinets, and many other things can create an ideal environment. Today we will tell you about a trend that many modern kitchens are adopting: the waterfall countertop.

As its name suggests, waterfall countertops mimic the appearance of a river that flows into a large waterfall. To simulate this continuity, the top of the table is folded on the side until it touches the floor. Some designs even use the waterfall as support.

Because its primary utility remains that of a table, it must be sturdy. That is why its construction is in the vast majority of cases in stone. If your kitchen already has countertops with granite, marble, or the like, then the installation of this type of countertop is recommended.

The main attraction of this countertop over a traditional style is the sense of continuity it offers. Modern designs seek to create interrelated spaces, which makes the occupants of the houses feel more comfortable with their surroundings. After all, this style tries to imitate nature and its organic design.

Price to install a waterfall countertop
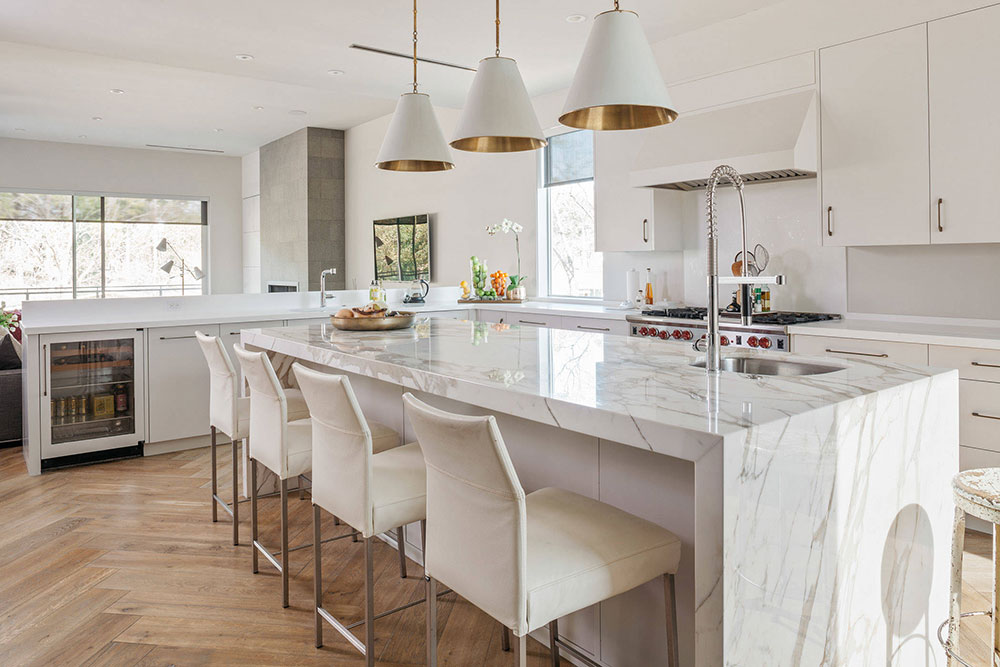
Urban-Modern-by-Poet-Interiors How to use a waterfall countertop to make an awesome kitchen
Image source: Poet Interiors

Acquiring a large piece of stone and assembling it is not economical, which is why most countertops tend to use the traditional style. Luckily, there are cheaper alternatives, you just have to know how to select the materials.

The most common options, such as granite, quartz, and marble, can be priced between $135 and $220 per square foot, including both material purchase and installation. Although this may not seem like much because the countertop is not that large, the problem is that assembling it is expensive due to the necessary equipment.

To build the countertop, it is necessary to fit two pieces of stone, and for this to be possible, the corners must be cut at 45-degree angles. The only way to cut the stone with this precision is by using a computer numerical control laser cutter. Although the process seems easy, it can cost up to $2,000 depending on who does it.
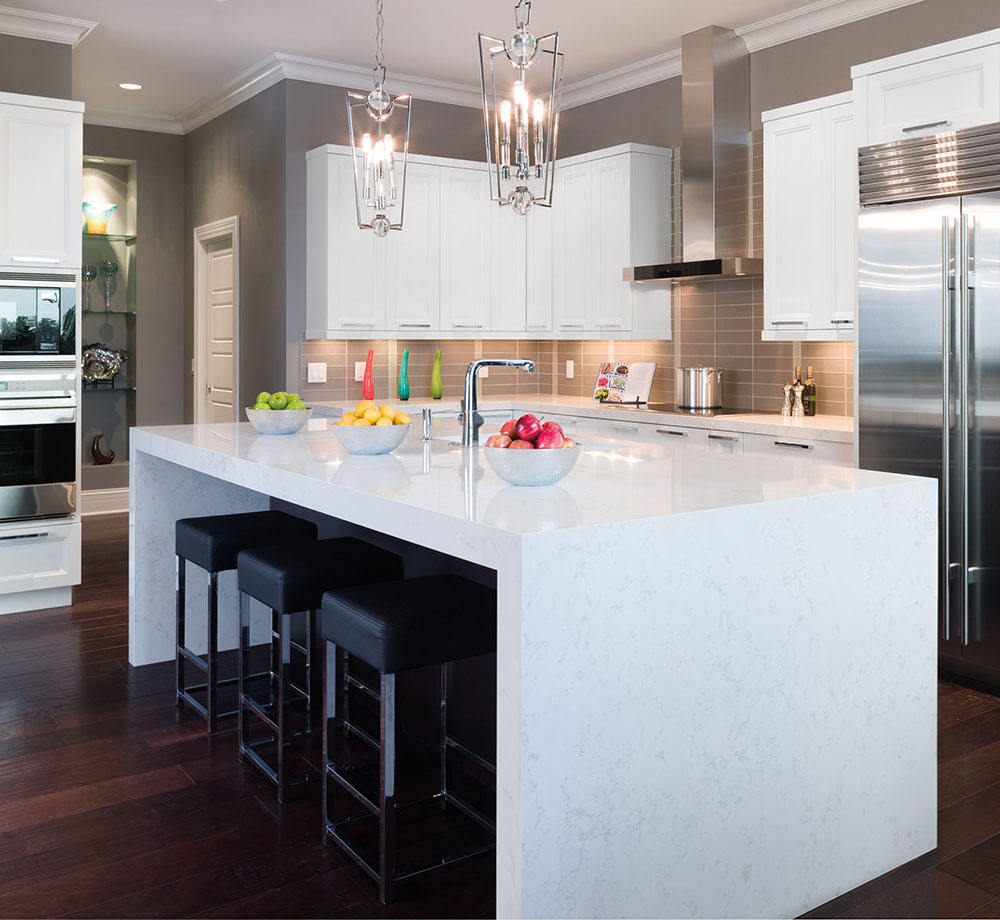
Cambria-Iowa-by-Cambria How to use a waterfall countertop to make an awesome kitchenImage source: Cambria

Of course, it is possible to reduce this price if the material for the waterfall countertop island is not stone. A cheaper alternative is wood, and some types have exceptional finishes. For a counter that is 0.90 x 1.52 meters, prices could vary between $150 and $300 depending on the wood. Also, since it is a basic material, you could even save on installation costs if you have the tools to do it yourself.

A substitute for stone is cement. Creating a waterfall countertop island with concrete is like building a wall: you assemble a wooden formwork with the desired shape, and then pour the concrete into it. Using the same dimensions as the previous example, the price to build this countertop should not exceed $250.

What is the best material?
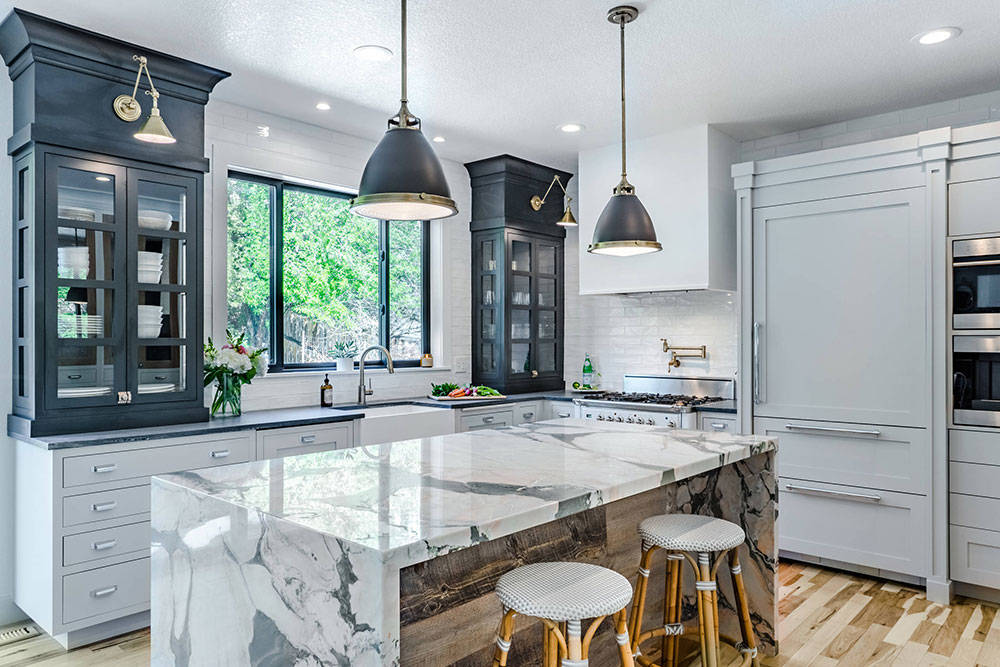
INDUSTRIAL-FRENCH-by-Kitchen-Society-Design How to use a waterfall countertop to make an awesome kitchenImage source: Kitchen Society Design

There is no single correct answer to determine what material you should use in your countertop. They all work, so in the end, it is a choice that takes into account the kitchen’s design and the cost.

As we mentioned before, most kitchens have stone as the material to cover the shelves, so it is recommended to keep it in the waterfall countertop so as not to distort the kitchen’s appearance. The most popular are quartz, granite, and marble.

Thanks to the new popularity that these kitchen islands have gained, wood, concrete, and steel have also managed to stand out in the market, especially when it comes to economic options.

Coating stones

Cedarview-Residence-by-Root-Architecture How to use a waterfall countertop to make an awesome kitchenImage source: Root Architecture

  • Marble: the most expensive option in the list, and also one of the most beautiful thanks to its patterns. Its formation comes from limestone, which is heated and subjected to high pressures, which gives it a shiny and slightly porous finish. Marble can change slightly in designs and colors thanks to the combination of other minerals, such as graphite, quartz, or clay, so not all presentations are the same.
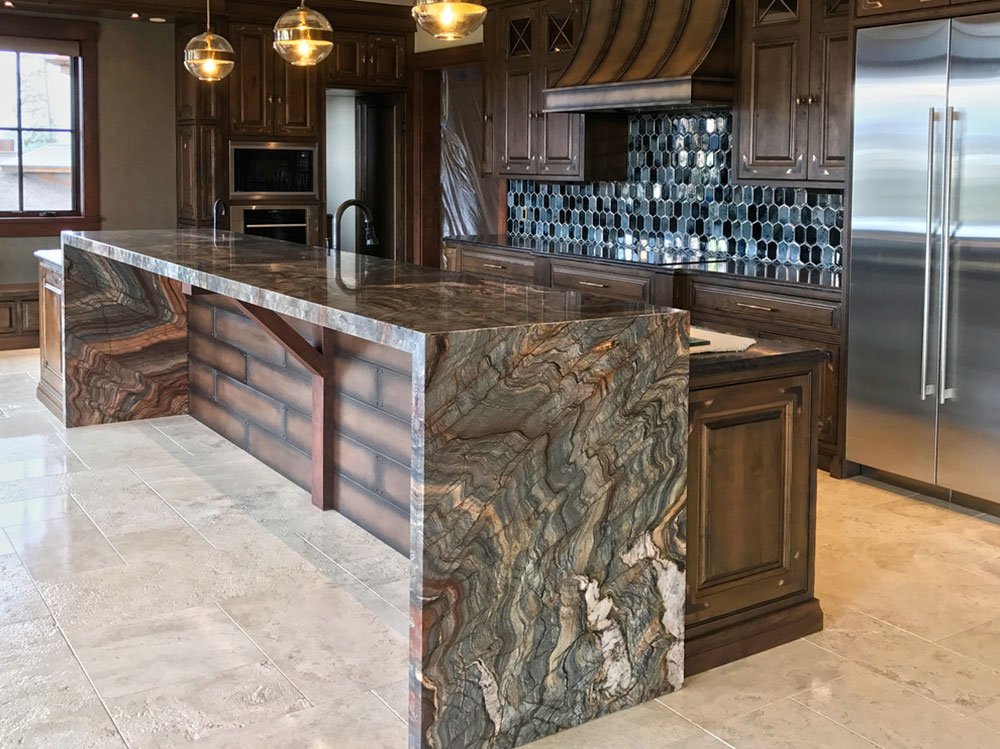
6cm-Fusion-Granite-Kitchen-Island-mirrored-6cm-Mitred-edge-and-waterfall-edge-by-YK-Stone-Center-Inc. How to use a waterfall countertop to make an awesome kitchenImage source: YK Stone Center Inc

  • Granite: Those looking for a more rustic appearance will find a fascinating design in granite. This stone also has varied designs depending on the combination of minerals, but mica, feldspar, and quartz are required for its basic formation. Everything compressed creates a pattern full of small spots.
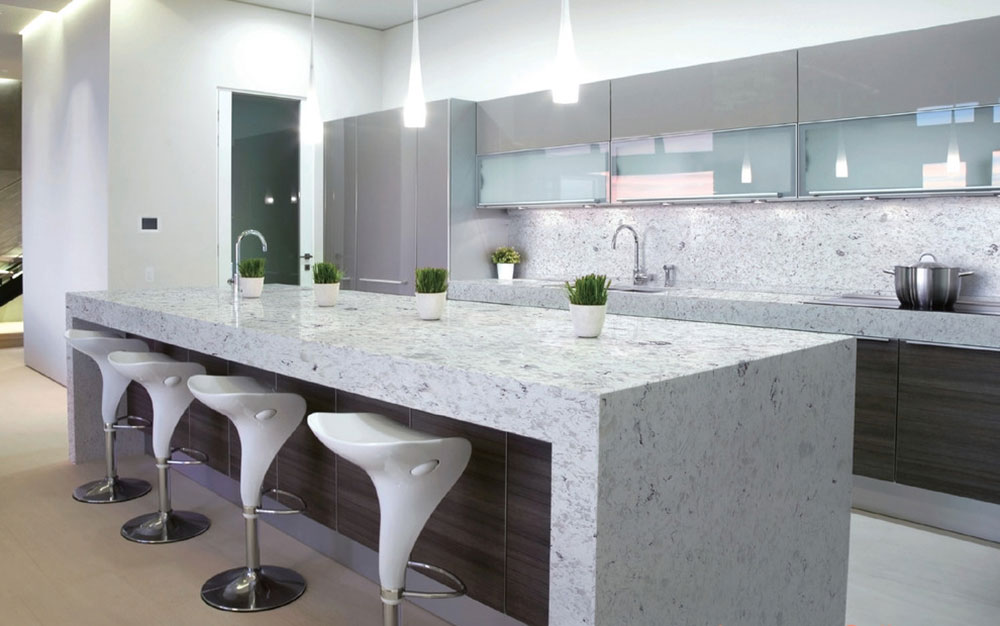
Waterfall-Countertops-featuring-uQuartz-Collection-by-UNIVERSAL-GRANITE-MARBLE How to use a waterfall countertop to make an awesome kitchenImage source: UNIVERSAL GRANITE & MARBLE

  • Quartz: one of the most abundant materials in the world is also one of the most resistant stones to build kitchens. The quartz pattern is much more delicate, hardly showing stains that contrast with its natural tone, and it is not as bright as other options, but thanks to the neutral color it has, it can be combined with any kitchen.

Equally eye-catching alternatives

The-Saxony-by-Sarah-Tombaugh-Architect How to use a waterfall countertop to make an awesome kitchenImage source: Sarah Tombaugh Architect

  • Concrete: thanks to how easy it is to mold, concrete is becoming a very attractive option for those users who want to add variety to the countertop’s design. A simple and smooth design can achieve a minimalist appearance, but with more complex moldings, other styles can be imitated. Furthermore, it can be mixed with many additives to make it more resistant if necessary.
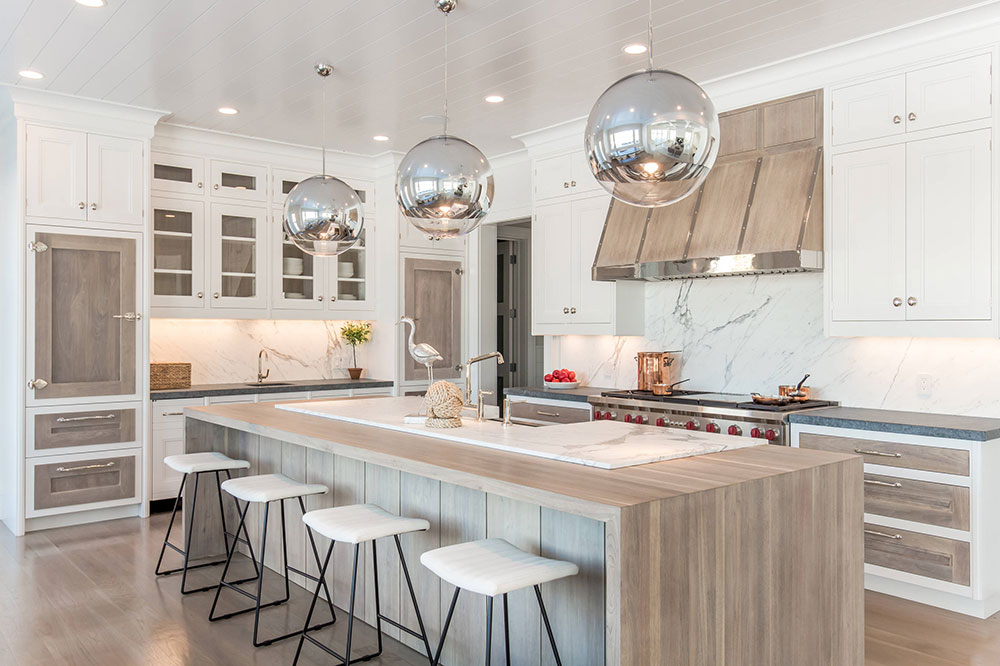
Bakes-Kropp-Bridgehampton-Driftwood-Dream-Kitchen-by-Bakes-Kropp-Fine-Cabinetry How to use a waterfall countertop to make an awesome kitchenImage source: Bakes & Kropp Fine Cabinetry

  • Wood: you can achieve a traditional appearance with the use of wood to make your kitchen furniture. Since a large number of accessories are made from it, you will have no trouble combining it. Woodworking is much easier than other materials, so even a novice can try to build a waterfall countertop with it. Of course, to achieve a professional finish it is required experience.
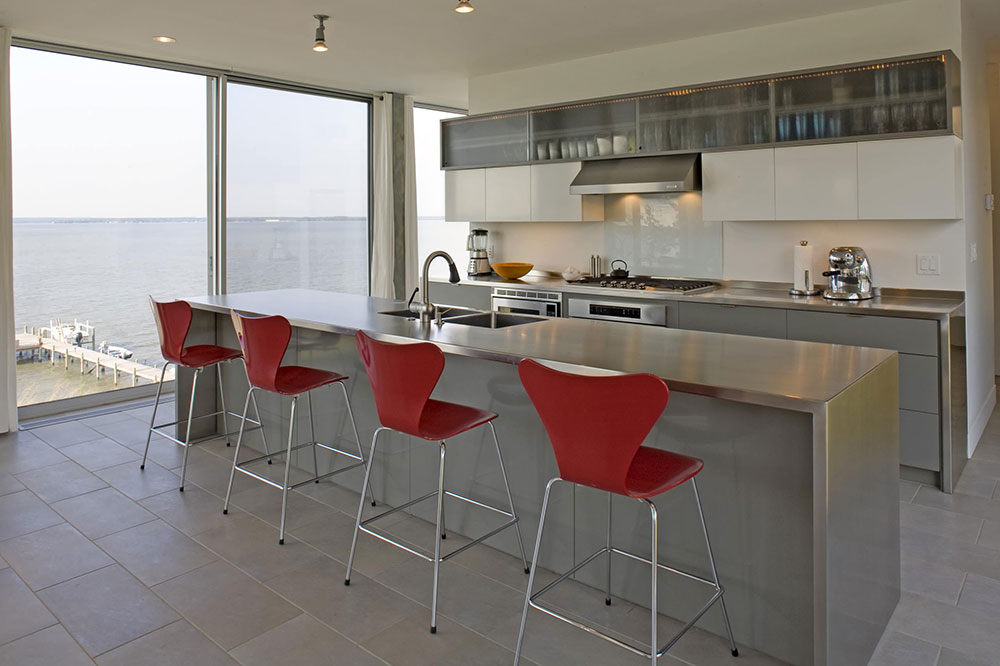
River-House-Kitchen-by-Ziger-Snead-Architects How to use a waterfall countertop to make an awesome kitchenImage source: Ziger|Snead Architects

  • Stainless steel: the most modern kitchens will benefit from a stainless steel counter. This has a futuristic appearance and can be worked in a single piece, which when heated can be easily folded.

The appeal of waterfall edge countertop
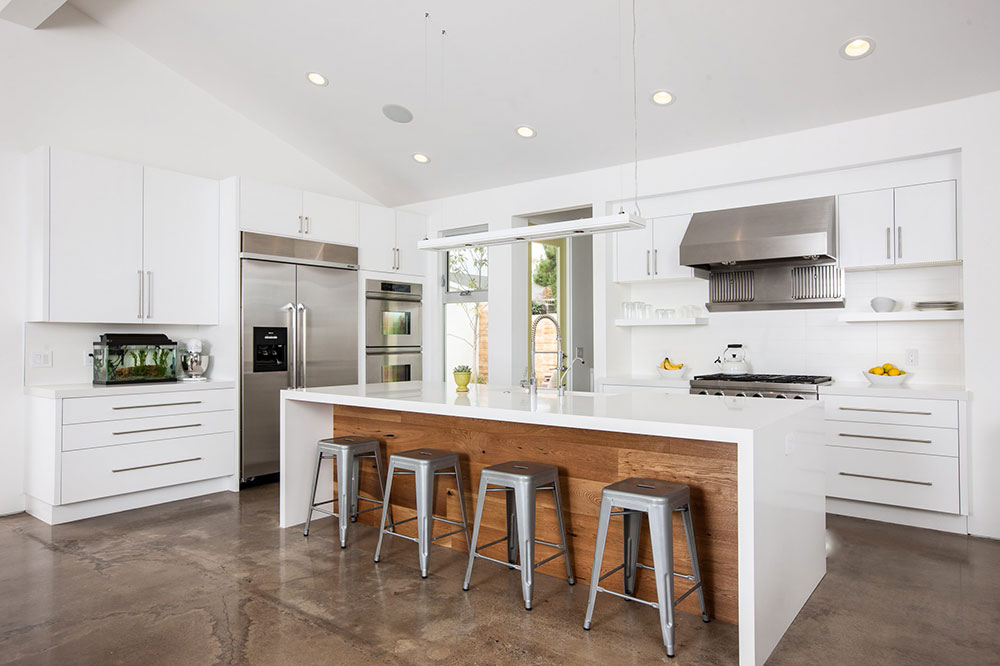
Costa-Mesa-Farmhouse-Contemporary-remodel-by-Christiano-Homes-Inc. How to use a waterfall countertop to make an awesome kitchenImage source: Christiano Homes, Inc.

There are many reasons why you should consider installing a waterfall countertop. Visually, these create an interesting point in the kitchen due to the uniqueness of their shapes. Unlike traditional countertop, people are not accustomed to seeing a single piece that works as a table and support at the same time.

Storage space, outlets, and other facilities are always a problem in kitchens. These many times break with the environment’s scheme, causing a negative impact at the visual level. These aesthetic details can be hidden with the side panels. Similarly, since the stand is just as strong as the rest of the table, there is no chance of it being scratched or broken.

The kitchen, from the architectural point of view, has a direction that must be followed at all times, creating an orderly route in which people can carry out all the corresponding activities. The free spaces break this continuity, but with a waterfall countertop, it becomes less noticeable.

Colors for all tastes

Kitchen-by-Charlie-Co.-Design-Ltd How to use a waterfall countertop to make an awesome kitchenImage source: Charlie & Co. Design, Ltd

When it comes to colors, there are several guides you can follow to create an ideal kitchen. You can choose to combine the countertop with the rest of the kitchen, creating a harmonious design, or you can break all the rules and use a contrasting color to make this table more daring. Here are some traditional ideas.

  • Perfect white: white in kitchens never fails. This color is clean, which will make the environment feel immaculate. Many stones combine perfectly with white. Best of all, most building materials for a countertop are smooth enough to be easily cleaned in case of stains, keeping the white color.
  • Sharpness with white and green: combined with a natural color like green, the previous option can become something more daring. Marble is the perfect companion in this duo.
  • Something calm with blue and white: blue is a cold and relaxing color, which makes kitchens feel more sophisticated and cozy. This combination is also perfect for metallic details.
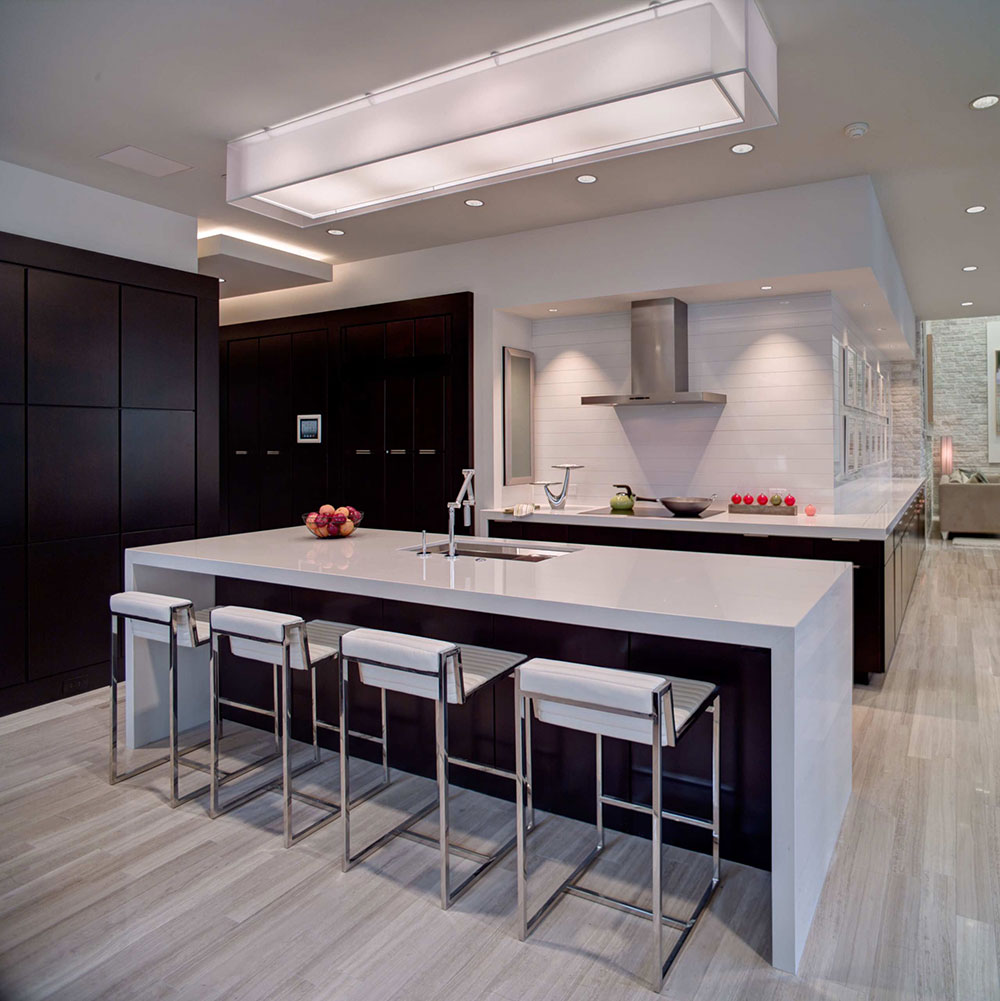
The-New-American-Home-by-Phil-Kean-Design-Group How to use a waterfall countertop to make an awesome kitchenImage source: Phil Kean Design Group

  • The elegance of the opposites: black and white are different, but there is no more harmonious mix. A few touches of white will serve to create highlights in this design. For example, the countertop can be a light color, while the rest of the construction comes into view because it is darker.
  • Just add the necessary details: you can design a kitchen that only introduces a couple of details in the form of satins so that the atmosphere is not so monotonous. The quartz is perfect for this job.
  • Maximum elegance: gold is a luxurious color, which will make your living room shine like white. This is the ideal color for those who want to highlight.
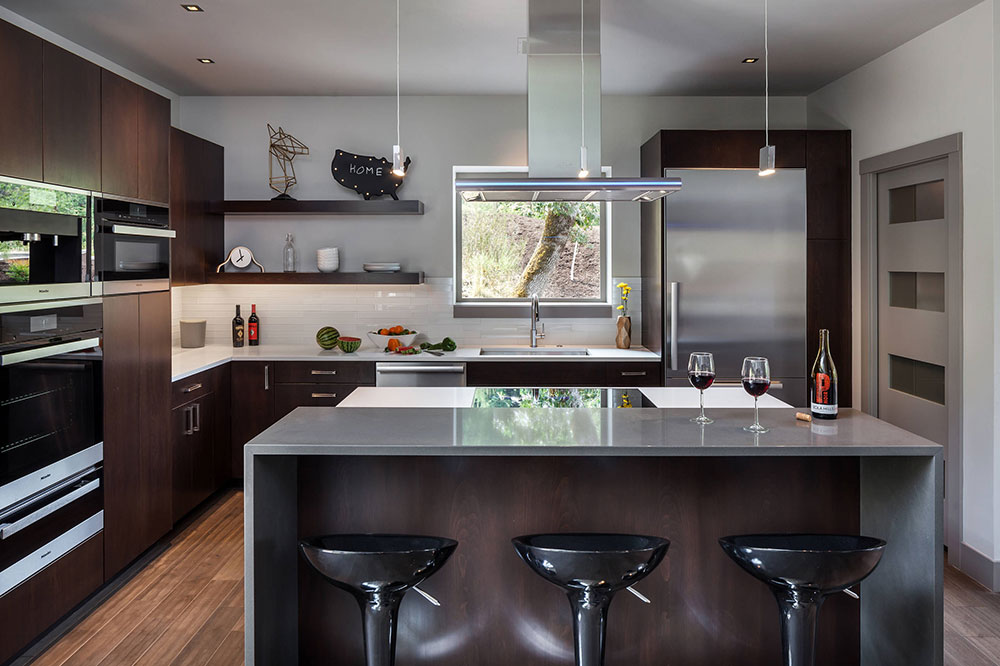
Hallmark-Residence-by-Jordan-Iverson-Signature-Homes How to use a waterfall countertop to make an awesome kitchenImage source: Jordan Iverson Signature Homes

  • Conceals stains: with a black countertop, you will never have to worry about stains again. this color matches many accessories and can work for both mid-millennium gothic looks and modern styles.
  • Black with contrasts: in this case, the main color is black and it is contrasted with lighter tones so as not to create such a dark environment. The waterfall countertops found in bars tend to take advantage of this combination.

The best place to install a waterfall counter edge
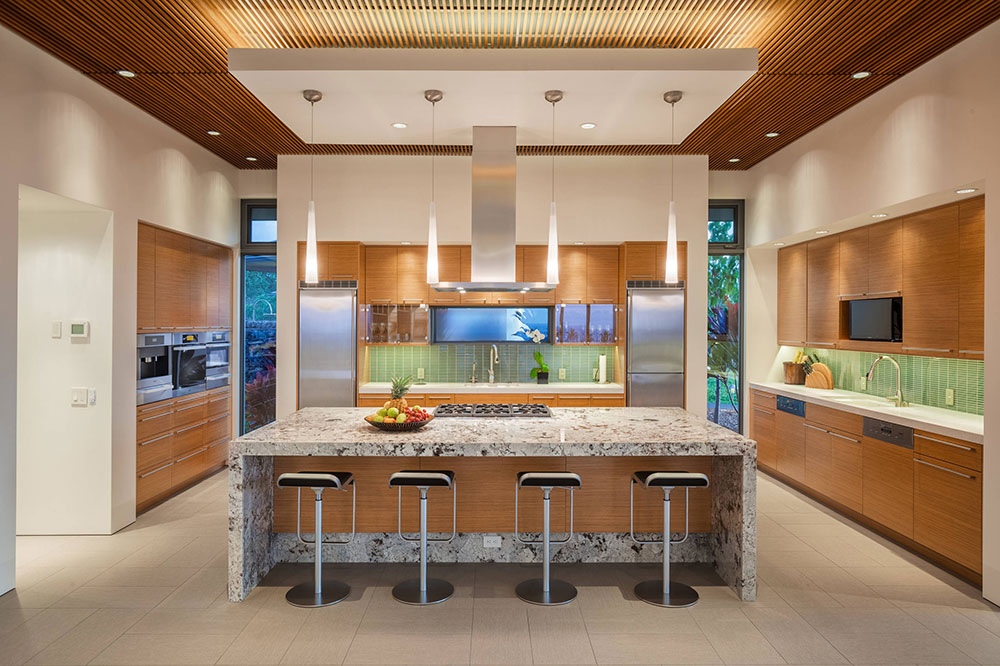
Kukio-by-Nicholson How to use a waterfall countertop to make an awesome kitchenImage source: Nicholson

Although this detail can be placed anywhere in the kitchen, it will always stand out much more if it is installed on the central island. This is because, unlike a side countertop, the island has four available sides on which the waterfall counter can be built.

However, you should not feel limited by this. In general, this construction detail will always look good.

As this design is currently in vogue, the number of options on the market are immense, and you may be able to find them under other more sophisticated names. For example, some designers call them work surface wrapped islands.

Enter the global trend with a waterfall countertop

An organic and continuous design, or something industrialized, modern, and with many corners. No matter the final design, the waterfall countertops will adapt perfectly to any environment.

If you want to renovate your kitchen, but don’t know how to get started, all you need to do is add a new side to your countertop or island. You will see how immediately your home becomes more sophisticated.

If you enjoyed reading this article about waterfall countertop, you should read these as well:

The post How to use a waterfall countertop to make an awesome kitchen appeared first on Impressive Interior Design.


source https://www.impressiveinteriordesign.com/waterfall-countertop/

Sunday, July 26, 2020

How to texture drywall so that it looks amazing

Every owner of a home built with drywall has thought of decorating them at some point. This desire is understandable, considering that its factory appearance is quite sober. The good news is that there are many ways to change their appearance, although some of them may require advanced tools and knowledge. Today you can learn how to texture drywall with the following guide.

Drywall is a technique widely used in construction. This consists of covering wooden or galvanized steel structures with plaster. This technique allows to lower costs in projects, in addition to the fact that prefabricated panels can be adapted to multiple dimensions.

Due to its popularity, there are multiple options on the market to customize its appearance. However, each design requires a specific installation, which is related to its complexity.

The simplest alternatives for applying drywall textures only require a wide brush, but some will need more sophisticated machinery such as a hopper gun or pressure blocks. You can even create varied textures on the drywall, but you will need a specific nozzle.

Today we will discuss various techniques, and how to install them.

How to texture drywall

Add a 3D effect to the walls

Pearl-by-Josh-Wynne-Construction How to texture drywall so that it looks amazing
Image source: Josh Wynne Construction

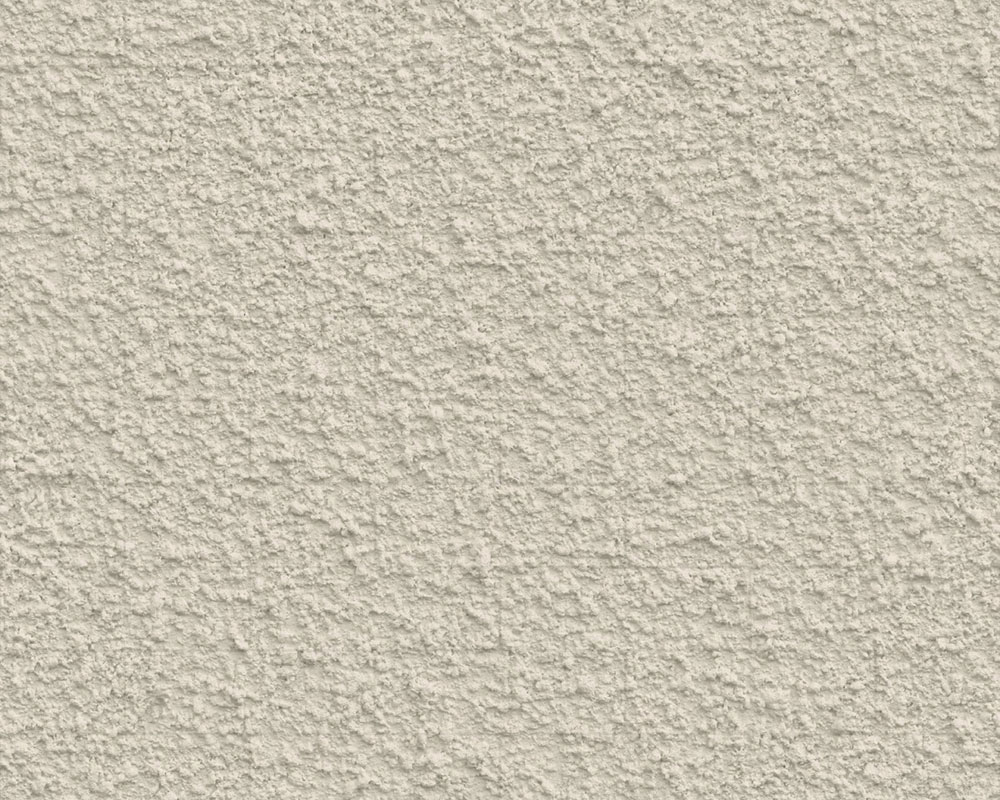
Textured drywall is very similar to a conventional wall that has ridged frieze. This is done by applying an additional layer much thicker than the paint, which can be molded to give it a 3D effect. With the right lighting, the wall will generate shadows, creating dynamic patterns that will change depending on the light’s angle of incidence.

Additionally, adding a thick texture to the drywall is a smart way to patch possible imperfections and repairs that the wall may have, such as the joints between the different panels. Since this is an irregular appearance, there will be no way to identify the different sections.

Steps to apply the different drywall texturing techniques

cover How to texture drywall so that it looks amazing

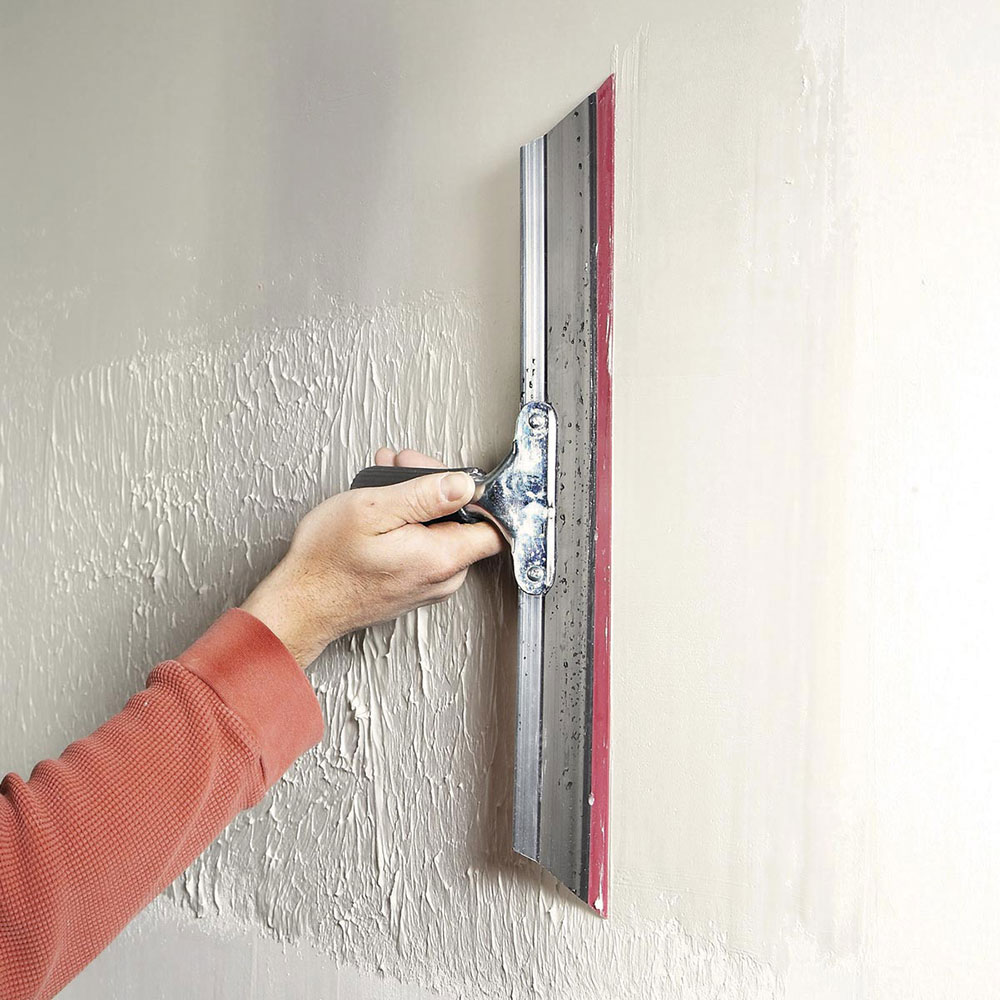
Do you want to know how to texture walls by hand? Therefore, this list of tips is what you need. Keep in mind that, like other projects, experience will influence the result, so you should not be discouraged if you do not get the perfect finish the first time.

You can practice applying the texturing compound to a couple of additional drywall panels that you will need to stick to the wall. The texture compound does not dry quickly but is thick enough to adhere to panels, and you can shape it as desired.

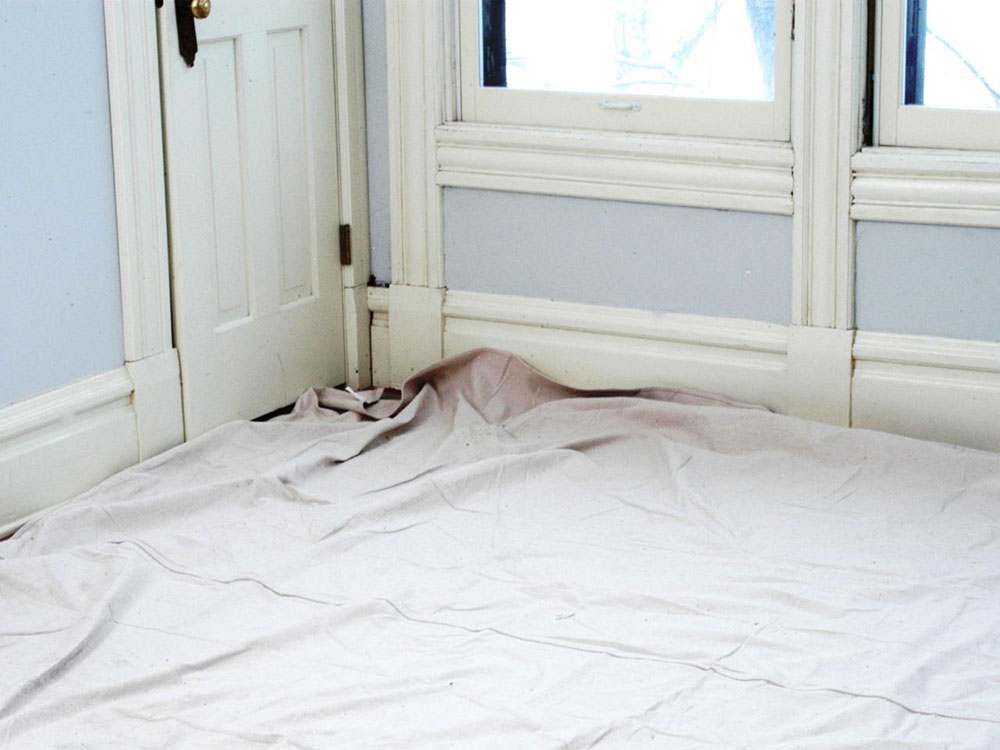
Before you start, remember to put plastic blankets or newspapers on the floor to avoid dirtying them. Also, before the compound dries, remove it and put it back with the rest to preserve its semi-liquid state.

What you need to prepare

goggles How to texture drywall so that it looks amazing

If you feel confident enough about your abilities, the next thing to do is apply the true wall textures. Before you begin, you will have to sand the entire wall to remove any blemishes it may have.

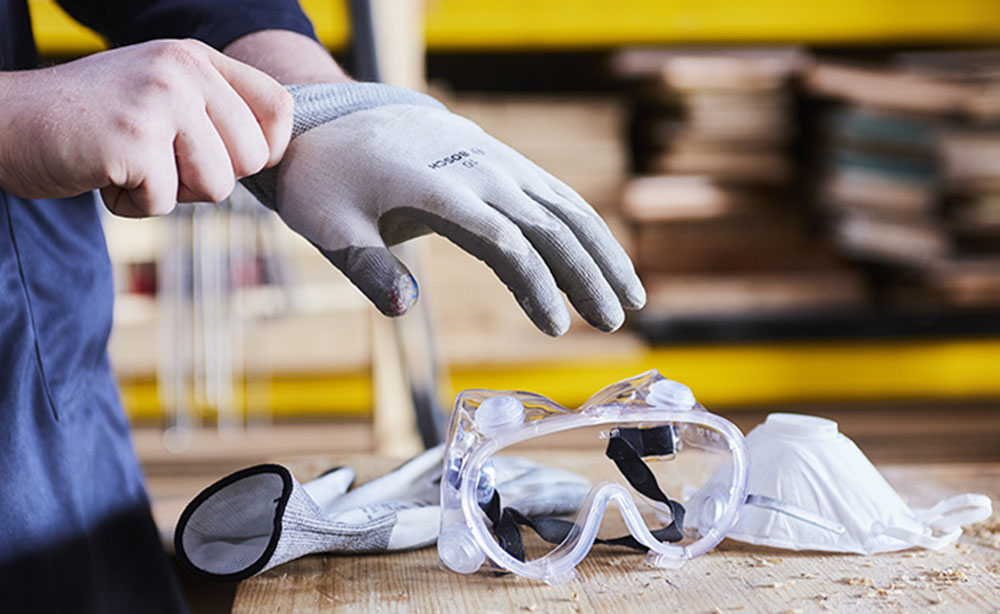
Since the sanding job releases microscopic dust particles, you will need to wear a mask and goggles as a safety measure. Inhaling them can be harmful to your health.

For larger areas, it is best to use a pole with a rounder sander. For the most difficult areas, such as corners, you can use a sanding sponge. To make the wall smooth, be sure to use fine-grit sandpaper. Also, do not apply too much pressure or you could damage the drywall.

Apply a primer coat

primer How to texture drywall so that it looks amazing

The hand texture, in addition to needing a smooth surface to adhere, requires a primer coat on the wall. Like the paint, the primer must be applied to a clean wall.

As you recently sanded, you will need to clean the drywall to remove dust. The smallest particles can be removed with a damp cloth.

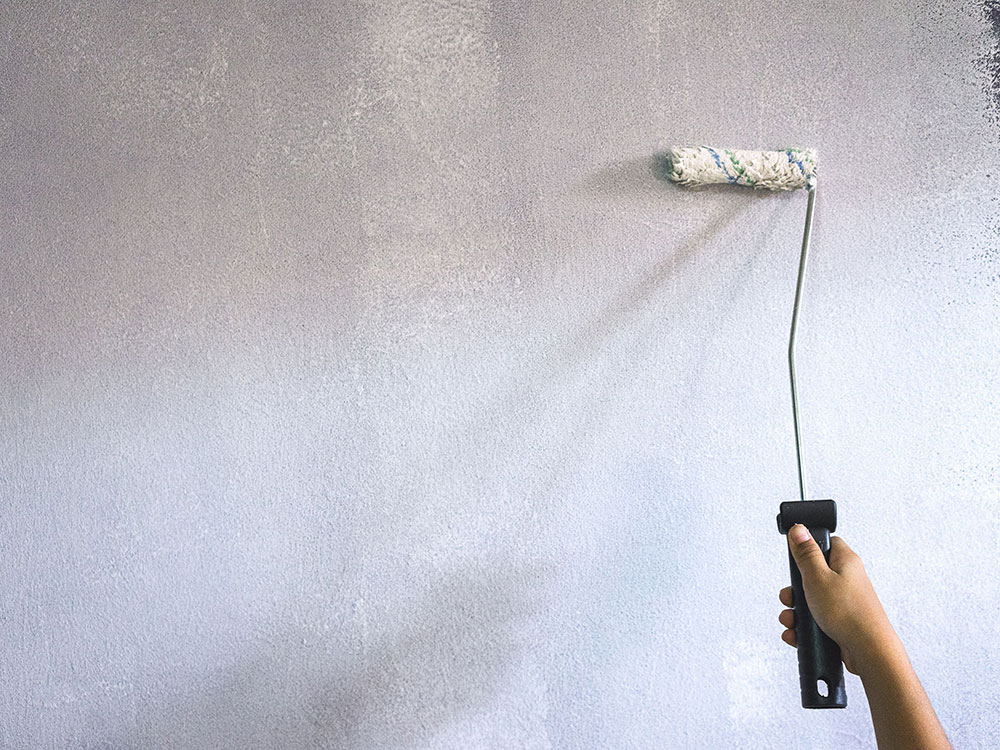
Using a roller, you will apply a primer coat to the entire wall to be textured. To achieve a better result, the primer should be done in a single layer.

Prepare the compound for texturing

compound How to texture drywall so that it looks amazing

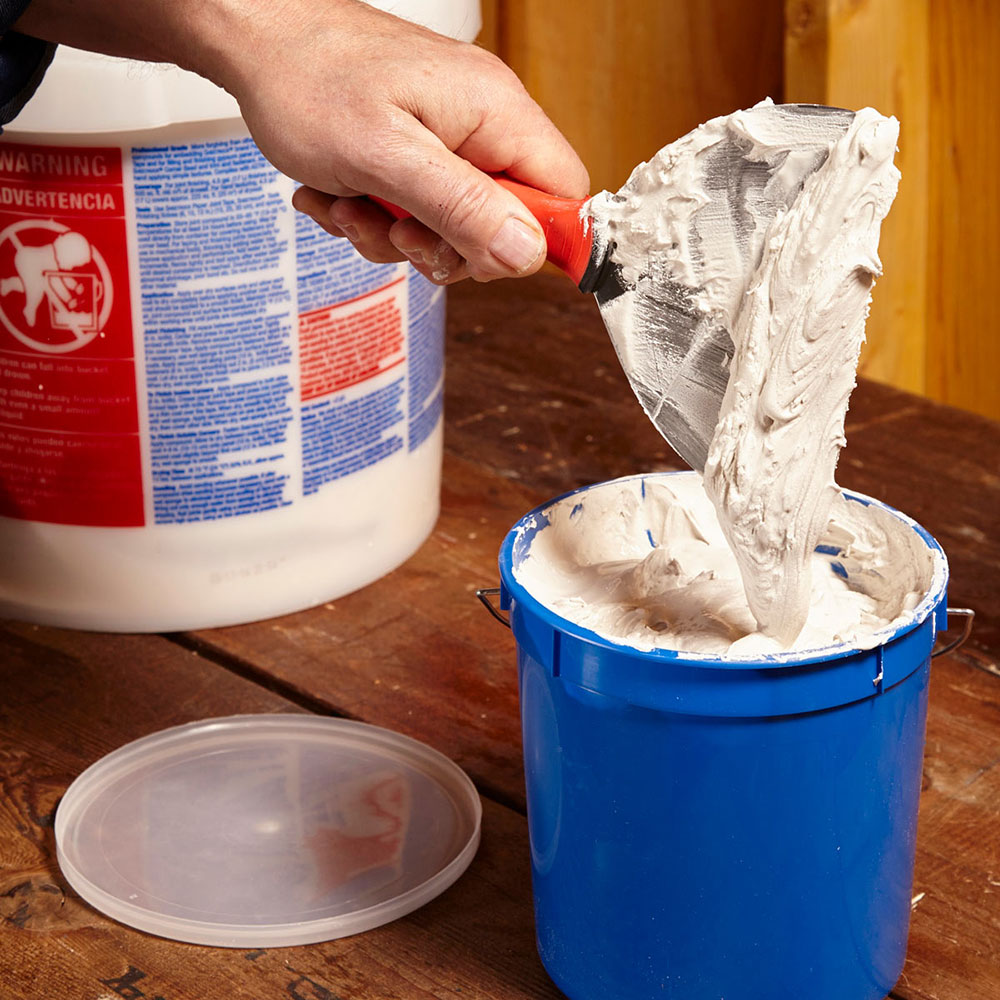
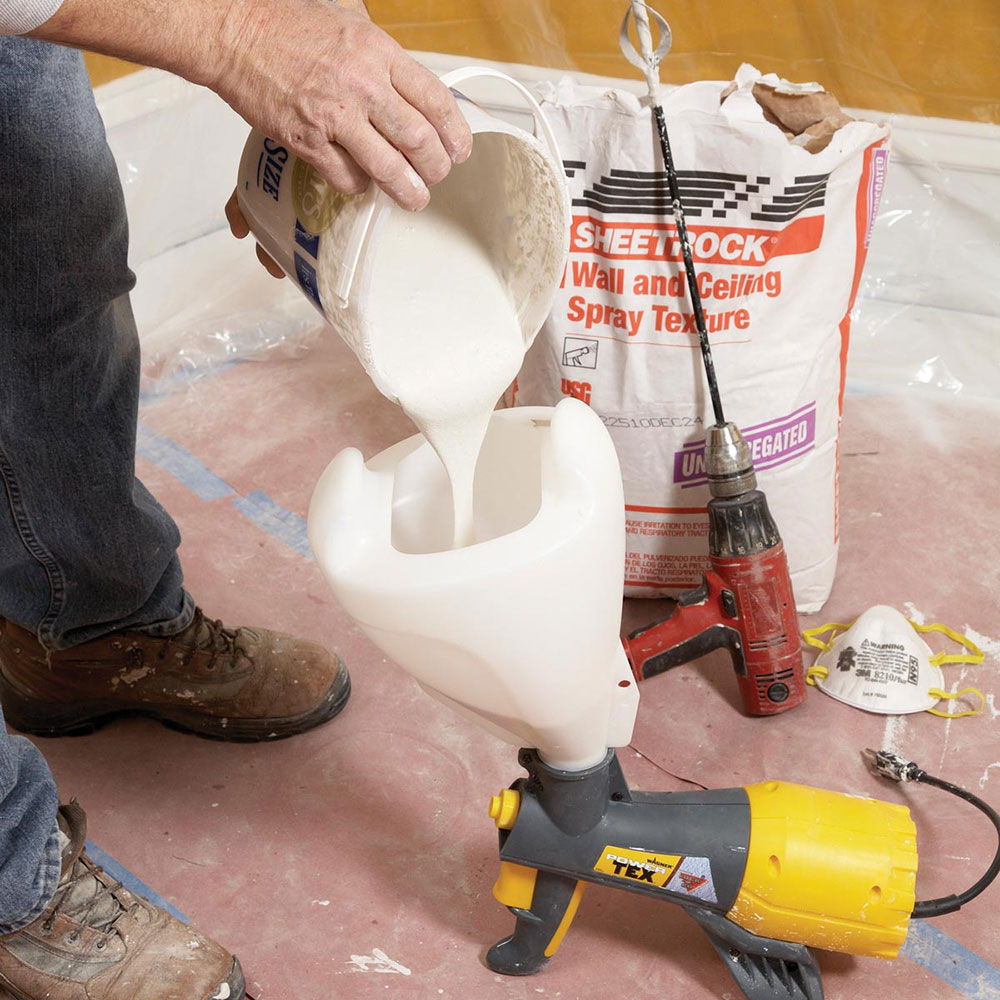
Now that the wall is ready, it’s time to make the compound. Get a bucket with a capacity of at least 5 gallons, and pour the compound halfway through the bucket. Now pour a cup of water and mix it.

You can mix the compound manually using a spatula, but due to its thickness, we recommend that you use a drill with a mixing paddle. As you mix, keep pouring water until the compound has a consistency similar to that of cake batter. If it becomes liquid, pour another bit of the mud compound.

How to texture drywall using the knockdown method

knockdown1 How to texture drywall so that it looks amazing

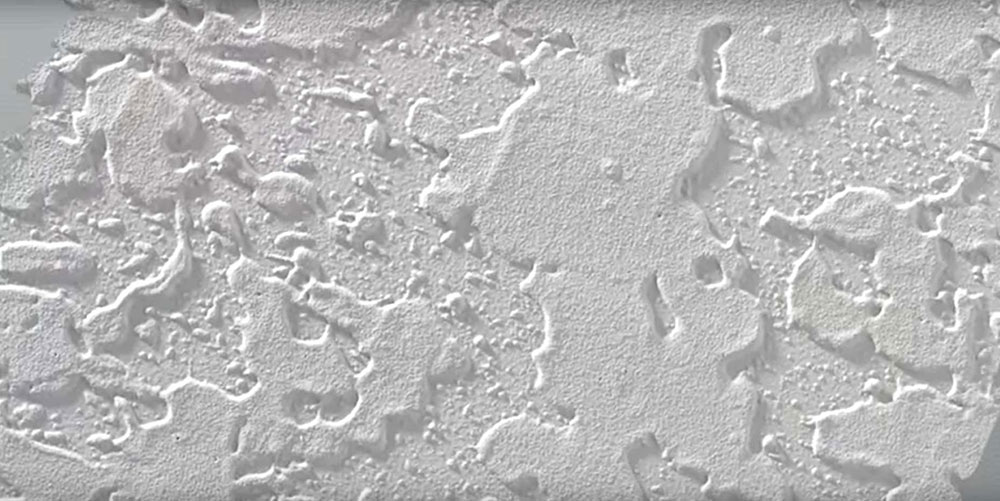
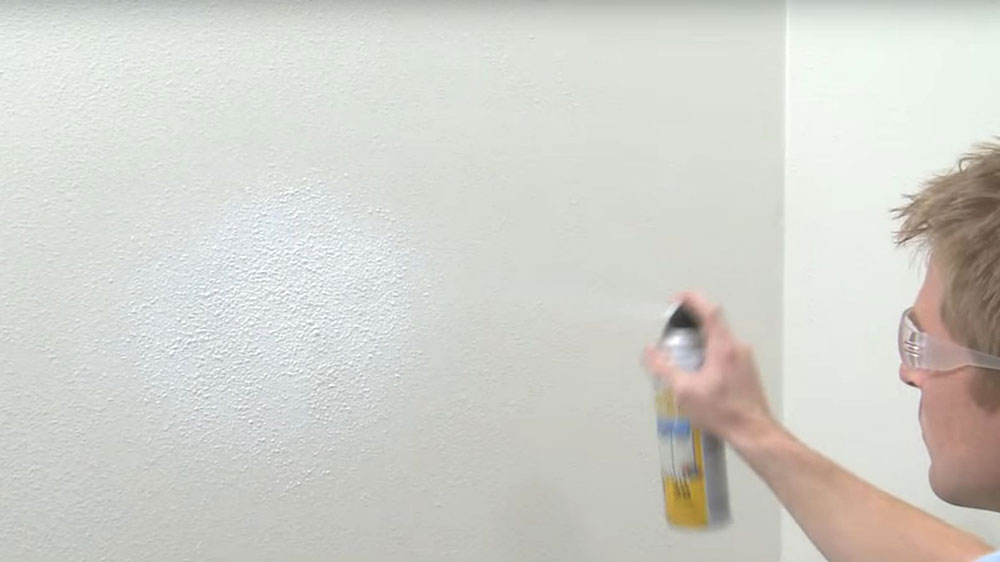
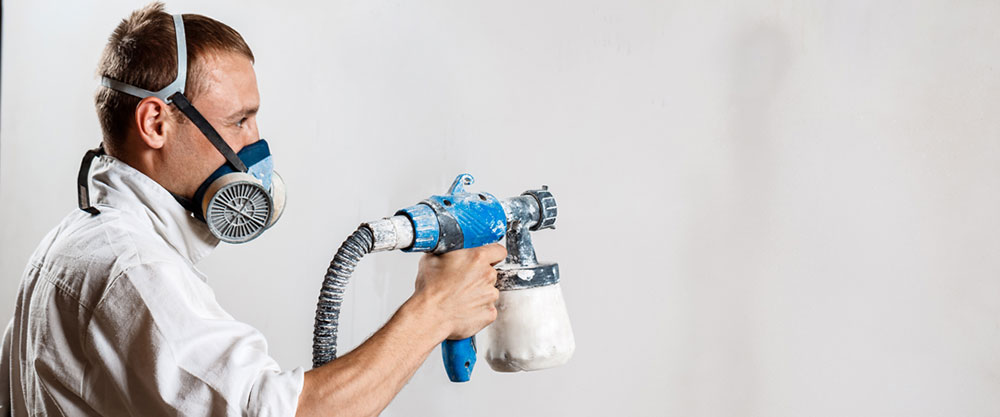
This method works with any type of mixture you buy and is one of the easiest to apply. The ideal drywall-texturing tool for this method is a 60-psi sprayer (or no less than 20 psi). It can also be done manually with a short roller brush, but it will be slightly more difficult to achieve a smooth finish.

Using the sprayer, apply the compound over the drywall as if you were painting. There is no specific way to do it, so you can use vertical, horizontal, or diagonal movements.

knockdown How to texture drywall so that it looks amazing

The only thing to consider is that you need to be constant and fast with the movements or it will make the material accumulate in a single point. It is better to make a thin layer and then apply another on top if necessary than to have to remove the thick pieces that will look like bumps.

How to texture drywall using the basic swirl

basic-swirl1 How to texture drywall so that it looks amazing

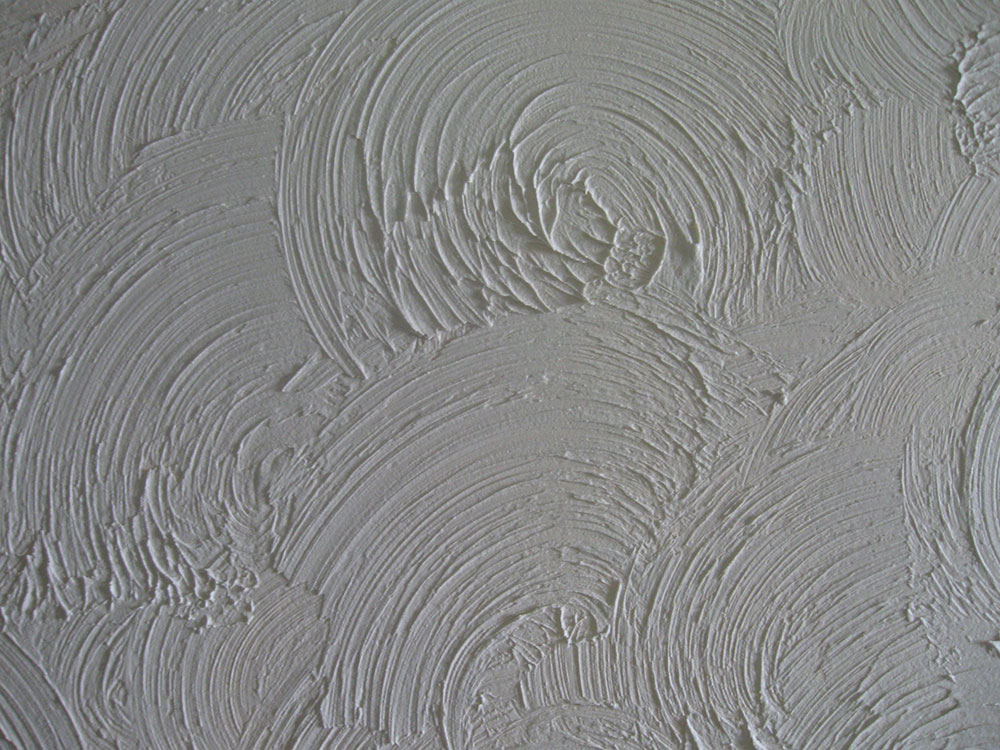
To apply the basic swirl you will need the compound to be thick, so avoid pouring a lot of water into it. For a more striking finish, add white quartz to the mix. This can also be used to give more consistency to the compound.

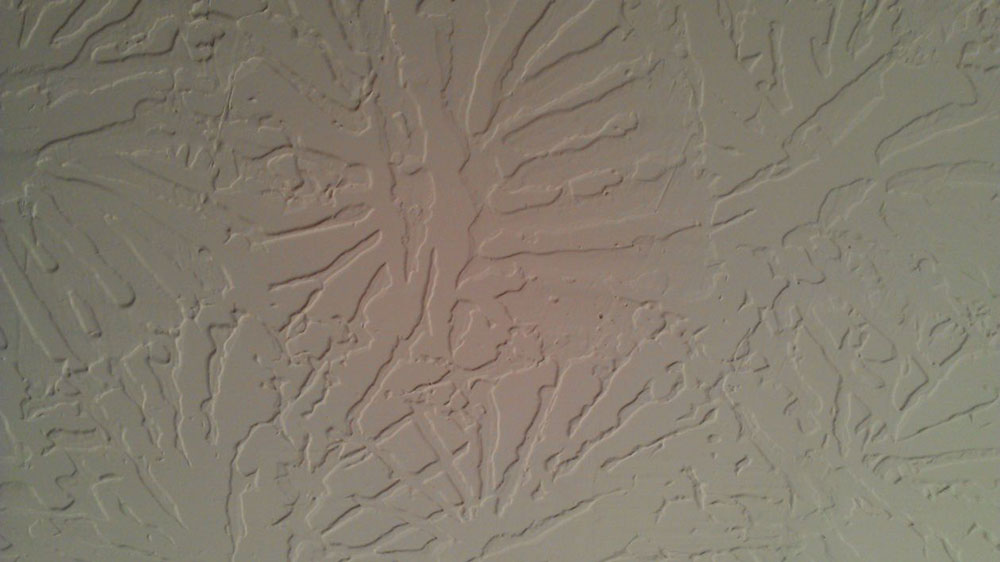
Using a trowel, apply the compound over the drywall from top to bottom. The excess is ​​perfect for creating the swirls of this drywall texture, which you will form using the serrated side of the trowel.

basic-swirl How to texture drywall so that it looks amazing

Simply make circular or arc movements to create the swirls, always starting from the top. The trowel’s teeth will push the material into the surrounding.

Each swirls row is typically out of phase with the previous row, giving it a varied pattern and helping to hide blemishes.

How to texture drywall to create the orange peel

orangepeel1 How to texture drywall so that it looks amazing

Another popular drywall texture pattern is the orange peel, but to apply it yourself you will need an air compressor and a gun.

So that there are no problems, the compound shouldn’t be very thick. Fill the hopper halfway and adjust the air compressor pressure to 100 lbs. This will be the starting point, but you can adjust the pressure depending on the finish you want to achieve.

orange-peel How to texture drywall so that it looks amazing

Unlike the knockdown method, here you do not seek to cover all the drywall with the mixture, but rather to create small random spots that decorate the wall. You should let some of the primer coat be visible for best results.

orange-peel1 How to texture drywall so that it looks amazing

If you wanted to know how to do orange peel texture without a hopper, we recommend that you leave this job to a professional. Although it is possible to do it, the technique is very difficult.

How to make the slap brush texture

slap-brush How to texture drywall so that it looks amazing

This technique will work even on surfaces that have been previously painted, and all you need to do to prepare the wall is clean it to remove dust. In case the wall paint is oil-based or glossy, a superficial sanding is recommended to create some irregularities that help the mud compound to adhere.

If you don’t want to sand the wall, you can coat it with trisodium phosphate (TSP) for a similar effect, but remember to apply it using gloves.

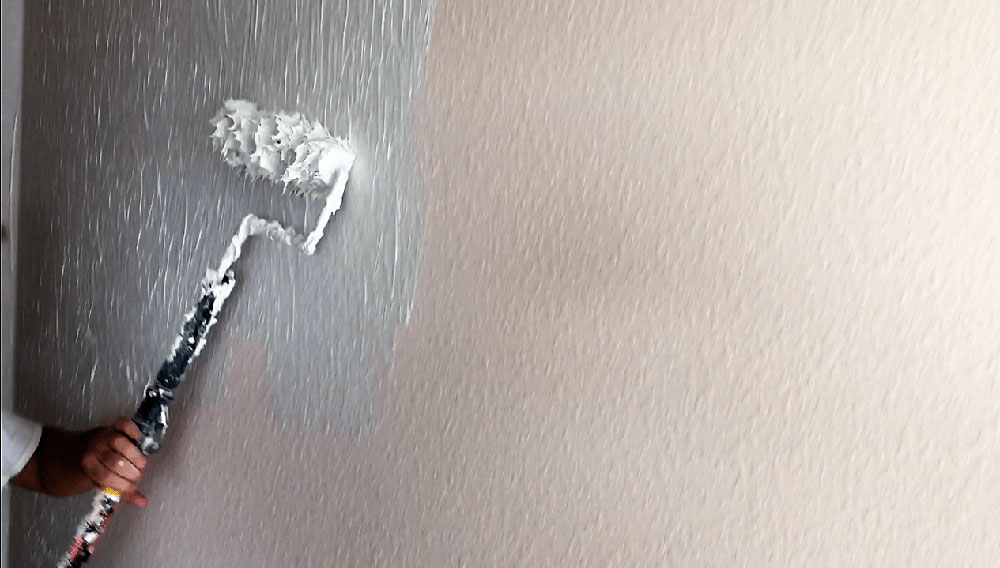
As for the compound, it must be slightly diluted to be able to soak a paint roller with it. The application process is the same as with painting; just roll the roller in one direction and then back it down the same path to create a smooth line.

slap-brush2 How to texture drywall so that it looks amazing


Since you will need to stamp the surface as you apply the compound, it is recommended that you work in small sections no larger than 4 feet. Using a slap brush, stamp the compound, but this time with a horizontal movement for greater comfort.

You should be quick with the application of this technique since, if one of the sections dries, the new mud will stand out, creating a noticeable distortion in the texture.

Give your drywall a new look

Now that you know how to texture drywall, you can get a new look in your home or business without the need for a professional. However, each of the styles requires some experience in construction work, so if you decide to decorate your wall, it is recommended that you ask someone else for help to speed up the process.

If you enjoyed reading this article on how to texture drywall, you should read these as well:

The post How to texture drywall so that it looks amazing appeared first on Impressive Interior Design.


source https://www.impressiveinteriordesign.com/how-to-texture-drywall/
Saturday, July 25, 2020

How to remove paint from clothes without ruining them

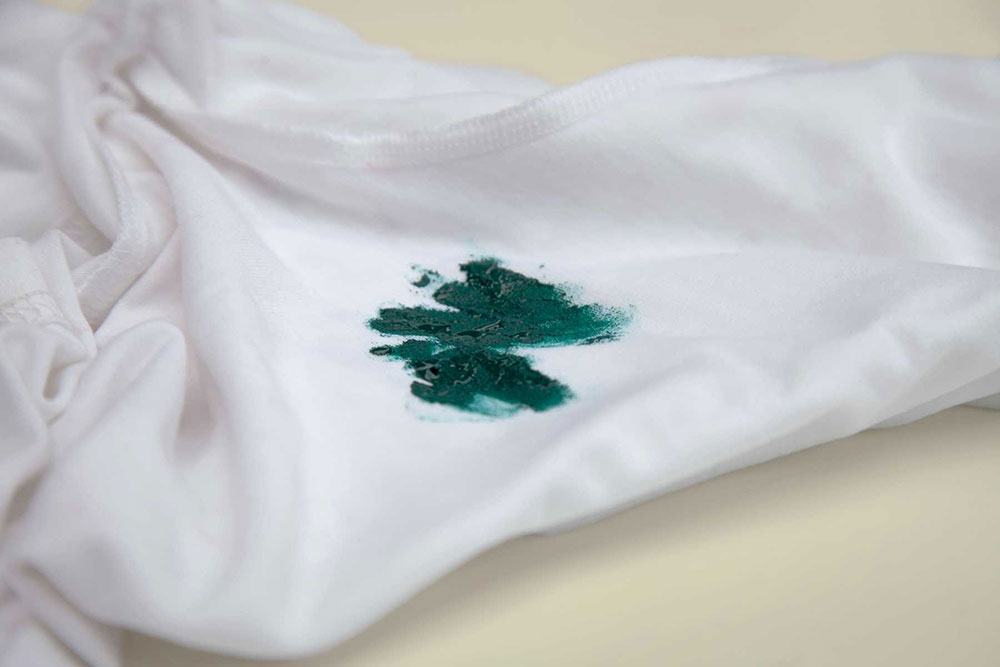
We’ve all been through that atrocious moment when a paint stain falls on a garment in good condition. In this situation, it is normal to panic, after all the clothes will strongly absorb the paint to the point of drying and not letting the stain come out. If you want to remove paint on a wall, you will need to resort to abrasive cleaners, and this is not an option with clothing. But don’t worry, as today you can learn how to remove paint from clothes without tearing them in the process.

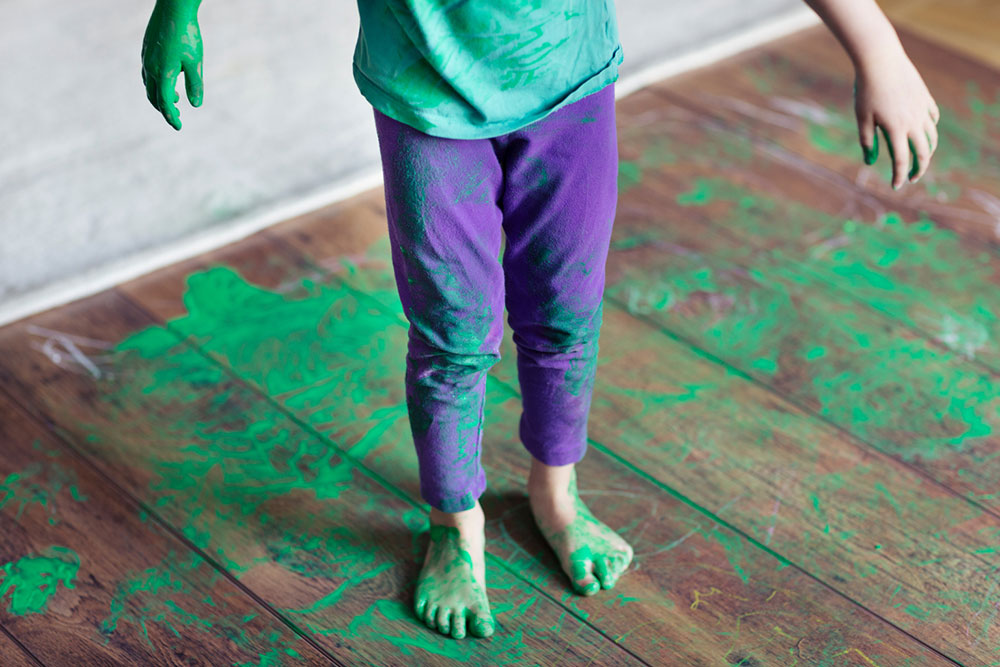
When working with paint, it is normal to wear worn clothes that can get dirty without problems, after all, a drop will inevitably splash on us. However, sometimes we forget this and we wear clothes in good condition. It may even happen that at the end of painting we lean on the still wet wall. No matter how the stain has arrived, what is relevant is being able to remove it.

Analyze what you are facing

latex-paint How to remove paint from clothes without ruining them

Before getting paint out of clothes, you should know what type of paint you must remove. Not all of them react the same way to certain compounds, and you may end up making the situation worse.

There are two types of paints that are used depending on the job: water-based and oil-based. These are subdivided into other categories.

  • Water-based: they can be acrylic or latex. Acrylic paint is not that sturdy, so it is used to paint works of art and other crafts. Latex paint is stronger, making it perfect for walls and ceilings.

oil-based How to remove paint from clothes without ruining them

  • Oil-based: due to their composition, these paints are brighter when drying. Also, they can be applied to a large number of materials without the risk of being erased, such as metal, wood, plastic, etc.

You should also consider that not all fabrics are resistant to these treatments. You may know how to get paint out of jeans, but the technique used for them is not the same for cotton.

Test in a small area if the method you are going to use damages the garment. If you see signs of wear, then discard it.

When cleaning, start using the least damaging and drastic method, and gradually increase aggressiveness only if the previous one did nothing. It is not recommended to use the most powerful tools first because they could damage the garment instead of cleaning it, and these are generally more expensive.

Most cleaning alternatives should not cause damage, but be aware that this risk will always exist when removing paint from clothes.

How to remove paint from clothes – Dry or wet paint?

oilbased1 How to remove paint from clothes without ruining them

It will always be best to try to remove a stain while it is still wet. This is especially true with oil-based paints.

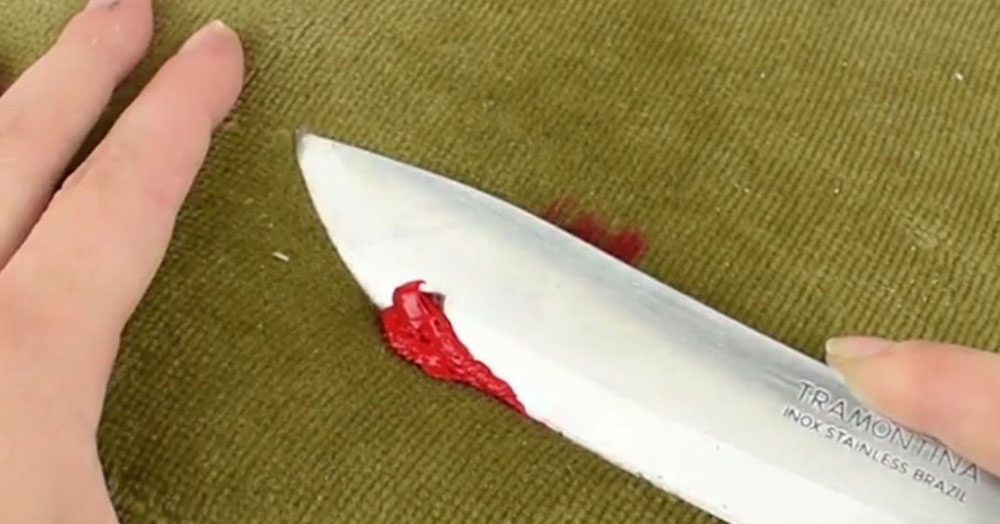
Once dry, you will most likely have to scrape the stain to remove the excess before trying to wash it. You can do this using a butter knife or a dull knife, or another similar utensil that has a thin edge.

You can try to dilute water-based paint even when dry, although it will not work in all cases.

How to remove paint from clothes – Water-based paints

remove_paint2 How to remove paint from clothes without ruining them

There is a high possibility that the paint you used was acrylic or latex; after all, they are the most common options for decorating walls. If it was one of these, the most important thing is to be fast in the cleaning. This type of paint can be cleaned without leaving residue when it is still wet.

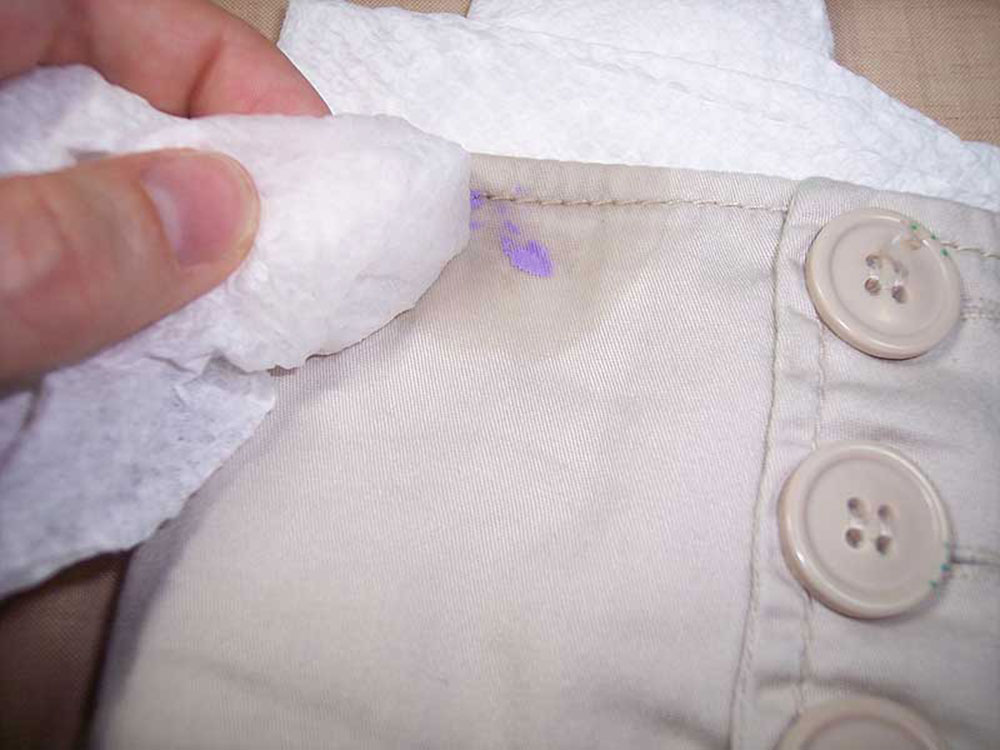
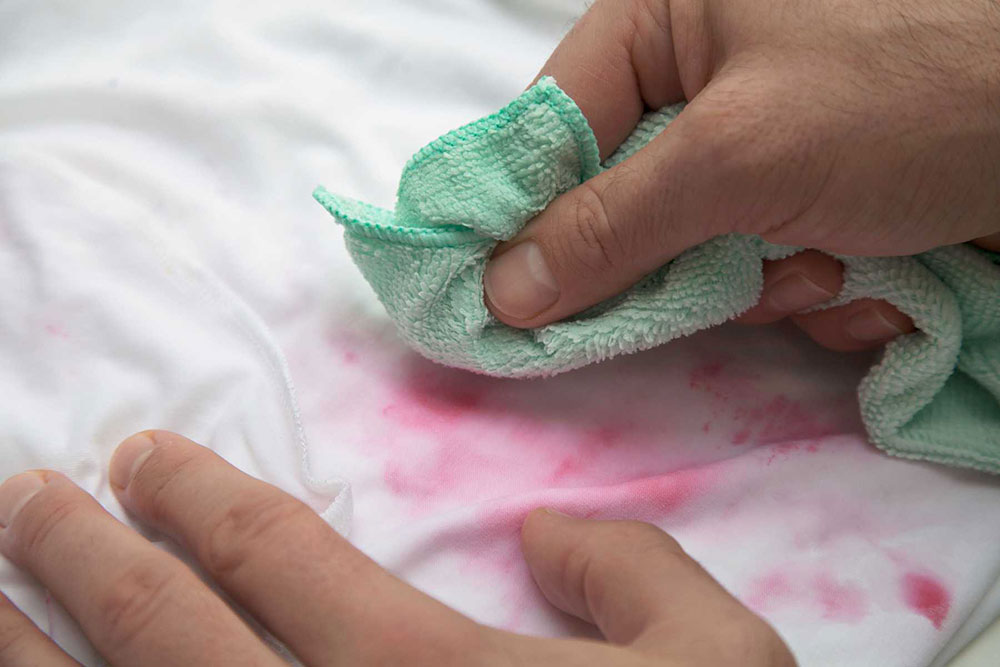
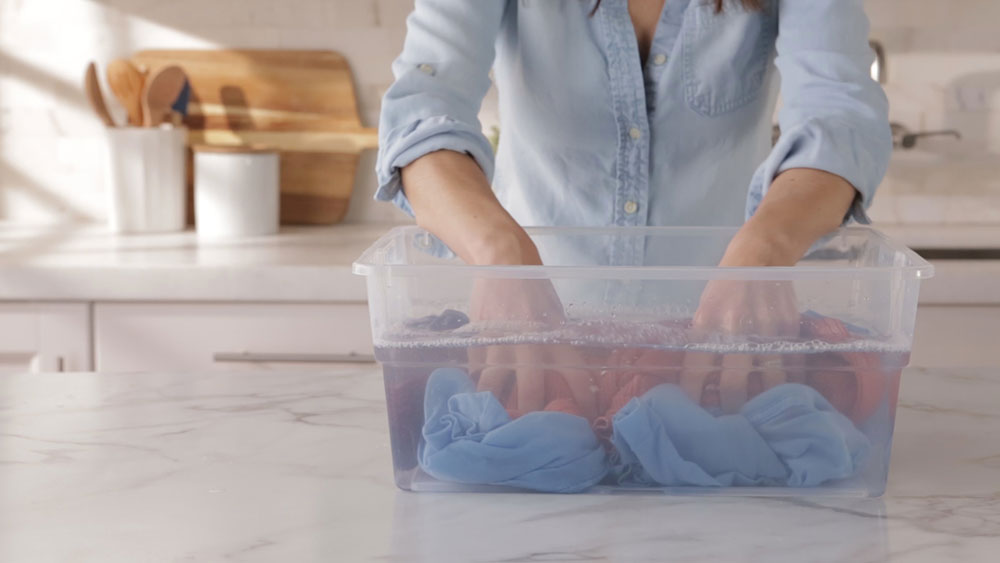
Place your garment on a clean cloth or paper towel to prevent paint from running through it, and try to remove as much of the stain as possible with another absorbent towel, pressing from above. As you clean, you must move the material that you placed under the garment so that it can continue absorbing paint.

soap-water How to remove paint from clothes without ruining them

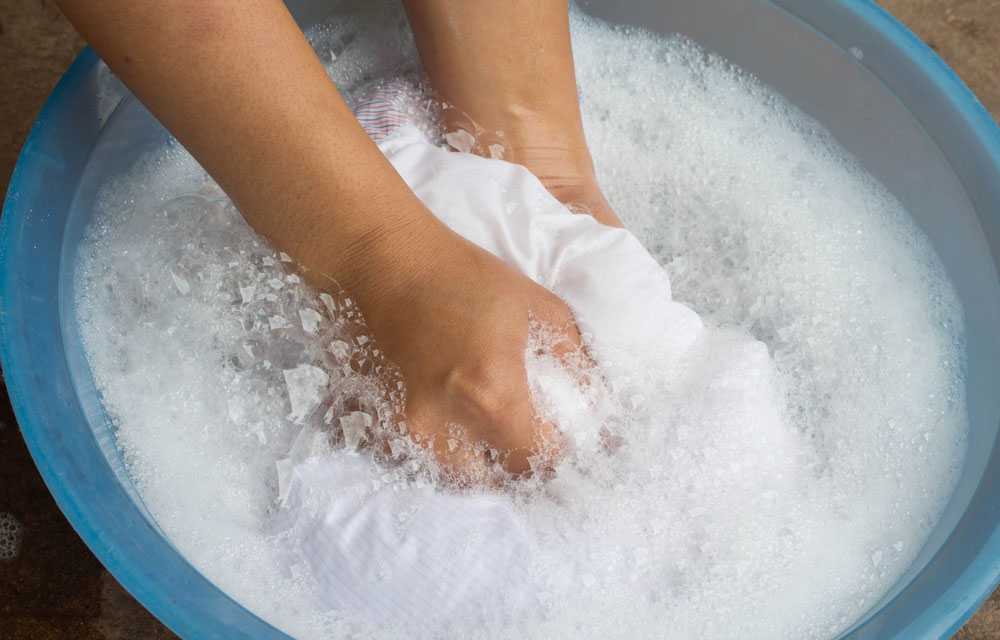
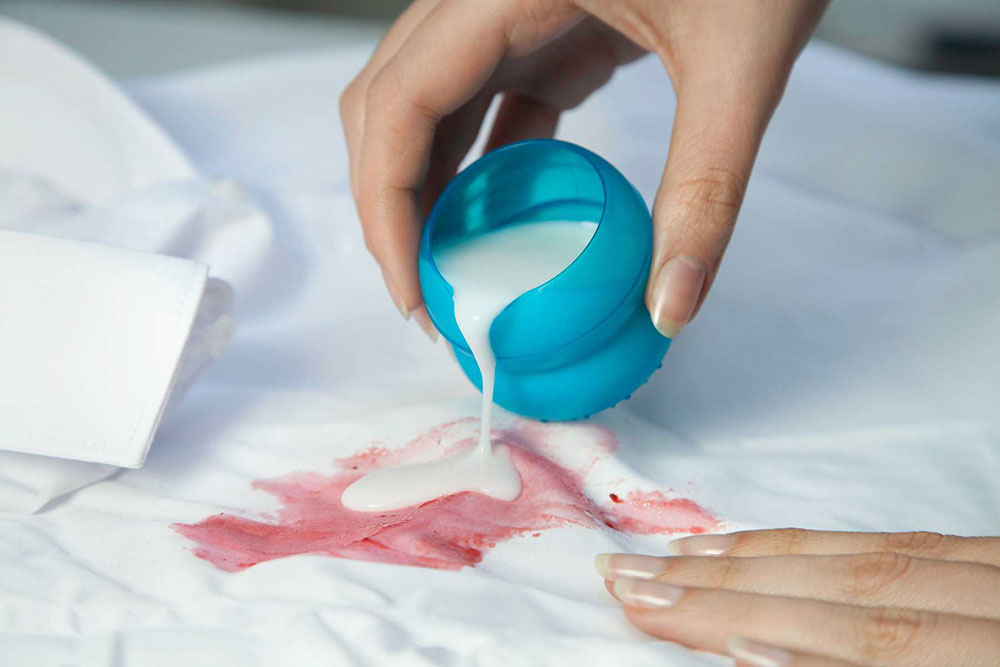
If this is not enough for removing acrylic paint from clothes, moisten a cloth with liquid detergent and rub the stain. It is rare to use a very powerful detergent, but if you are going to work on a delicate fabric, such as silk, it is recommended that you dilute it slightly with some water.

You can use liquid dish soap on white clothes as a substitute. Regardless of the detergent you use, you should apply it to the garment until it foams. Rinse with plenty of water and dry with a clean cloth that you have not used before.

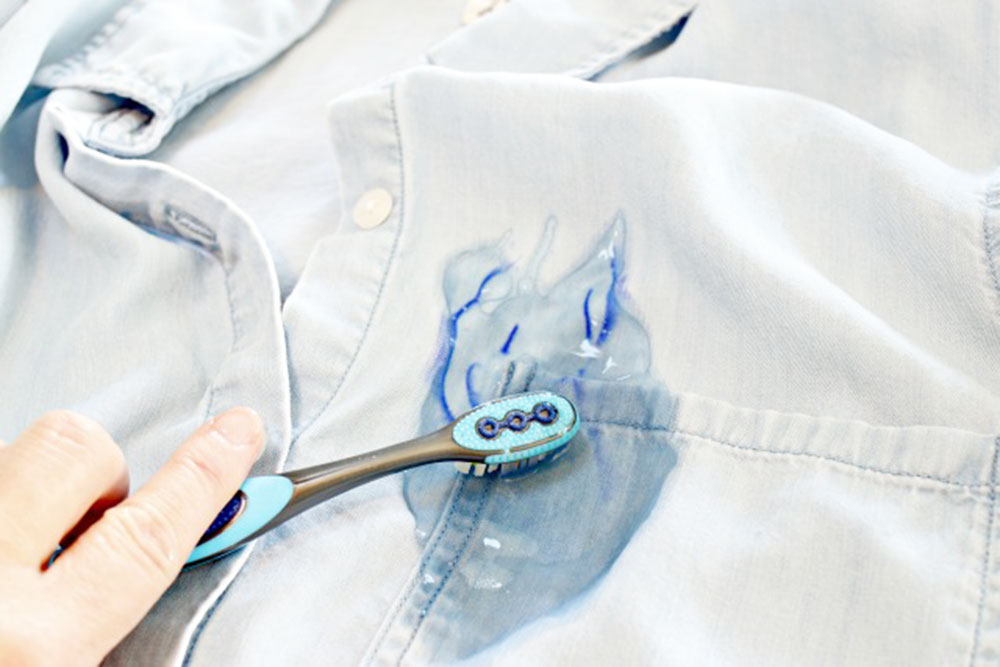
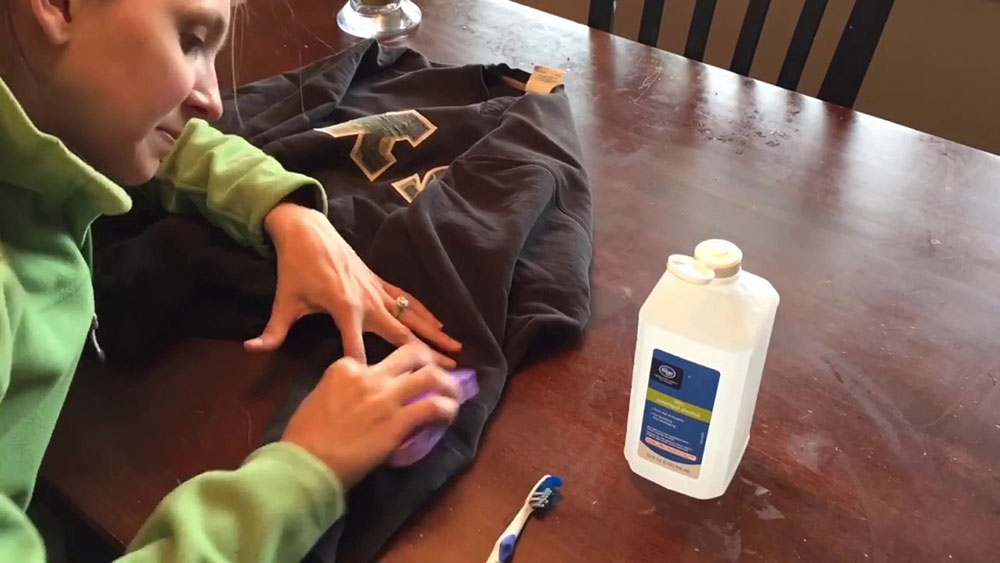
When detergents are not enough, you can try alcohol. Before applying, you should wet the stain with warm water to make it easier to remove. Do not pour alcohol directly on the garment; use a rag, a piece of cotton, or an old toothbrush to apply it.

knife How to remove paint from clothes without ruining them

Now you need to know how to get dry paint out of clothes. Acrylic paint should solidify into a kind of homogeneous powder. You can scrape it off using a butter knife.

Another homemade solution to deal with dry paint is to try to remove it with tape. As if it were a waxing, place the tape on the stain and lift it off.

toothbrush How to remove paint from clothes without ruining them

Whether you managed to remove most of the stain with alcohol, detergent, or using a knife, the next thing to do is simply wash your clothes as you normally would to remove the residue. Wash the garment as many times as necessary until the stain completely disappears.

This should be enough to remove acrylic paint from clothes, but if all else fails, it is best to go to a dry cleaner to try to save the garment.

How to remove paint from clothes – Oil-based paints

clean How to remove paint from clothes without ruining them

While oil-based paint is not as popular as its water-based counterpart, you will still find it on many surfaces due to its strength and glossy finish. Furthermore, these paintings are easily identifiable because they are thick, almost solid.

The problem is that this resistance means that it is also more difficult to remove if it falls on the clothes, but it does not mean that it is impossible. The following tips are perfect for those people who do crafts constantly.

If you are not sure if the stain was caused by an oil-based paint, check its packaging. Never try to use water to clean this type of paint or you will create a real disaster.

soak How to remove paint from clothes without ruining them

When the paint stain is thick, the first thing you should do is remove as much excess as possible to leave a thin layer on the garment. Use a worn but clean cloth for this.

All oil-based paints have one thing in common: they can be diluted with a solvent. Manufacturers tend to indicate which is the appropriate solvent to eliminate it in the packaging. However, some universal options should work with most paints even if they don’t appear in the recommendations.

clean1 How to remove paint from clothes without ruining them

Distilled turpentine is one of these universal options. As long as the garment you are cleaning is not made of acetate, rayon, or triacetate, you can use it to clean the stain. The best thing is that it is easy to get at hardware stores and paint stores.

Removing oil-based paint from clothes using a solvent is an easy process. Preferably using gloves, grab a dry cloth and pour a little of the diluent on it. Just rub the rag on the garment until the stain comes off.

stain-remover How to remove paint from clothes without ruining them

You will then need to soak your garment overnight. This will be done using water at the highest temperature that the fabric can resist, and previously applying a bit of liquid dish soap on the stain.

If the stain has not yet disappeared the next morning, prevent the garment from drying and repeat the process. This time apply a stain remover to help the solvent. Soak it again overnight.

Now you know how to remove paint from clothes. If all else fails, it is best to take the clothes to a dry cleaner to avoid damaging them by applying stronger solvents.

If you enjoyed reading this article about how to remove paint from clothes, you should read these as well:

The post How to remove paint from clothes without ruining them appeared first on Impressive Interior Design.


source https://www.impressiveinteriordesign.com/how-to-remove-paint-from-clothes/

Friday, July 24, 2020

6 Benefits Of Hiring A Pro End Of Lease Cleaning Company

As per the government rule, especially in countries like England and Australia, you should ensure that your leased properties such as house or apartment are spotlessly cleaned before you move out of the place in order to get the full deposited money back.

But we all know how difficult and stressful it is to maintain absolute cleanliness in all areas like bathroom, kitchen, living room, or even bedroom. That’s why in this article, we have curated our top 6 benefits as to why you should hire a professional end of lease cleaning cleaners to let them manage this job for you.

So without further ado, here are the advantages:

1. Get Your 100% Bond Back

A professional end of lease company will ensure that you a 100% bond back guarantee or that you will get your deposited money back before you move out of the place. This is in fact the main selling point of all the companies that you can find in your area.

You will get nothing but the absolute best bond cleaning experiences from end of lease cleaning companies like BnCleaning who value your money and will perform full end-to-end cleaning jobs in your place, leaving behind a sparkling clean kitchen, bathroom, carpets, balcony, and oven.

2. Save Your Precious Time

We all know how stressful and time-consuming moving-out is. First, you need to pack up all your things, dispose of the garbages or unwanted items, then you have to make sure that you don’t leave any important things behind.

Clearing up things and checking the property alone will cost you days or probably weeks, not to forget that you also need to find a company that will take care of moving the items out. If you also need to clean up your rented property, then you can imagine how much time you need to spend on the entire process.

By hiring experts to clean up your leased property before moving out helps ensure that you can save your precious time and spend it on other important things.

3. Maximum Cleanliness

When it comes to cleanliness, nothing beats a professional bond cleaning company who can thoroughly follow an end of lease cleaning checklist to ensure each and every corner of your property is cleaned.

As per the standard, the cleaning checklist covers 3 main areas in your house/apartment:

  1. Bedrooms/dining room
  2. Bathrooms
  3. Kitchen

Besides, traditional vacate cleaning companies will also include carpet cleaning, oven cleaning, and balcony cleaning to ensure that every important place is thoroughly cleaned. If you choose to do the job by yourself, you might end up leaving a corner or two uncleaned and therefore, lose your 100% deposit.

4. Make Moving Out Easy And Cheap

ls2 6 Benefits Of Hiring A Pro End Of Lease Cleaning Company

As mentioned in the above point, hiring a professional end of lease cleaning will help save you a tremendous amount of time, which in turn, will help streamline the moving out process, and remove all the burden and stress that need to be spent during this time.

Besides, this will also help save you the cost of cleaning. If you clean the place by yourself, you will probably need to buy all kinds of cleaning products and equipment to do things like disinfecting floors, clean the windows and cobwebs, doorknobs, etc.

So it’s better to leave the job to professionals who come equipped with all theses which will make your life easier and reduce the overall cost. Sure, you need to spend money on hiring them, but overall, it’s still much cheaper than doing the cleaning job by yourself.

5. Fully Insured Service

Another benefit of hiring a vacate cleaning firm is most of them will have insurance coverage in your area. Nowadays, if an end of lease cleaning company doesn’t have insurance, they can’t be operated publicly. But again, this will depend on where you live and your government’s law.

Insurance and warranty are important as this helps ensure that the company will be responsible for any losses or damages that occur during the cleaning process. Some of the most common situations where damages are likely to occur are damaged done due to harsh cleaning agents, accidents while removing stubborn stains, or when cleaning at fragile places like window glasses.

So make sure you check for insurance or inquire about the details before deciding to hire any bond cleaning agent.

6. Impress Your Landlord

Last but not least, is your landlord will be impressed by the quality of cleaning work done by your cleaners. By utilizing professional cleaning equipment, cleaning products, and following a detailed vacate cleaning checklist, you can expect to only get the highest quality cleaning job done.

Most end of lease cleaning firms will come with a no-clean, no-charge policy, which essentially means if you don’t get your 100% bond back, they will not charge a single dime of your pocket. So you can rest assured that once the cleaning work is completed, your landlord will definitely be impressed and will definitely return you the full deposit amount.

Conclusion

And here are all the benefits of hiring a pro to clean your leased property. Sure, you can always opt for a DIY method, but at the end of the day, it’s much easier, and cheaper to hire professionals, unless you really know what you’re doing.

The post 6 Benefits Of Hiring A Pro End Of Lease Cleaning Company appeared first on Impressive Interior Design.


source https://www.impressiveinteriordesign.com/6-benefits-of-hiring-a-pro-end-of-lease-cleaning-company/

Pool noodle hacks to make your life easier

When people think of summer, they immediately relate it to the pool or the beach. And while enjoying the water is pleasant enough, the experience can be much better using a couple of toys. There is no aquatic gathering that does not include a water woggle or pool noodle since these long rubber toys are an attraction among kids and adults. However, you should know that their flexibility and design make them useful for other tasks. Learn what other uses they have with these pool noodle hacks.

Who would have thought that a foam strip could be so useful? Many people have discovered ways to make these implements useful beyond a water party. However, looking for all these ideas on the internet can be overwhelming since they are many.

So you can go straight to their implementation, here is a list of some of the best crafts you can do with a pair of foam noodles.

Pool noodle hacks to try yourself

Avoid the carpal tunnel

Avoid-the-carpal-tunnel Pool noodle hacks to make your life easier

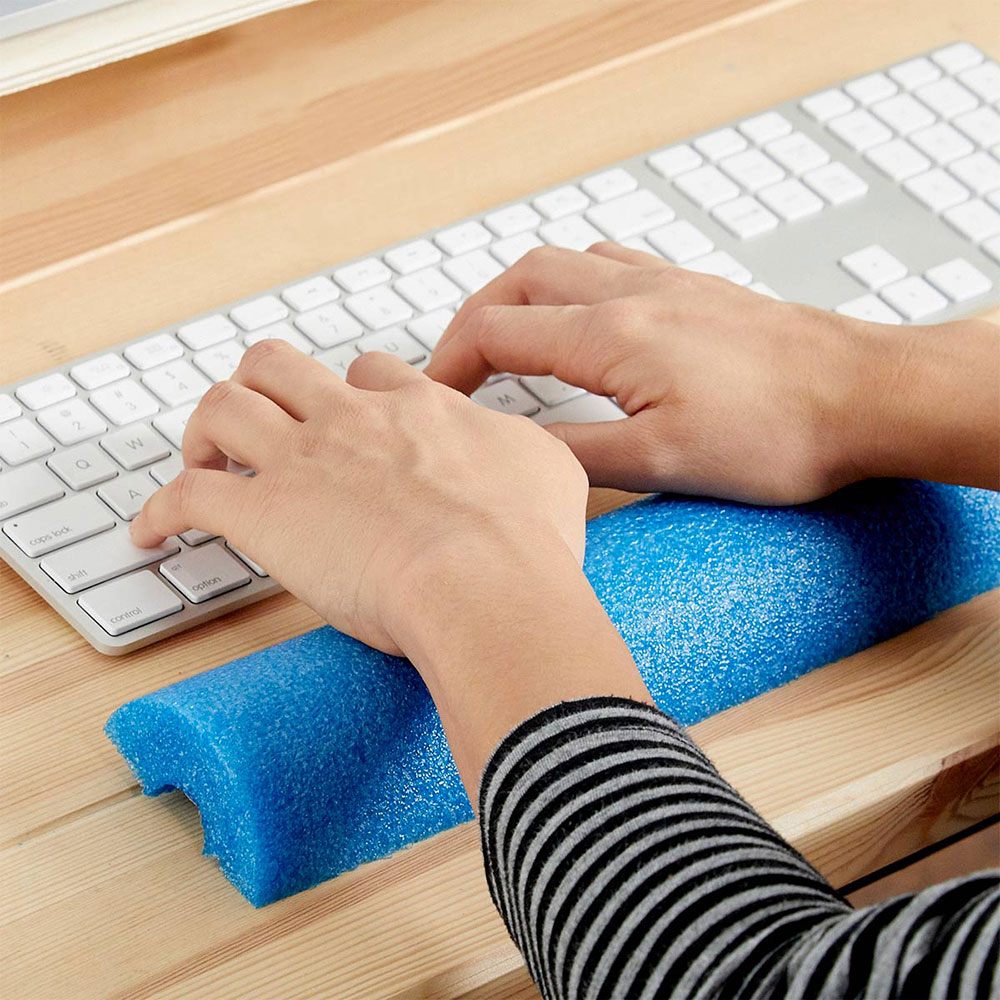
Coincidentally, these foam rubber pads are ideal for resting your wrist. Unlike a mousepad, which can be expensive, a water noodle is inexpensive and can be cut multiple times to have multiple spare wrist rests.

To best fit your hand height, it is recommended that the diameter be cut in half, or you will end up with the hand in an awkward position.

A real space war

A-real-space-war Pool noodle hacks to make your life easier

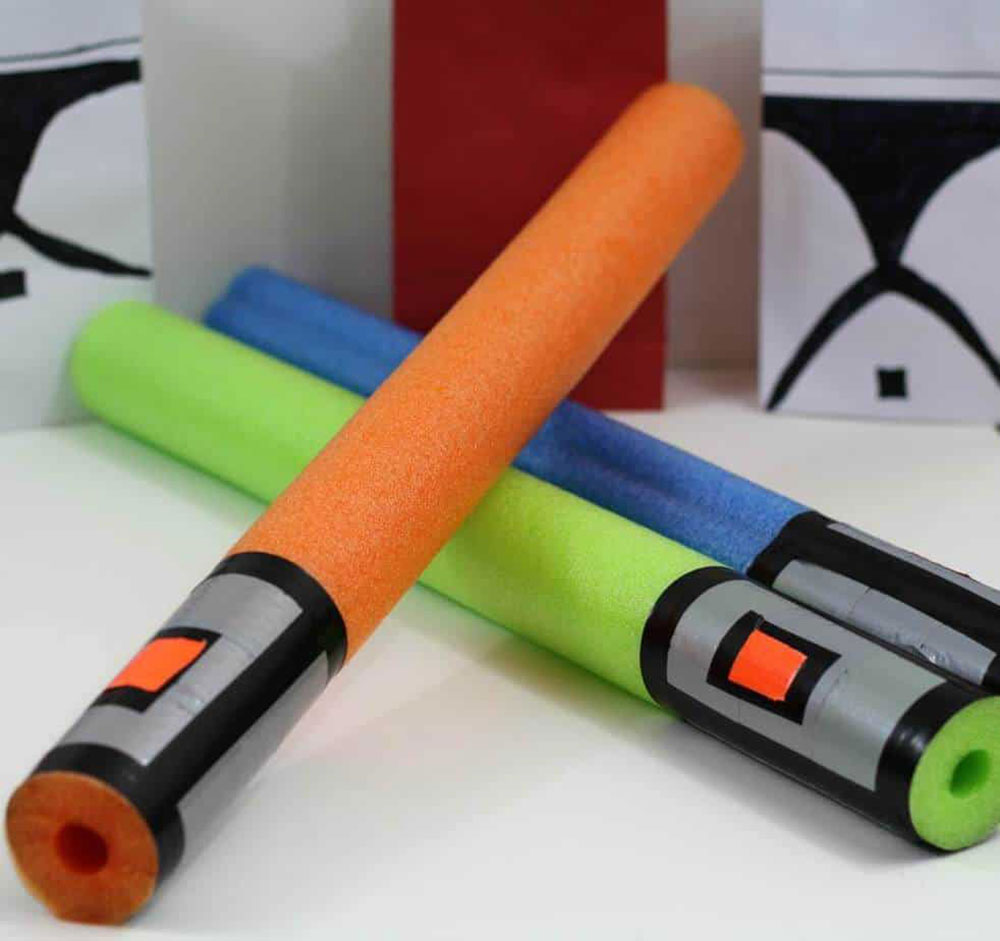
Are you a Star Wars fanatic? Then you must adore the concept of lightsabers. Of course, in real life, it is not recommended to hit people with real brooms or sabers, but a pair of foam noodles are a safe alternative for space combat.

If you want to throw a Star Wars-themed children’s party, you can create a fun dynamic in which kids design their lightsabers with cheap pool noodles, markers, and duct tape.

Set your bathtub

light Pool noodle hacks to make your life easier

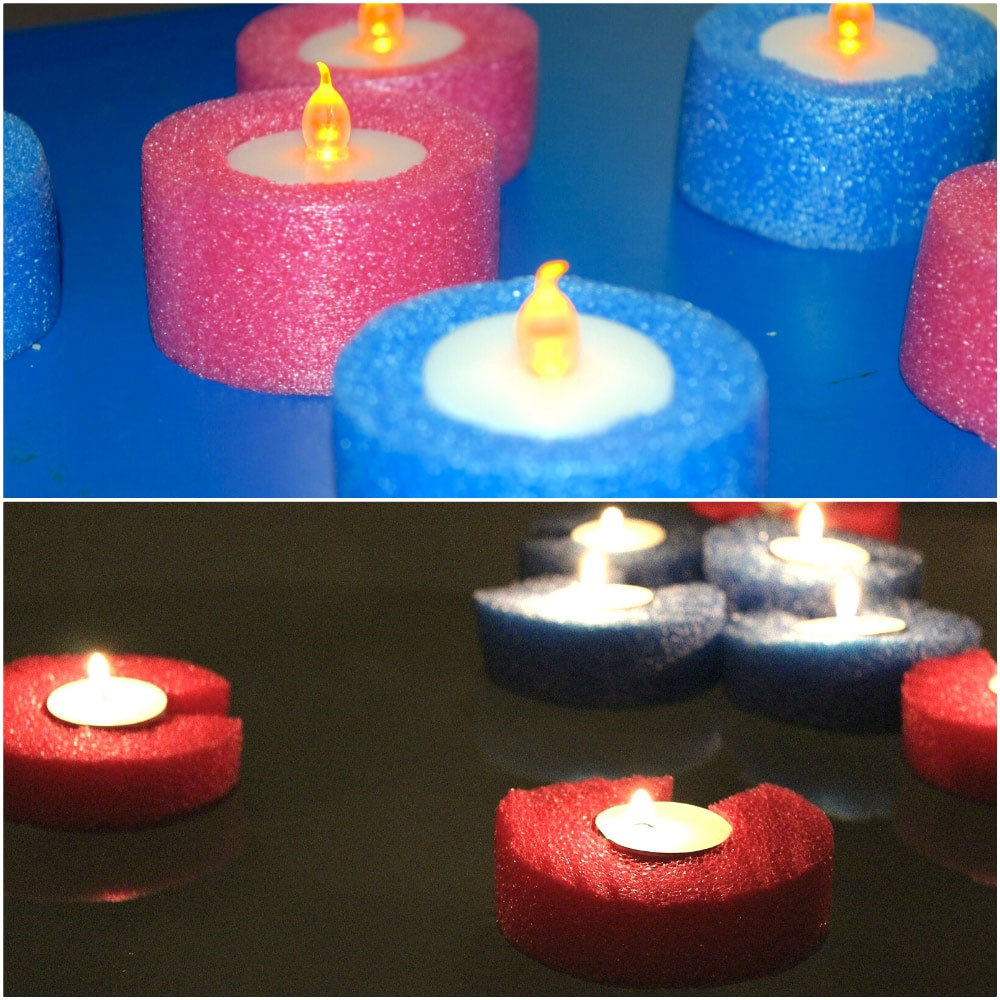
Setting a bathroom is a matter of imagination. Some throw roses into the water to make it more romantic, and adding candles on the sides can never be missing. However, it is even more innovative if the candles are placed floating in the water.

Well, you won’t be using wax candles, but electronic ones lit by LED lights and powered by batteries. To create a secure holder for them, you will have to cut a hole with the candle’s diameter in the noodle pool. So that placing them on the water is possible, you will also have to cover the bottom with wax wrap, which will prevent water from touching the batteries.

Protection for your fingers

finger Pool noodle hacks to make your life easier

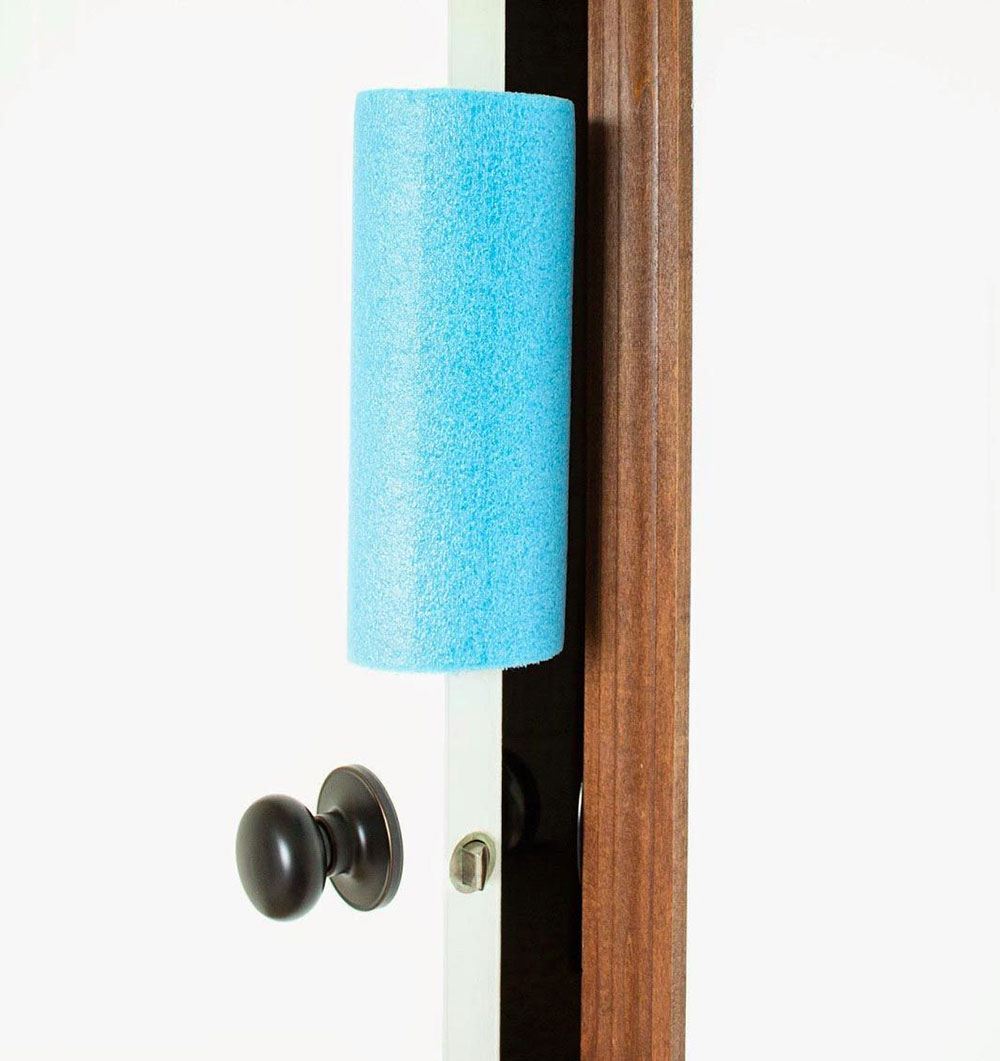
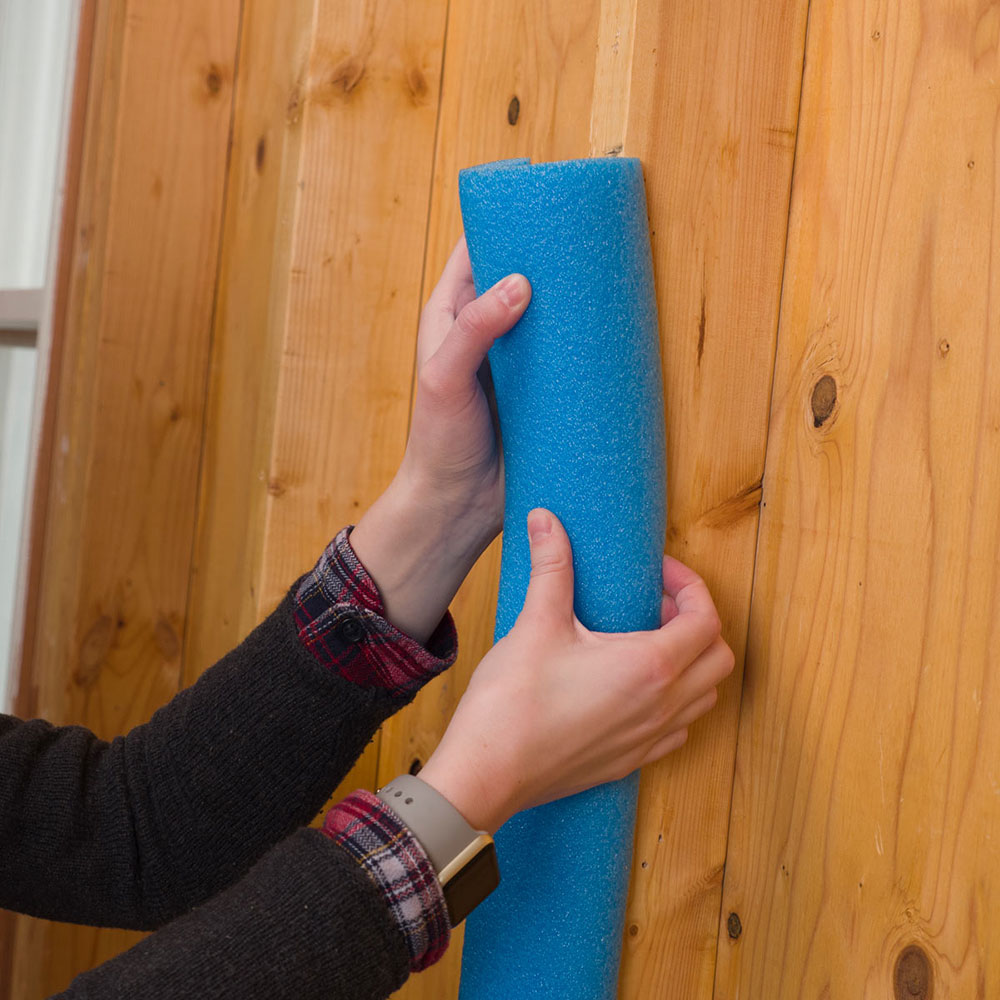
This is one of those pool noodles hacks that you did not know you needed, but that you will be grateful to know. Sometimes when closing the doors, perhaps by mistake, you can pinch your fingers. If this happens to you more often than you would like to admit, you can protect the door edges with a swim noodle. A 6-inch-long piece cut through the center is enough to cover the part where you grab the door.

Protects young children

Protects-young-children Pool noodle hacks to make your life easier

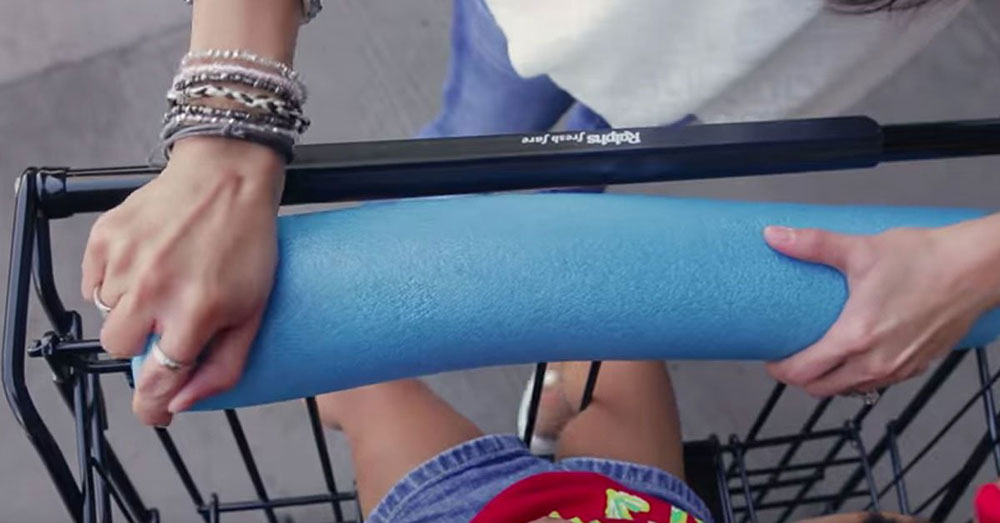
It is difficult to prevent young children from biting into anything that catches their attention, such as the metal bar on the seats in shopping carts. Needless to say, this is unhygienic, and the material is very hard for their gums. However, you can cut a tab to a swimming noodle to cover this metal bar.

Revolutionize the way you learn

maths Pool noodle hacks to make your life easier

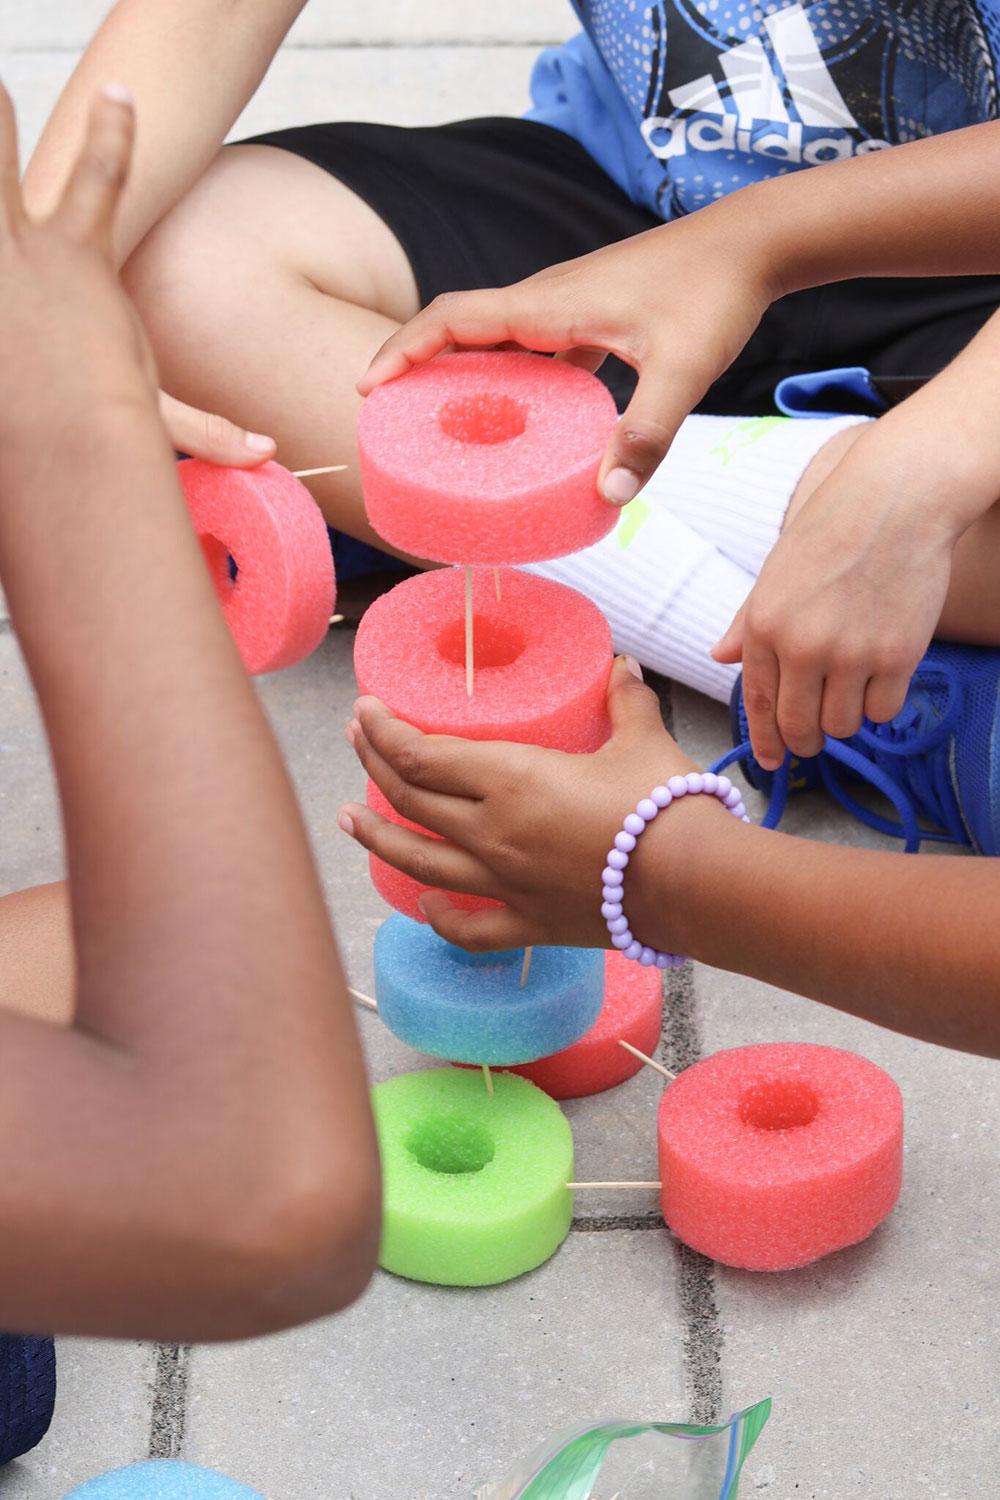
Math classes can be more fun with tons of foam pieces. There are many ways to use them as a visual guide to teach numbers and basic operations. You can even teach fractions with them. You only need scissors to cut a foam noodle.

Protect your car

car Pool noodle hacks to make your life easier

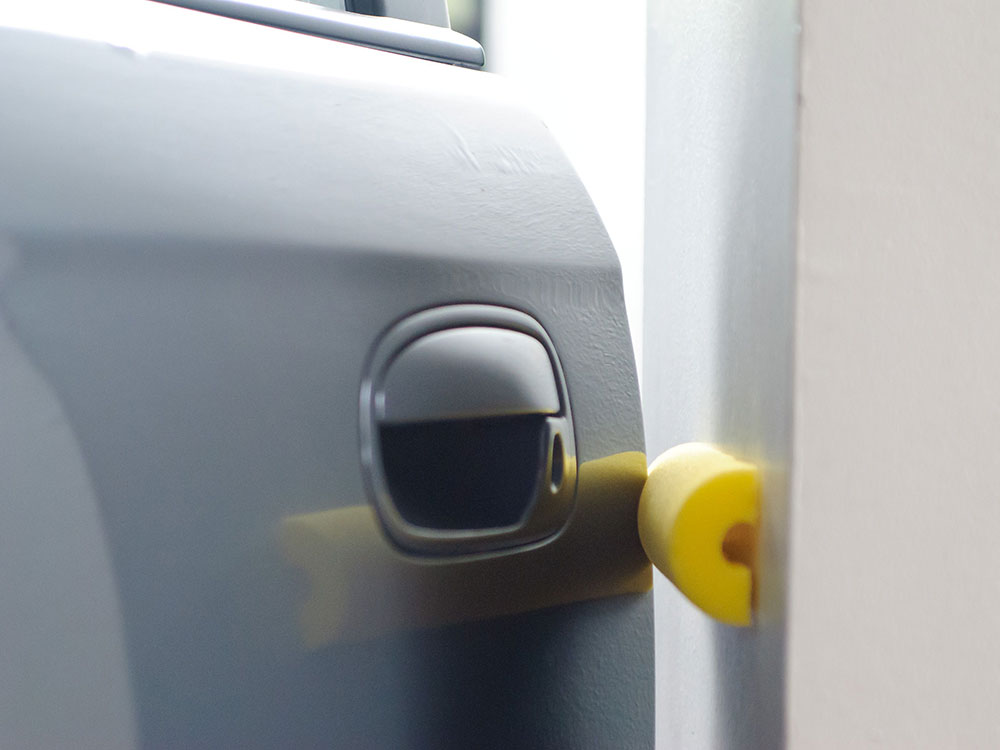
Narrow garages do not allow car doors to be opened quietly. An excessive movement and you will hit the edge against the wall. You can stop worrying about this with some large pool noodles. Cut them out in the middle and stick them where the doors knock.

To not use the hose

hose Pool noodle hacks to make your life easier

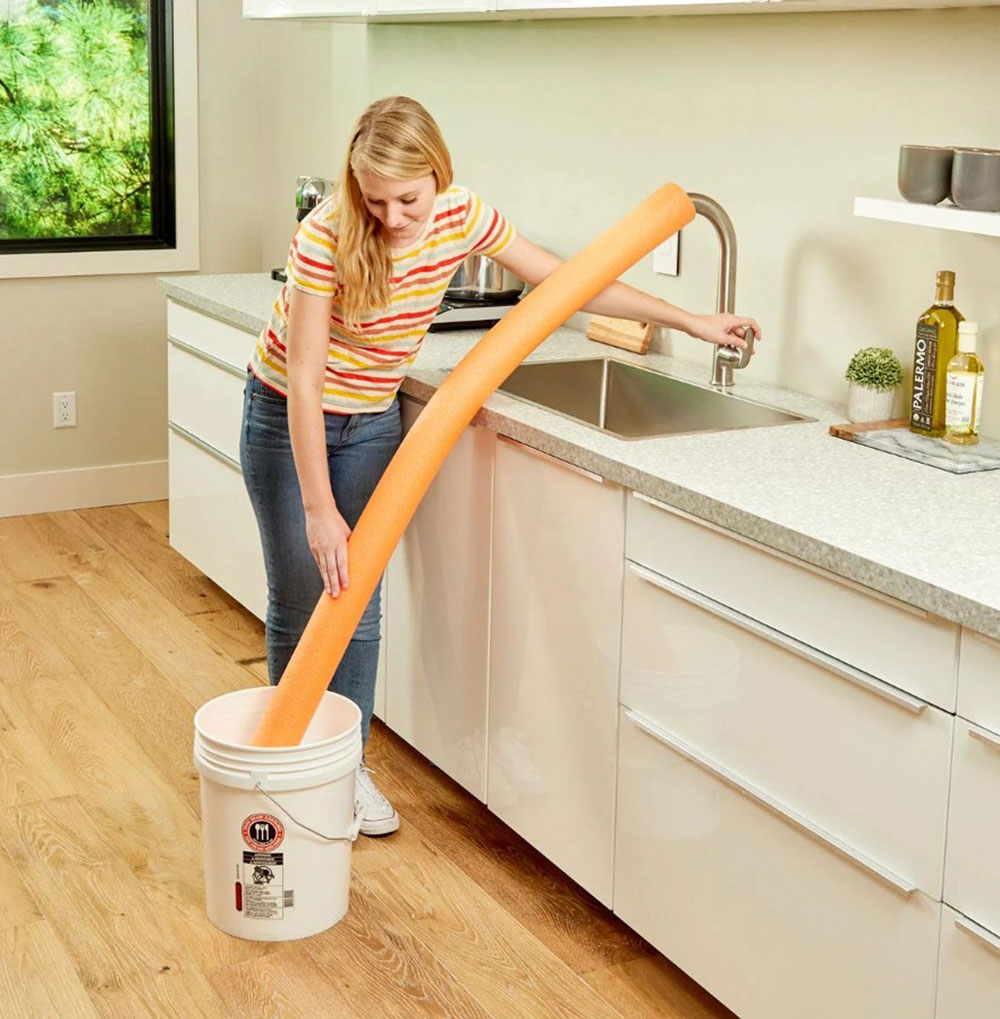
Pool noodle hacks can also be used in cleaning and maintaining your home. If you don’t want to resort to filling a bucket with water for mopping, you can put a pool noodle on a tap and use it as a hose. Make sure the foam is compact enough so that the water doesn’t leak.

Avoid hitting the walls

door-hinges Pool noodle hacks to make your life easier

This is another recommendation from the long list of 101 uses for pool noodles to avoid scratching walls and doors. Sometimes a door cannot be prevented from hitting a wall, but it can be protected to avoid damage. Similarly, by placing some pool noodles in the indentations, you can create a homemade cushion.

Keep your boots ready for action

boots Pool noodle hacks to make your life easier

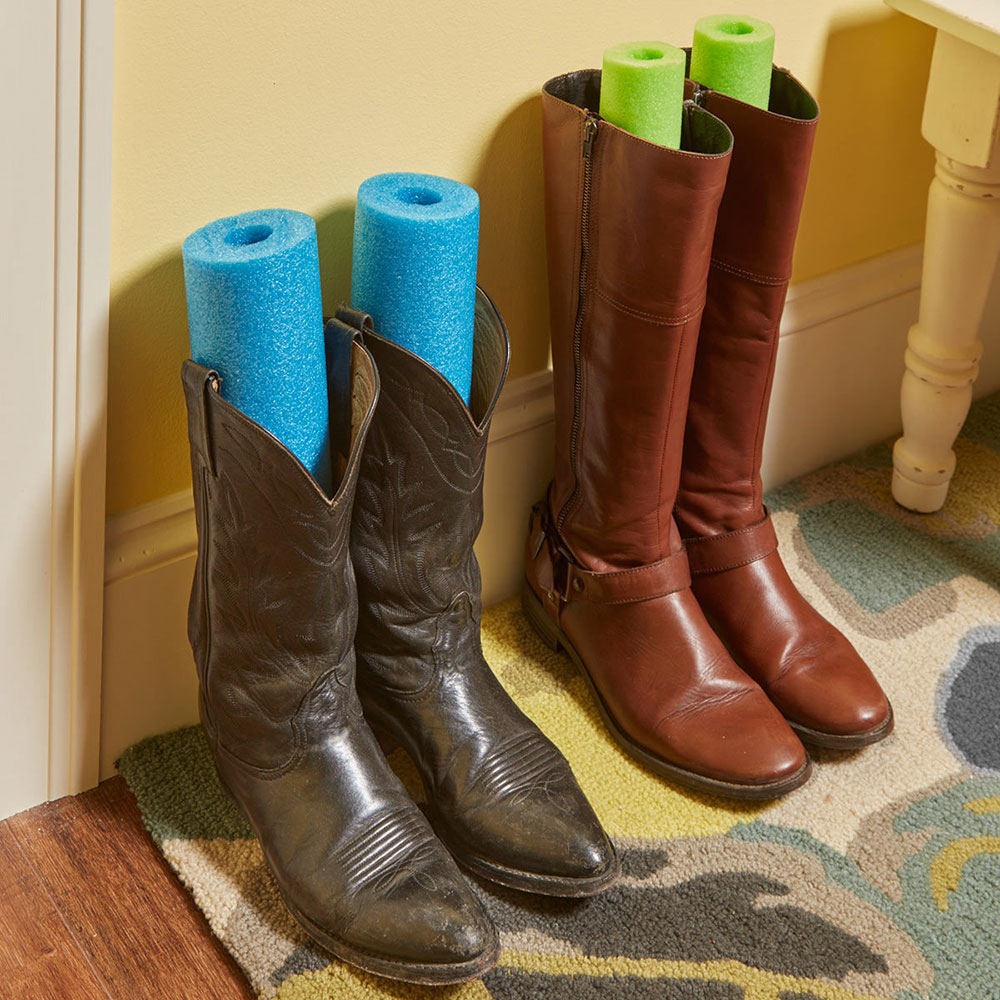
You can make a pair of boot shapers to keep the shape of your boots upright using a pool noodle you don’t need. This is strong enough to keep the footwear firm.

Prevents water from freezing when camping

camper Pool noodle hacks to make your life easier

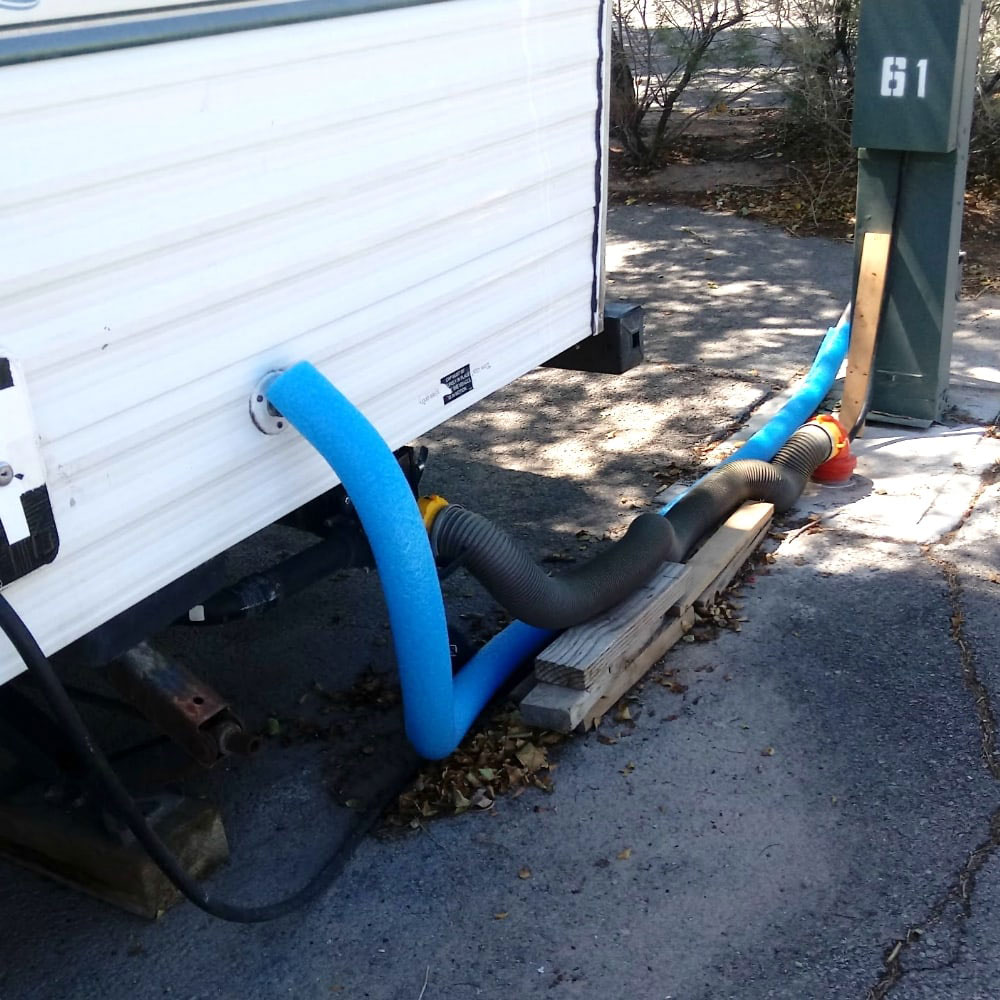
If you don’t want to run out of water in the middle of camping, then you can’t ignore the low temperatures. It can freeze pipes and tanks in minutes. The foam rubber of swimming pool noodles can be used as an insulating material, and since it already has a cylindrical shape, you only have to cut an opening in one side to install it.

Don’t leave the pool for drinks

Dont-leave-the-pool-for-drinks Pool noodle hacks to make your life easier


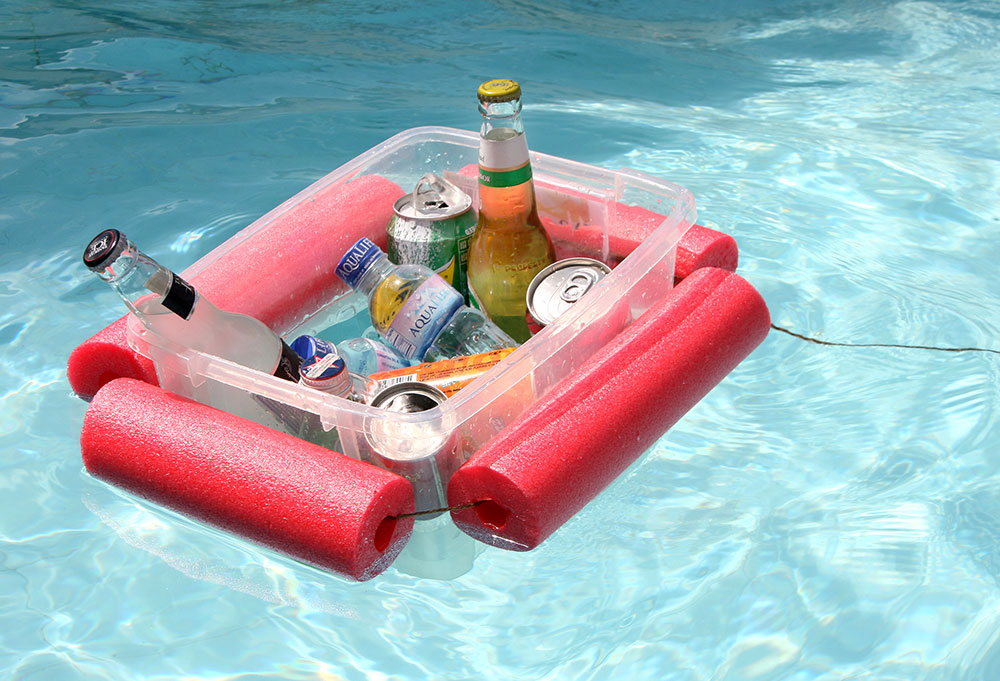
You do not have to leave the pool to find a drink if the plastic container is inside the pool. To make this possible, assemble a kind of raft or float that can support the container’s weight. Ideal for summer parties.

Protect your hands from heavy objects

hands Pool noodle hacks to make your life easier

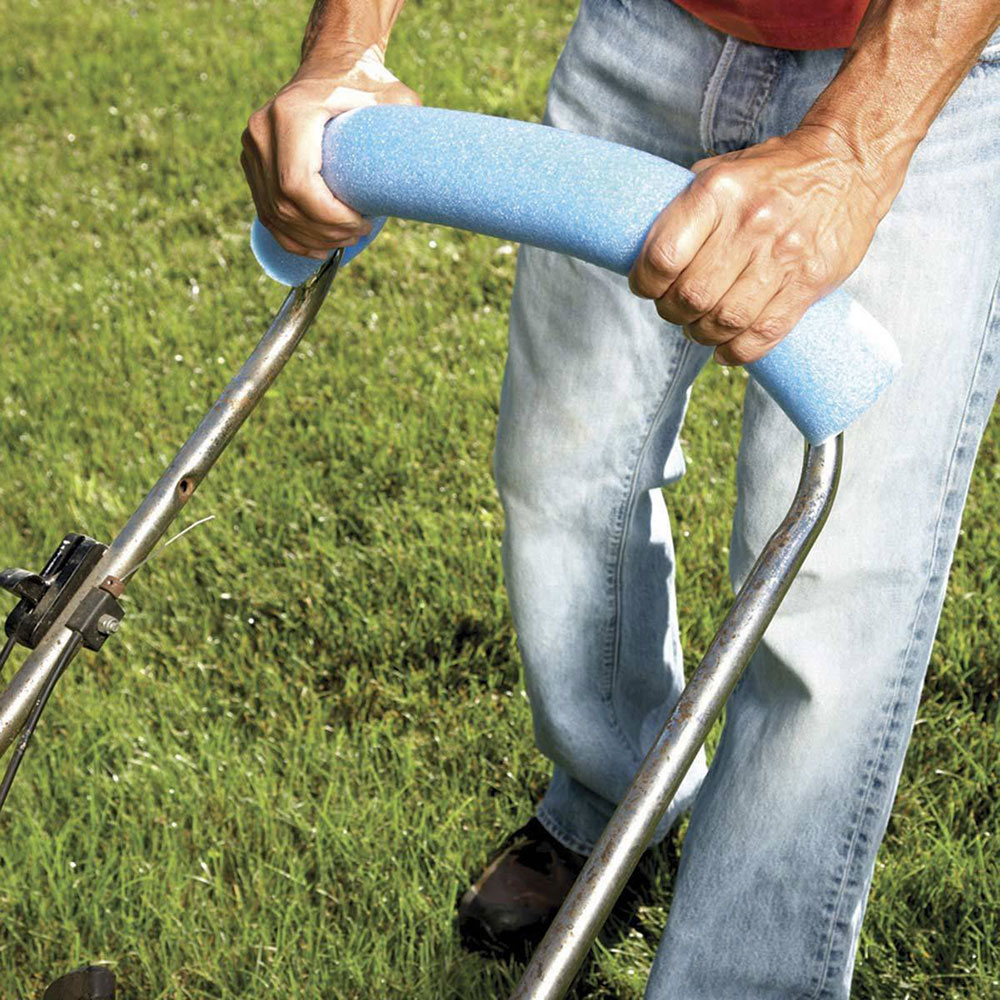
No matter how strong you are, grabbing a heavy object by a handle will always leave marks on your hands. This is because most handles are not built with comfortable materials. Nevertheless, you can make it softer by rolling it up with a pool noodle.

Identify each person’s glasses

There’s nothing worse than grabbing the wrong glass at a party, but this can be solved with identification on each one. Here are multiple pool noodle hacks you can apply: you can cut strips and draw shapes with a marker to identify each base, or you can even go further and cut out striking shapes with the foam. The important thing is that the pieces fit on the glasses.

Don’t fall out of bed

bed Pool noodle hacks to make your life easier

When a young child begins to use a bed, it is common for the child to move around a lot while sleeping, and on occasions, it may even fall off the edge. You can create a pair of homemade railings with Styrofoam noodles. It is recommended to sew the pieces to the mattress.

Additional safety for the trampoline

trampoline Pool noodle hacks to make your life easier

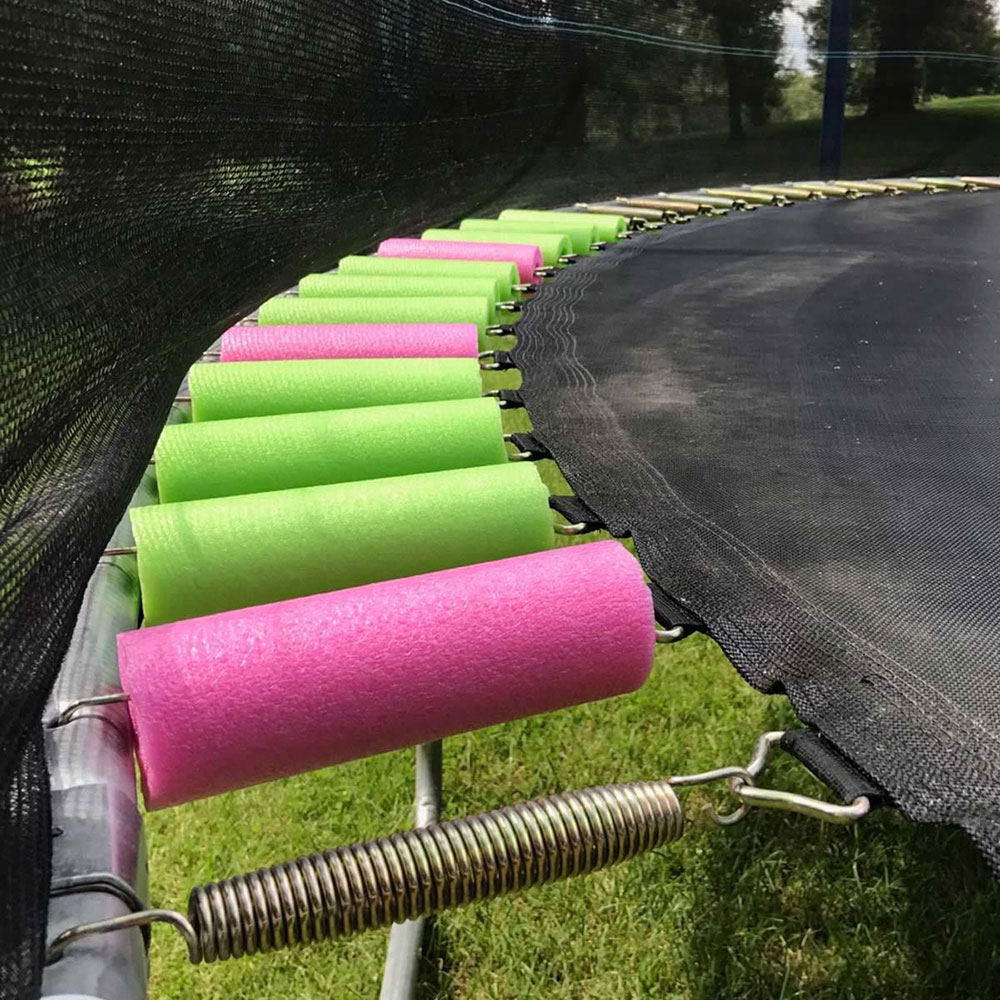
This is another of the pool noodle hacks that you should implement to protect children in their fun moments. Trampolines use springs on the sides to stretch a tarp, but children can step on them when they jump, causing serious injuries. You can make spring linings with cheap pool noodles to make the trampoline safer.

Use it as a support for plants

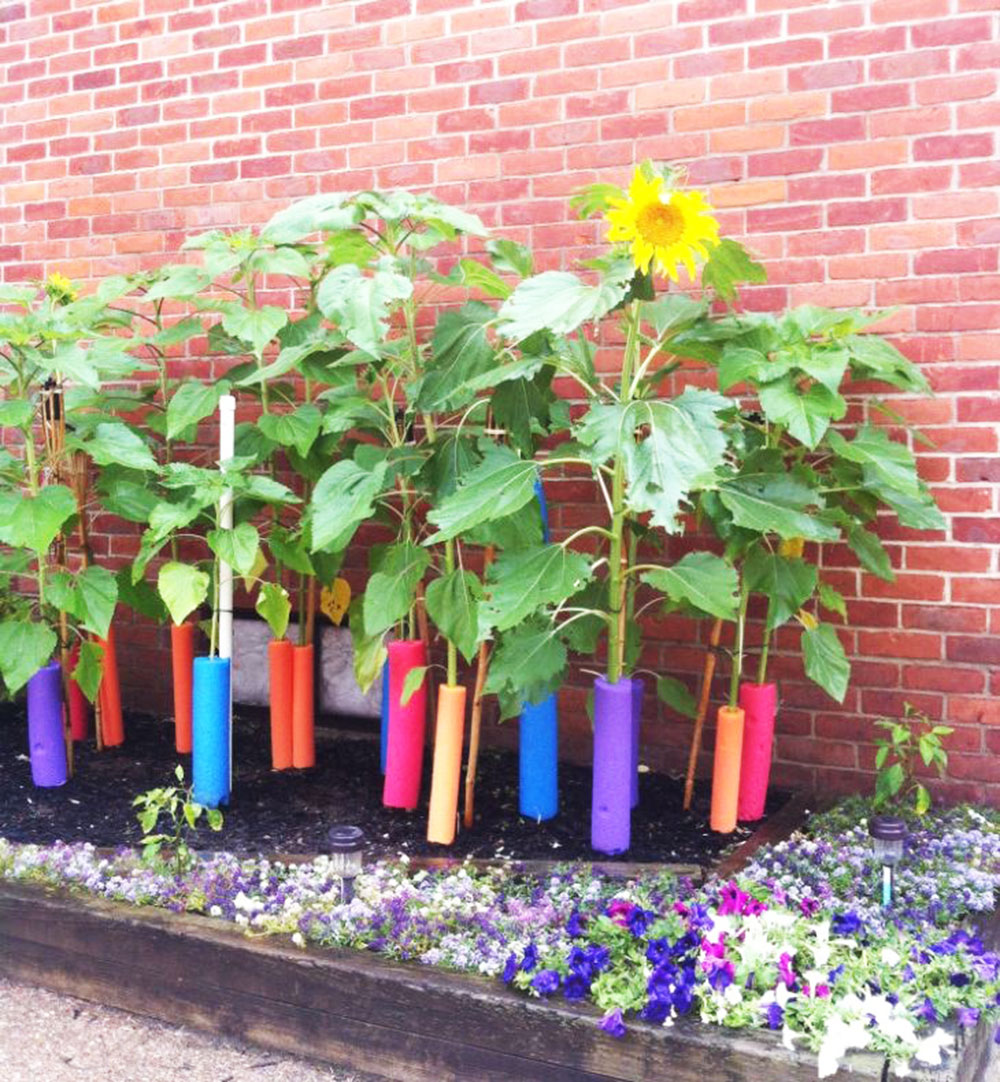
plant-support Pool noodle hacks to make your life easier

Instead of using wooden sticks, you can plant some water noodles to keep your plants steady as they grow.

Avoid losing your fishing rod

It can happen that during the excitement of fishing, you throw the fishing rod with so much force that it gets out of your hands. If you don’t want it to sink, you just need to put in a homemade float made from a piece of a pool noodle. This cheap trick will save you from having to buy a new and expensive fishing rod.

So the shelf organizers don’t move

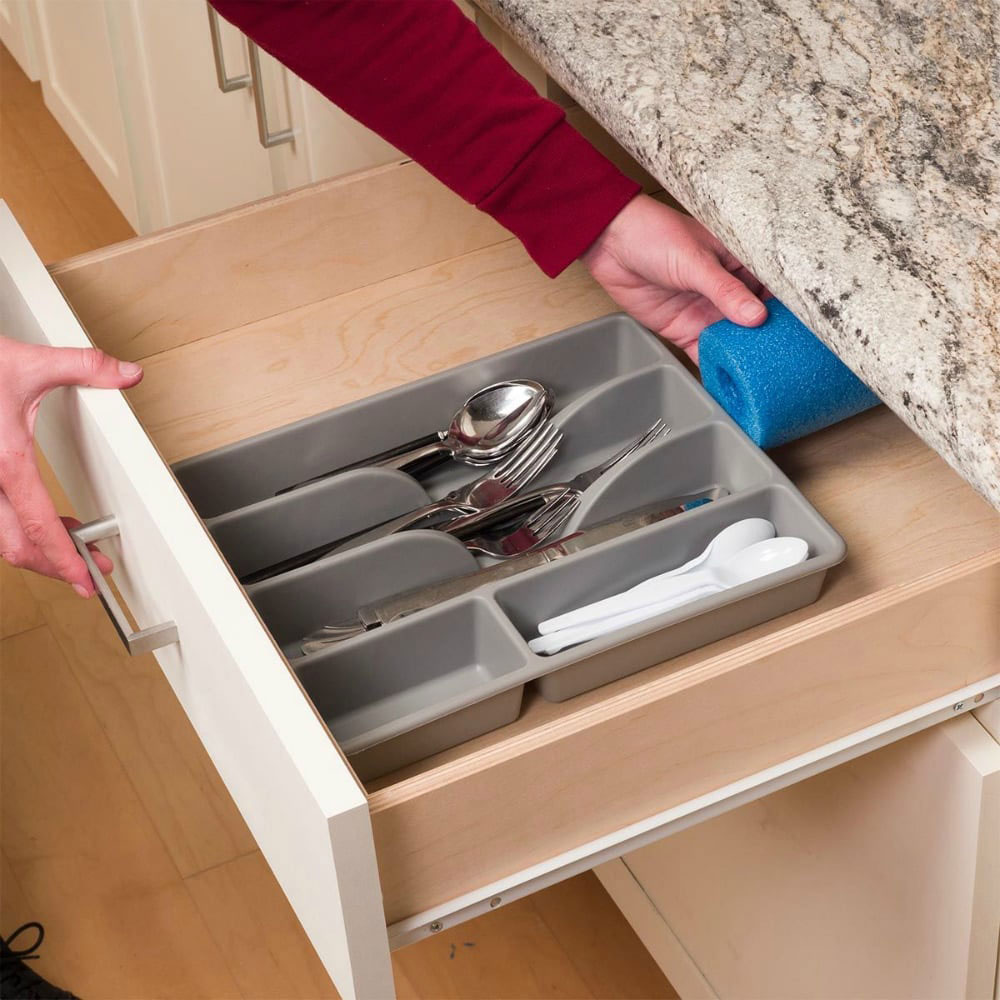
shelves Pool noodle hacks to make your life easier

If your cutlery organizer is loose in a drawer, you can fill the empty spaces with scraps of a foam noodle. This will prevent the organizer from moving when you open the drawer.

Stop scratching the floor when moving furniture

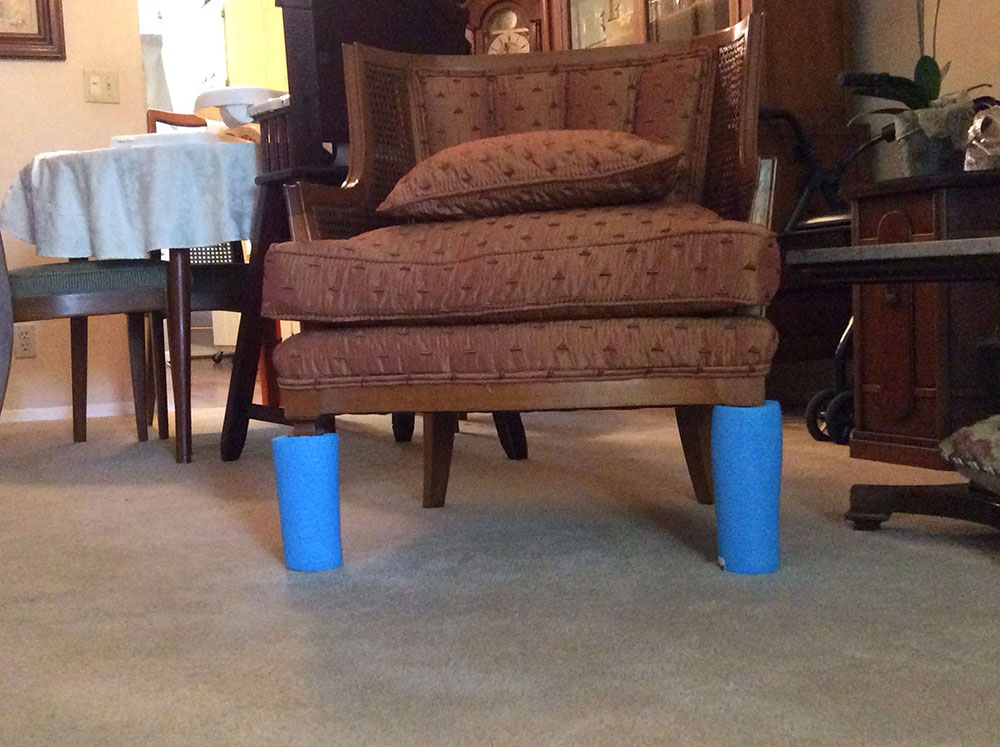
furniture-legs Pool noodle hacks to make your life easier

Furniture legs are delicate elements. They are not strong enough to be immune to hits, but they can scratch the floor if they are dragged. You can prevent both from happening by covering them with small pieces of water noodles. This is also perfect for avoiding heavy bumps with your little toe when walking.

Make beautiful wreaths

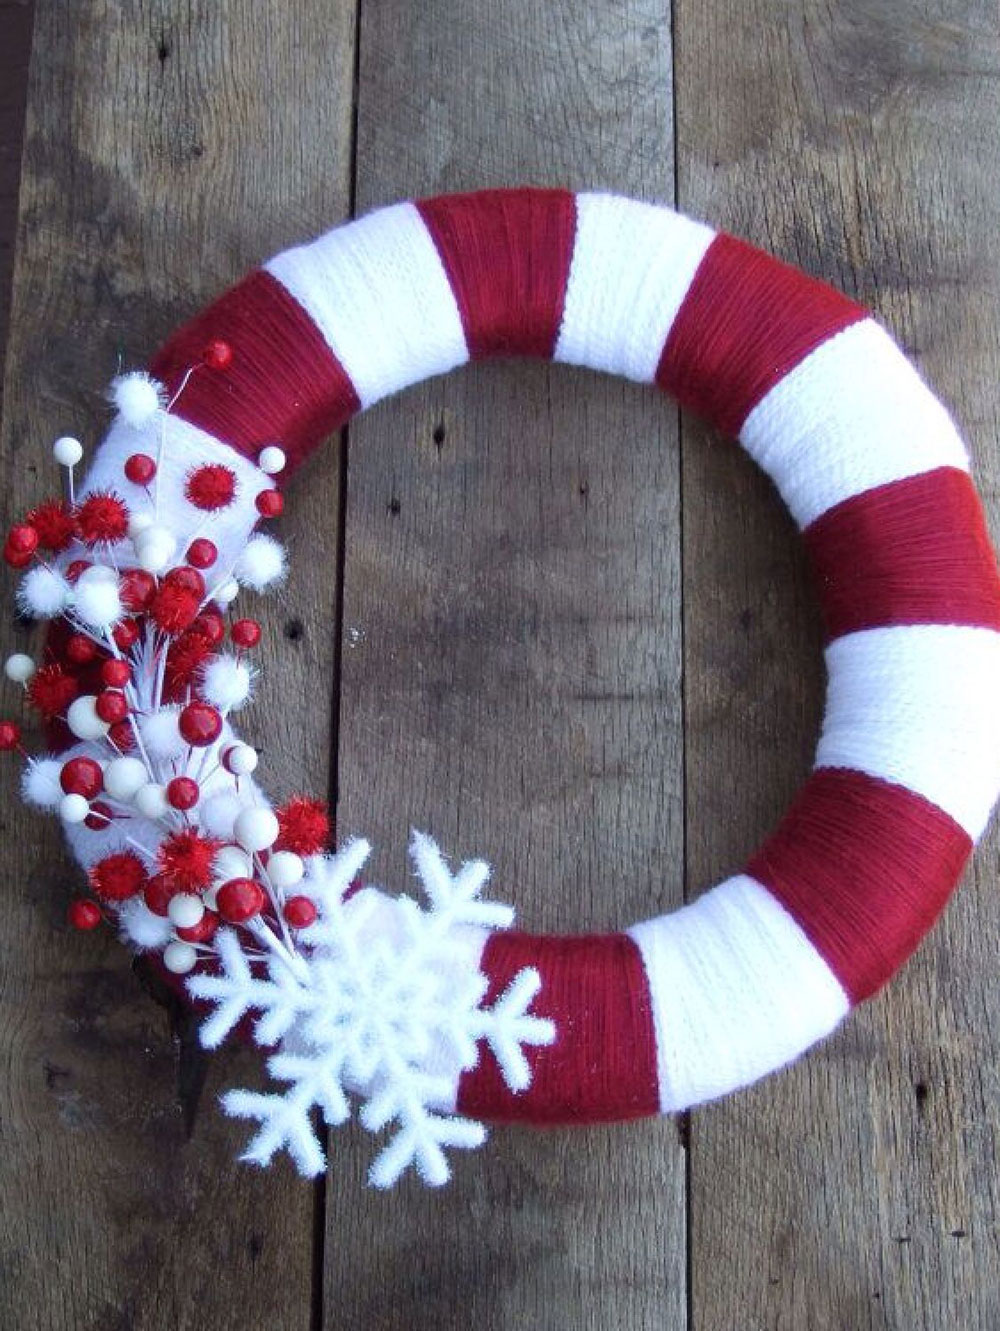
beautiful-wreaths Pool noodle hacks to make your life easier

With this craft, you won’t even have to cut the material, just fold and paste. Add a couple of extra accessories and you could even create wreaths for each of the seasons to decorate your front door.

Safe transport for bottles

A bottle liner is one of the pool noodle hacks that you can’t stop trying. If you are planning to have a picnic and want to bring a luxurious wine, or simply do not have a place to safely transport a bottle, make packaging with a pool noodle.

Eliminate all sharp edges

table-edges Pool noodle hacks to make your life easier

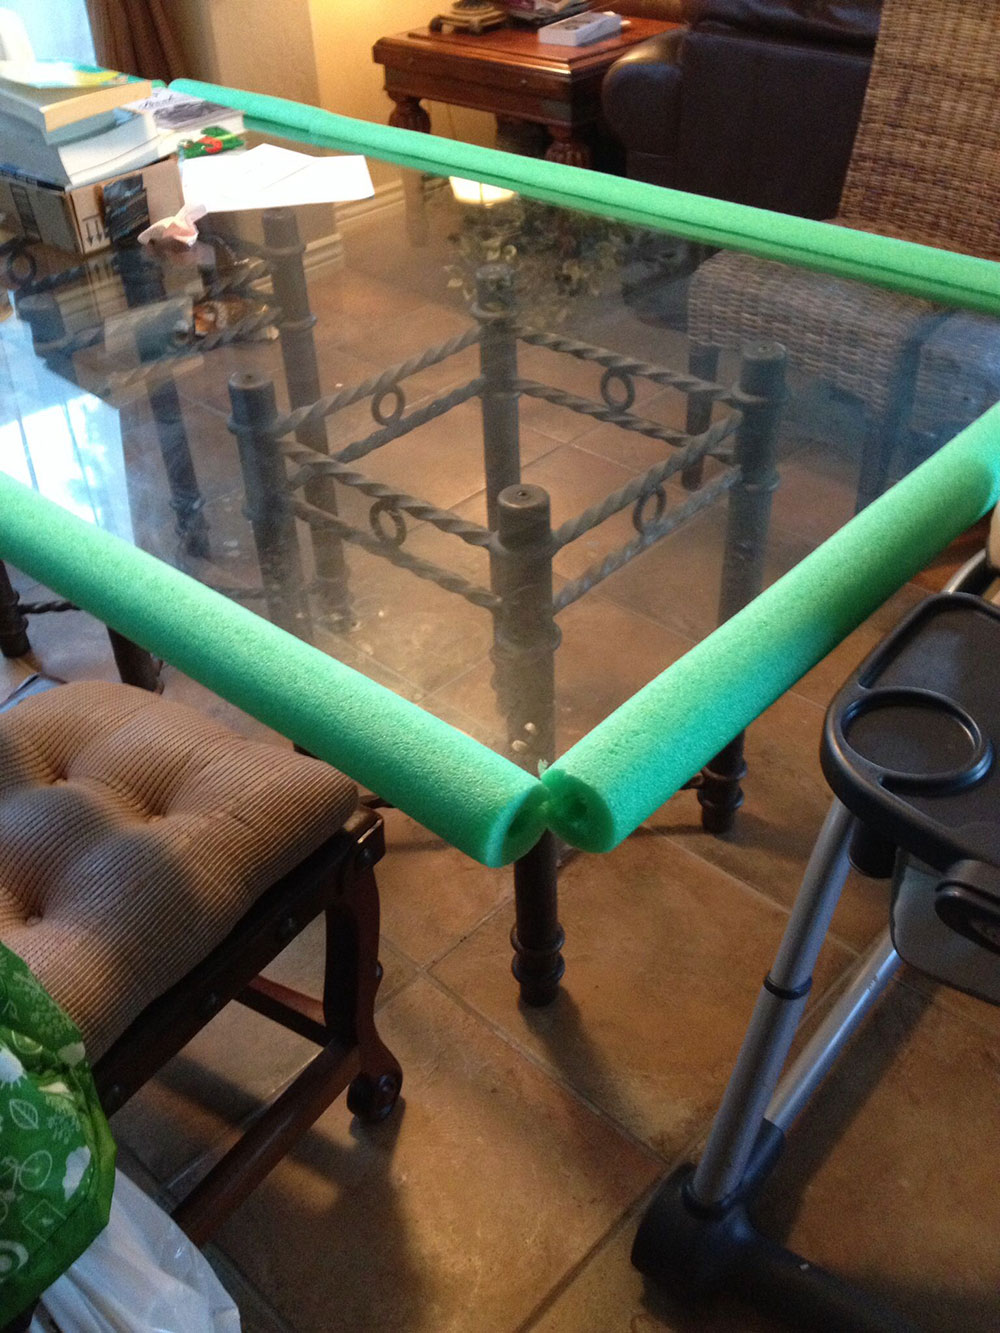
The corners of tables, chairs, walls, and other items are dangerous when children are nearby. After all, infants run around the house while playing, and a stumble can cause them to end up colliding with a sharp corner. To avoid an accident, cover every potential hazard with swimming pool noodles.

Keep cables tidy

cable-holder Pool noodle hacks to make your life easier

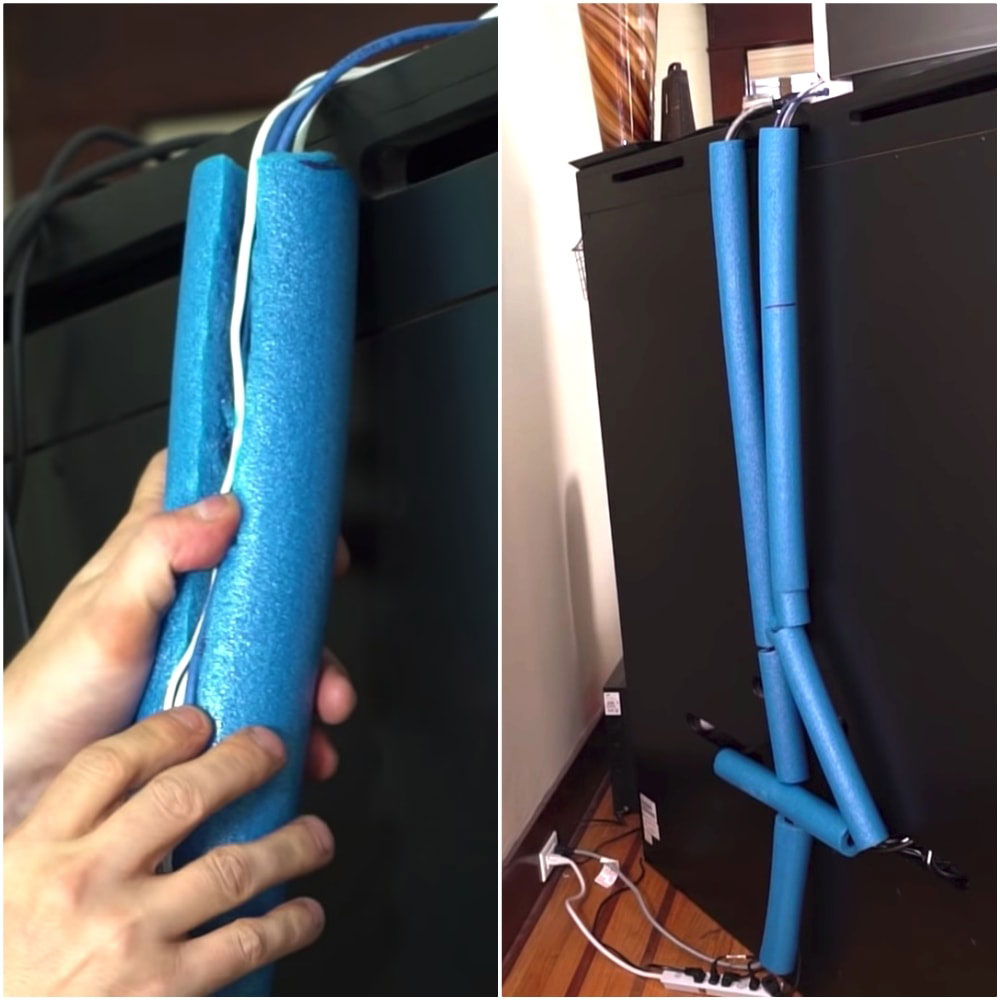
If you have a lot of messy cables on the floor, you can put them in a noodle pool you don’t use to store them in one place.

A wrinkle-proof hanger

hanger Pool noodle hacks to make your life easier

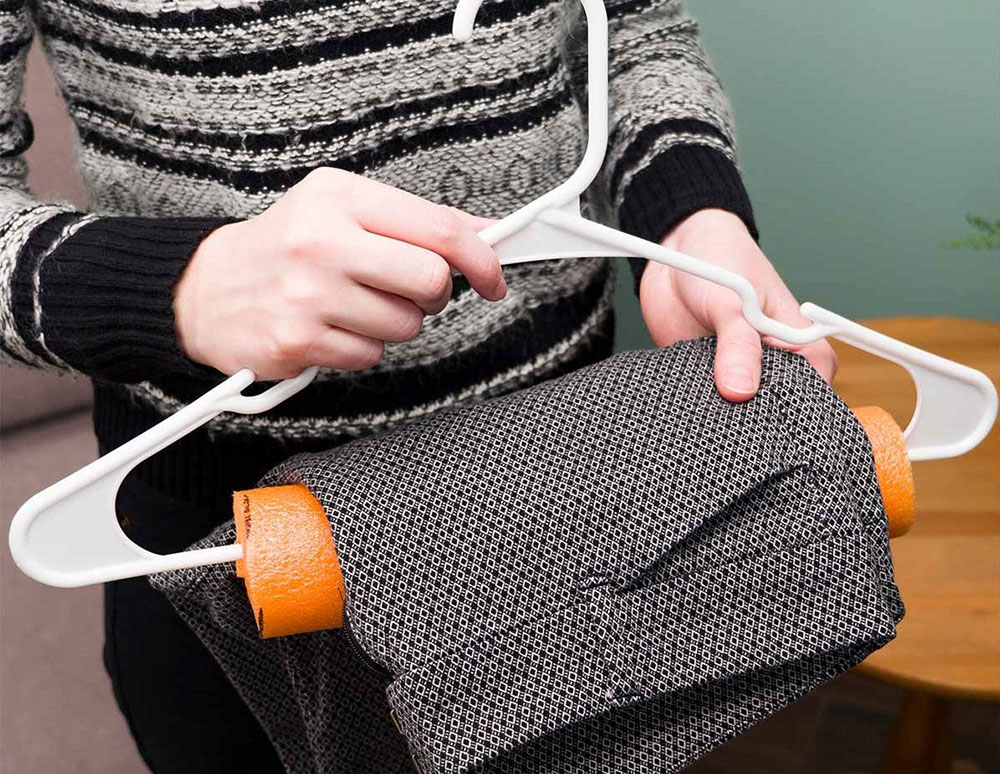
Some hanger designs cause pants to wrinkle. The pool noodles’ foam will serve as a sticky surface that will prevent the pants from moving out of place, preventing the appearance of wrinkles.

Safe transport of furniture

Safe-transport-of-furniture Pool noodle hacks to make your life easier

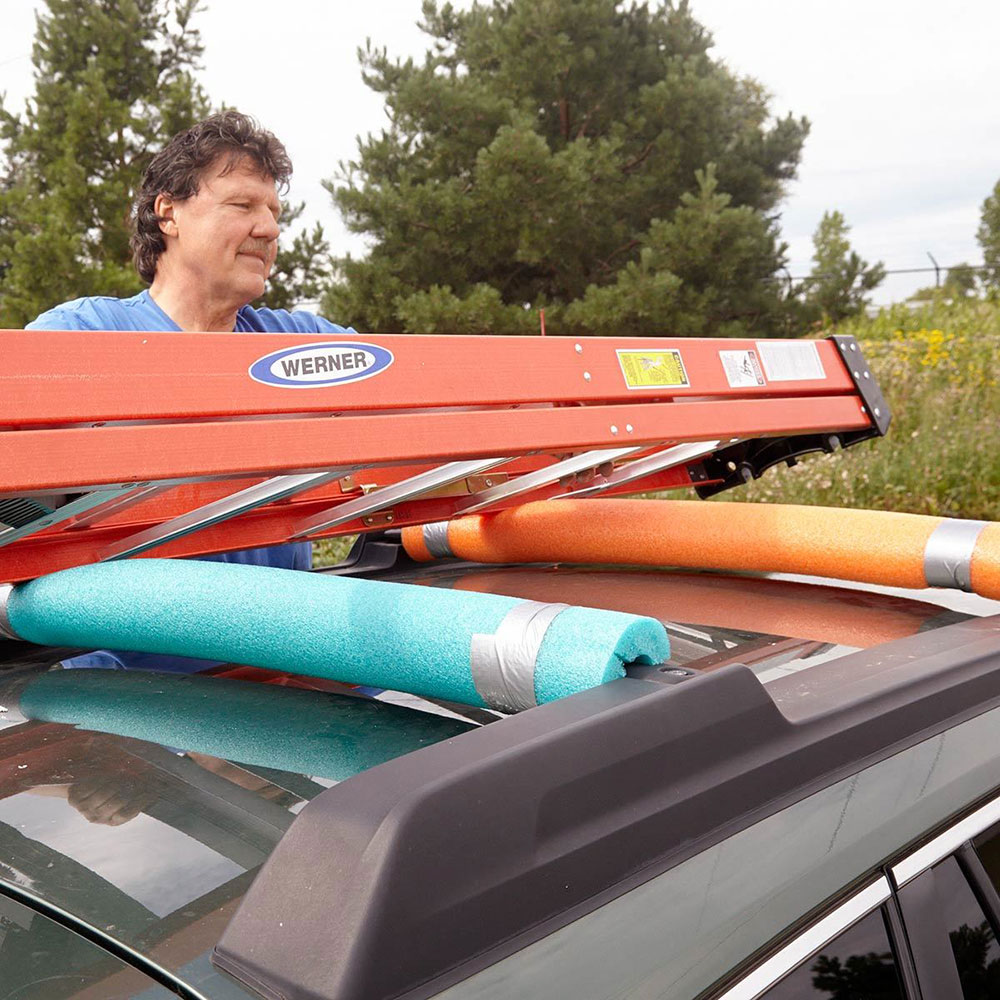
We finish this list of pool noodle hacks with a perfect idea for those who want to transport a large piece of furniture on their vehicle’s roof. To avoid scratching the car, put on some large pool noodles that work as a stand.

If you enjoyed reading this article about pool noodle hacks, you should read these as well:

The post Pool noodle hacks to make your life easier appeared first on Impressive Interior Design.


source https://www.impressiveinteriordesign.com/pool-noodle-hacks/