Wednesday, May 29, 2019

Working from Home? How to Set Up a Distraction-Free Home Office

Working from home can be a double-edged sword. On one hand, skipping a commute and getting to work in your pajamas is great. On the other hand, your house is filled with distractions and it can be hard to stay focused. I’ve worked from home for 13 years and every time I think I’ve conquered it, something happens to pull my focus. I’ve learned, however, that the trick to telecommuting is setting up your home office properly.

The way you design your home office can help you stay distraction and stress-free so you get your best work done in your home sweet home. Here are a few ways to make sure you’re able to stay on your grind.

Organized home office space

A clear desk equals a clear mind. Image: Africa Studio/Shutterstock

Declutter the space

I know that I have a clearer head when my desk is decluttered and organized. It doesn’t need to be perfect, but creating organization spaces to get papers, mail and other stuff off of your desk can help you stay laser focused. While cabinets are your best bet, you can definitely use trays and file boxes to keep things tidy. Or invest in a wall-hanging file basket to get things off of your desk. When you sit down to work, keep only what you’re working on in front of you and stash the rest.

I also find that I work better if the rest of the house is tidy. Even if you have a separate home office, it’s hard to concentrate if you know the rest of the house needs some work. I like to set a timer for 10 minutes and do a quick decluttering in the main spaces before I sit down to work. It’s enough time to load the dishwasher, clear counters or start some laundry. Having those small, brain-cluttering tasks out of the way gives me more bandwidth to focus on work.

Home office in back room of home

Adjust your computer for maximum comfort. Image: Artazum/Shutterstock

Get comfortable

You might think that working from bed is the ultimate in comfort, but anyone who works from home can tell you that it gets old. Having a comfortable, ergonomic space to work is the key to staying focused. Make sure your computer, desk and chair are adjusted for comfort. Your feet should be flat on the floor, your elbows should be at a 90-degree angle and the top of your monitor should be at or just below eye level. Comfort helps increase focus since you’re not being distracted by a sore neck or strained eyes.

Industrial home office

A well-placed lamp can help you focus on what’s important. Image: Africa Studio/Shutterstock

Utilize lighting

My optometrist is always scolding me for my long hours on the computer. But while that can’t be avoided, you can use light to help you focus when working from home. Whenever possible, bring in natural light. It reduces eye fatigue and helps you stay energized. If your office is without natural light (basement workers, unite!), you can reduce eye strain by skipping harsh, blue fluorescent lighting. Bring in warm white light with a lamp and use it to shine a spotlight on your workstation. When you’re done, you can switch the light off on your desk — and your mind — to signify that the work day is done.

Open concept home office

Use bookcases to create a dedicated office space. Image: PlusONE/Shutterstock

Create definition

Not everyone is lucky enough to have a separate home office with a door. Still, you need to create some delineation between your home and your home office. Without creating a clear workspace, it’s tempting to work longer hours or let projects seep into your personal life. You need a way to physically stop your work day and close the door between your professional and personal lives. Without it, you risk major work-at-home burnout.

No standalone office? No problem! Use bookcases or screens to give your workspace a defined look. You can also create an “office” using area rugs or even a different paint color on the wall. Even a pair of noise-canceling headphones can help put definition between work and your regular distractions. Do whatever it takes to create a separation between your work and personal life at home.

Modern home office with quirky style

A well-stocked home office limits interruptions. Image: Africa Studio/Shutterstock

Keep must-haves on hand

It seems like every time I get up from my desk, I find a new distraction. Whether it’s getting the mail, giving my dog some love or noticing that my kitchen needs to be cleaned, the fewer times I get up, the better. I’ve learned to keep all of my must-haves in my home office so I stay put and stay focused. That’s not just office supplies like pens, notebooks and my trusty planner. It also means my beloved Keurig machine so I have quick access to drinks.

If you notice that you’re getting distracted when you have to get up, see what you can keep on hand. Stock your home office with coffee, quick snacks and whatever tech you need to be comfortable. Hey, if you were working in a regular office, you wouldn’t be leaving every time you got the munchies or needed a quick hit of caffeine. Treat your home office similarly and you can keep distractions to a minimum.

Working from home can be a blessing and a curse. While it’s great to get to set up your ideal situation, it’s all too easy to lose focus. By creating a home office that is comfortable, peaceful and stocked with your faves, you can work remotely without all of the distractions.

The post Working from Home? How to Set Up a Distraction-Free Home Office appeared first on Freshome.com.


source https://freshome.com/distraction-free-home-office/

Under Stairs Storage: How to Maximize the Space from Your House

Each space of our home can be used intelligently. From an architectural point of view, there are no dead spaces but badly used. One of these is usually the one under the stairs. Although the solution is simpler than it seems: you just have to create an under stairs storage.

Our alternatives are practically unlimited when designing an under stair closets. Are we looking to store small objects or do we have large boxes to stack? This is the first thing we must consider for its construction.

We may have just space under stairs that only allows us to place shelves and cabinets, or it is possible that ours is a whole room under stairs, ideal for brooms and vacuum cleaners.

We do not have to end up making unpleasant storage, and more considering that we will see it constantly when using the ladder. Our under stairs storage must overflow life, should be an extension of the home design.

If you have many ideas in your head and cannot decide on one, or if you still do not know how to approach this field, then read on to learn some clever remodeling tips for this much-neglected space.

How to use the understairs space with smart solutions

The list that we leave you are just some of the most popular decorating ideas, but there are many other options when it comes to building smart solutions. With no more to add, we started it:

Always be prepared with an under stair bathroom
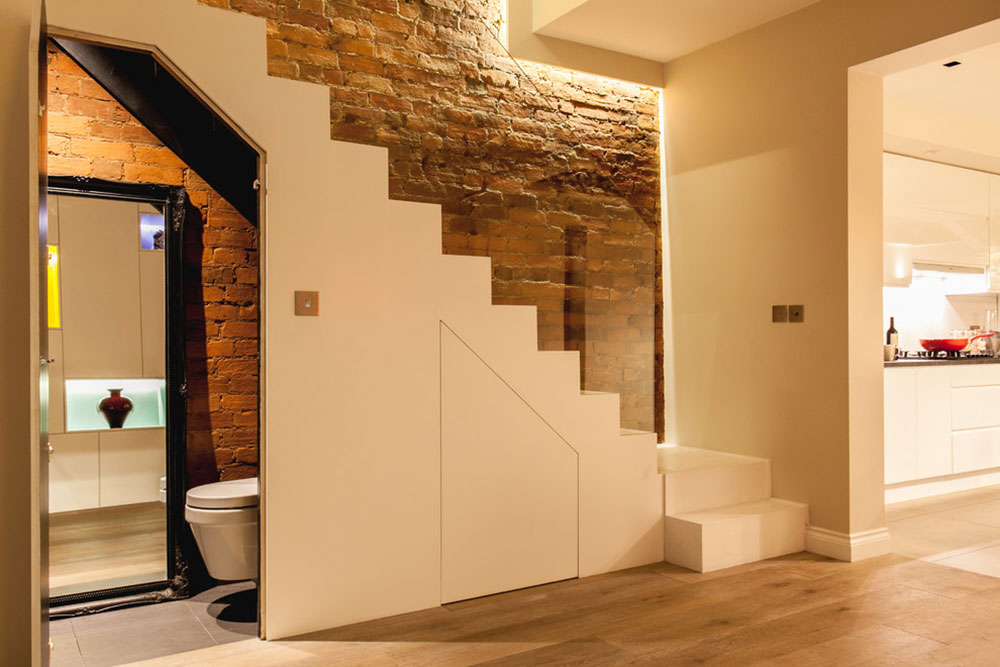
Concealed-under-stair-cloakroom-by-Timothy-James-Interiors-1 Under Stairs Storage: How to Maximize the Space from Your HouseImage source: Timothy James Interiors

Previously we had already mentioned it, but one of the most practical solutions is to install a bathroom under the stairs. It is a combination of a small warehouse with all the functionalities that a W.C. and a sink give us.

The bathrooms are the most requested rooms in a home. Having one with immediate availability and easy access is ideal for our guests or for children and seniors. If we need another bathroom, but space is scarce, stairs are always an option.

Another aspect that we did not mention is that a well located and constructed bathroom can increase the value of your property by up to 5% (although this is just rumors, it is good to consult with real estate agents).

However, today we will not go into detail about its preparation. If you are interested in getting more information about it, you can follow this guide that we prepared where we cover more thoroughly the aspects to consider.

An elegant design with high functionality
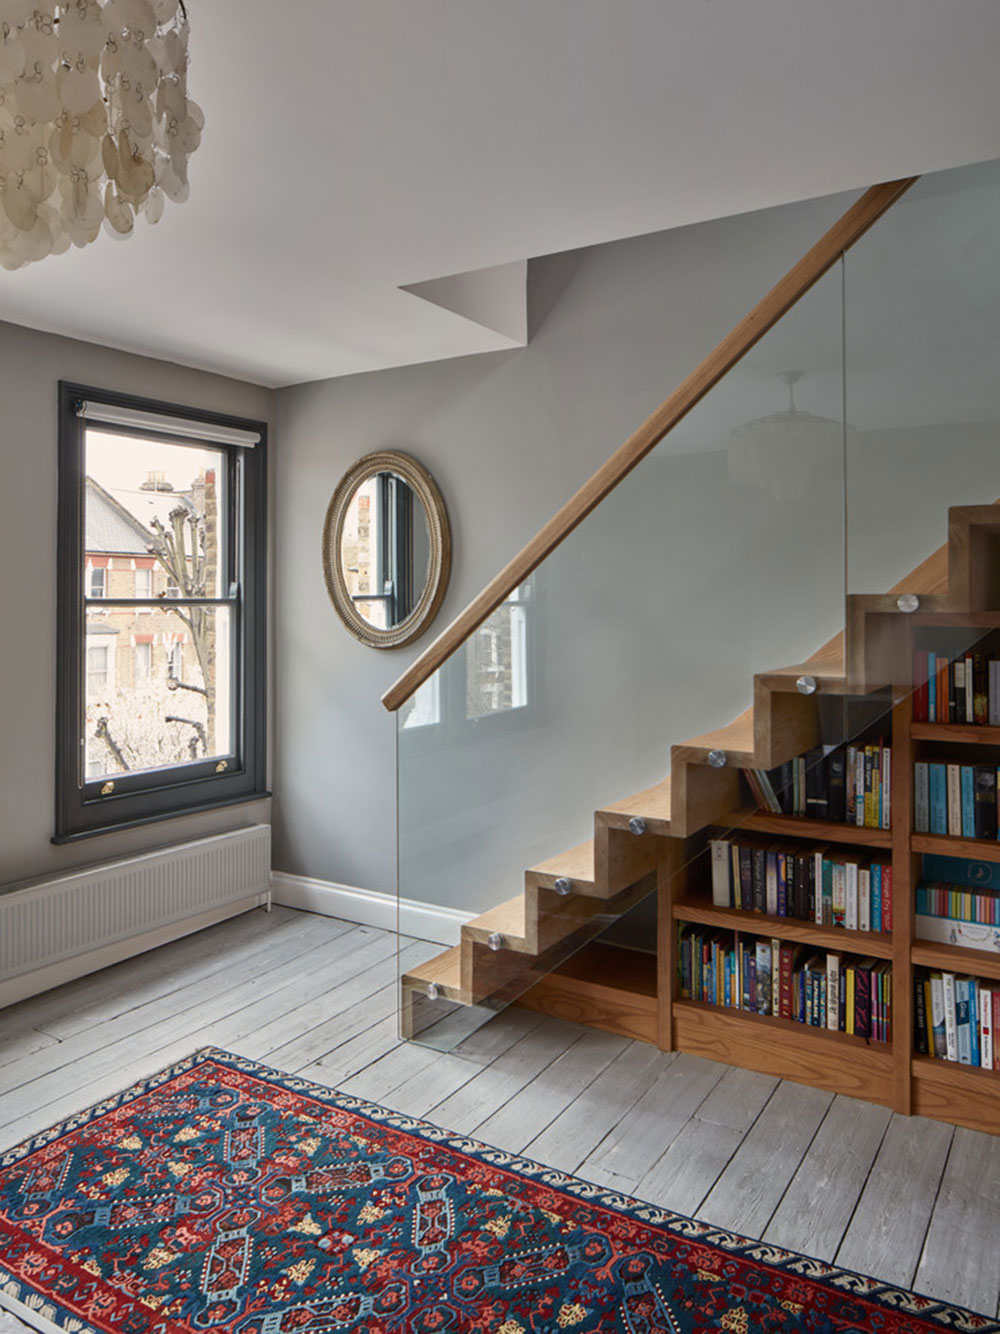
North-London-House-by-Golden-Design Under Stairs Storage: How to Maximize the Space from Your House
Image source: Golden Design

Have a bookshelf under stairs is no reason to neglect the aesthetics of this area. Many times, we end up with a lot of drawers without shape that we simply hide with the use of plants or other ornaments.

Let’s be smart in the location of the stores. Let intermediate spaces to hang small portraits. See in the designs that we present as a mixture of decorative elements and free spaces can create pleasant environments.

Keep this space lit. Play with light tones to create eye-catching zones that do not require more elements to highlight.

The pantries are wonderful as under stairs storage
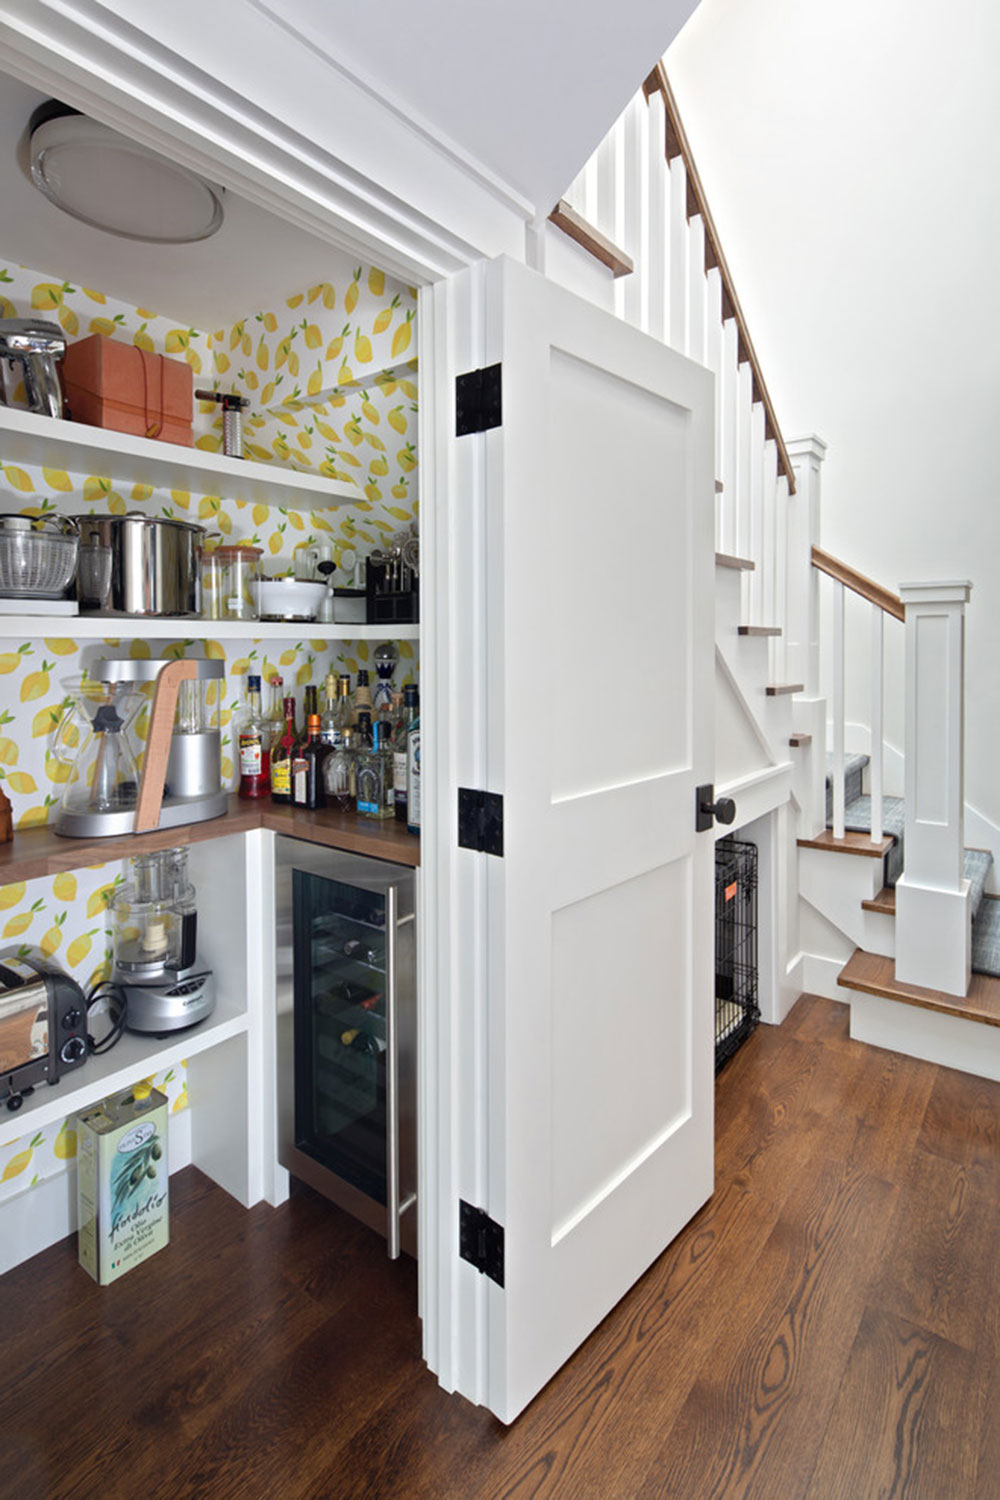
San-Mateo-full-home-remodel-by-JPM-Construction Under Stairs Storage: How to Maximize the Space from Your HouseImage source: JPM Construction

If you are one of those who like to store food in large quantities, you may find yourself in the predicament that the kitchen does not always offer enough space. An additional pantry is a solution to our resource problems.

Inside the pantry, we can store everything that the small kitchen cabinets do not allow us since it will be a room exclusively destined for this. Using shelves, we can have everything ordered and ready to find it easily.

A curious fact: although now the term has been combined to fulfill both functions, formerly the larder and the pantry were different rooms. Due to the smaller spaces, it is common to use the same room to store everything, although if we have additional space, we can always choose to make a larder for our meat.

The pantry is more versatile in its usefulness since it can store fruits, dairy products, bread, canned, cereals, among a wide variety of options.

If we are going to choose to install this type of storage under our staircase, it is important that we take into consideration if it really is the best option. If it is far from the kitchen, it is not advisable to build it.

The stairs are the perfect laundry in small homes
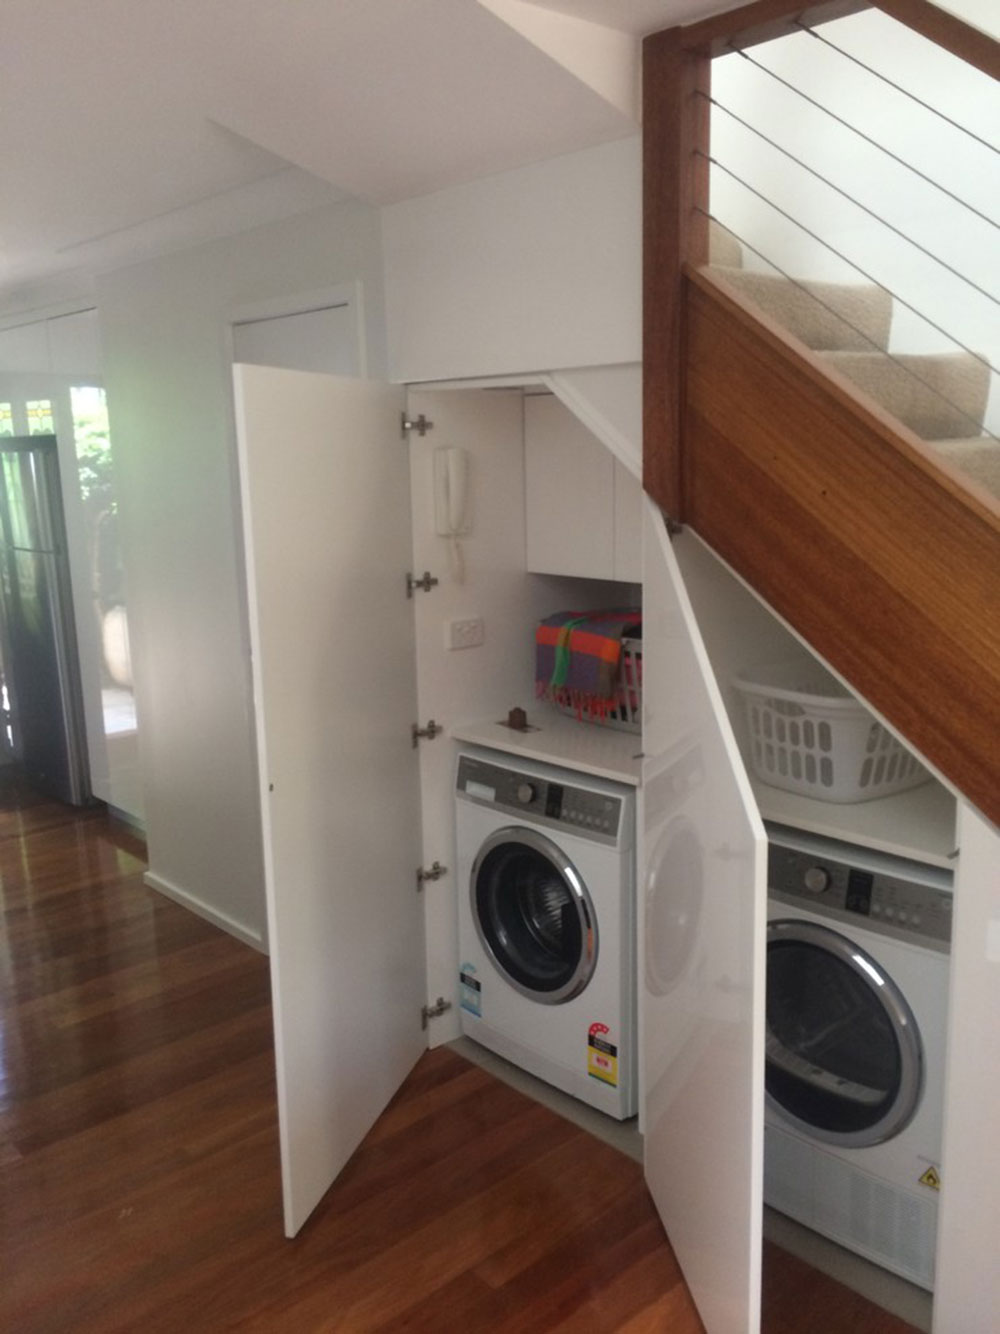
Laundry-moved-to-utilise-space-under-stairs-by-McGarry-Constructions-Pty-Limited Under Stairs Storage: How to Maximize the Space from Your HouseImage source: McGarry Constructions Pty Limited

At the moment of designing a house, it is normal that located near the kitchen or the backyard, a room of reduced dimensions will be built where our products and laundry artifacts will be found.

The laundry room has become a necessity today. However, sometimes space does not allow a whole room to be dedicated to it. If you do not have one of these, you can intelligently use that under stairs space.

We simply have to add some portable shelves to place some of the implements such as soap or detergent, a tube that allows us to hang clothes hangers, and of course, we must install the appliances that we need, such as a washing machine or dryer. We can also add a retractable ironing board.

Under stair, closets-cupboards are an always good option
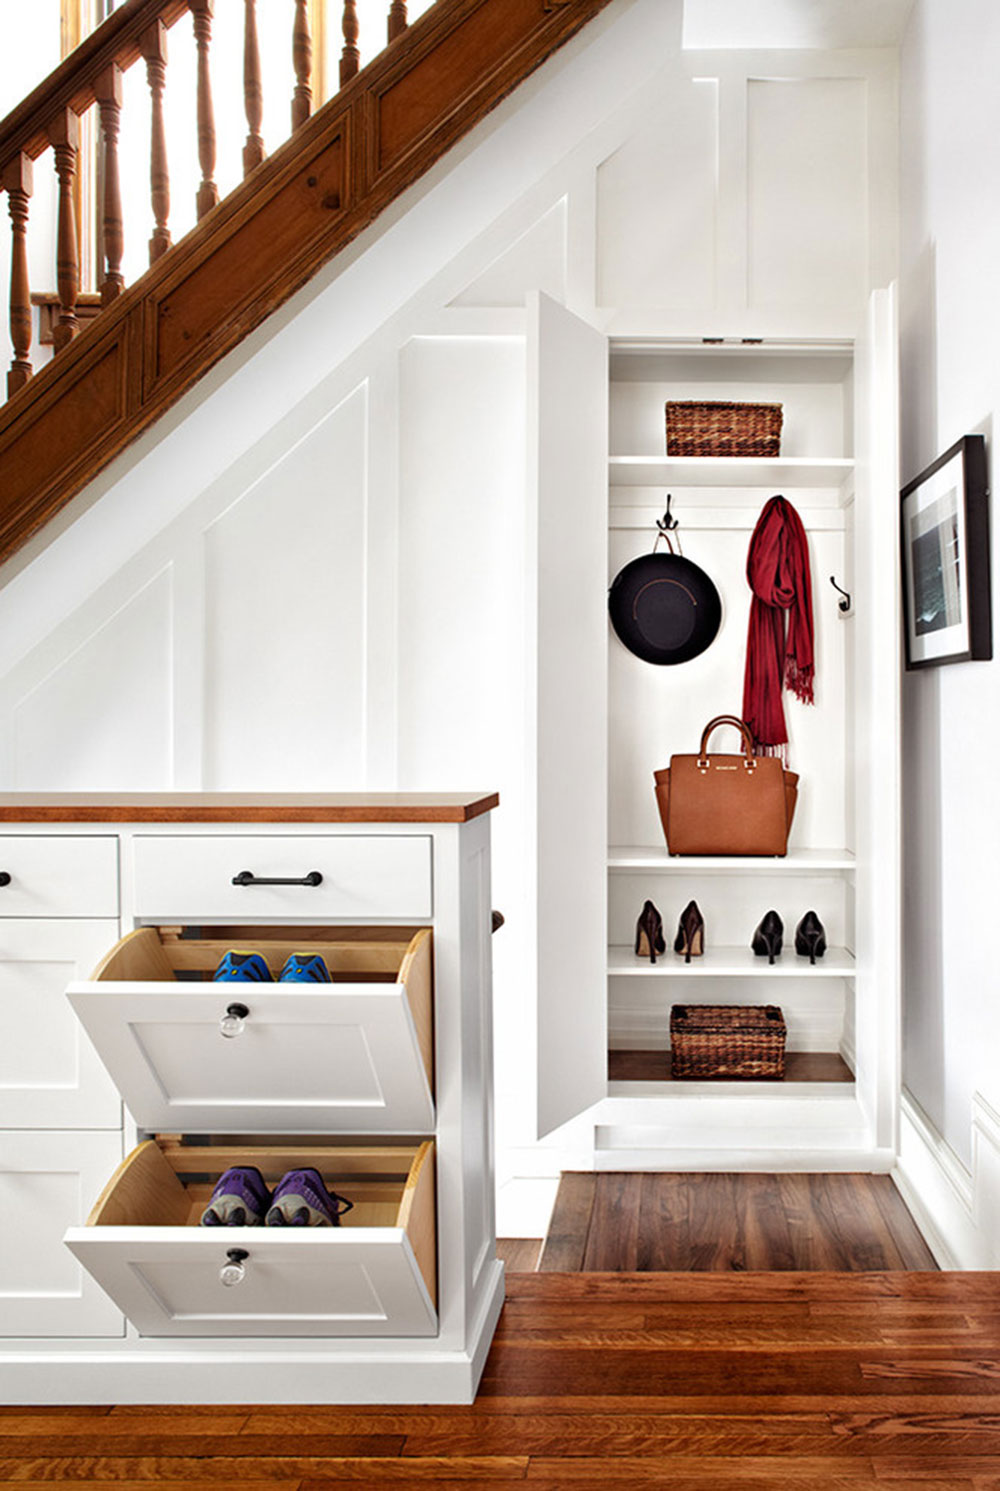
Fern-Avenue-Parkdale-by-Men-At-Work-Design-Build Under Stairs Storage: How to Maximize the Space from Your HouseImage source: Men At Work Design Build

Thanks to its ease of installation, and its practicality, cabinets are the most versatile and considerable options to be carried out in small spaces. Depending on what we have to build, we can make simple shelves or racks.

With a little organization, we will achieve a striking space. You can review this article if you want to know more tips to create a dream under stairs wardrobes.

Attracts attention with the use of draws and shelving
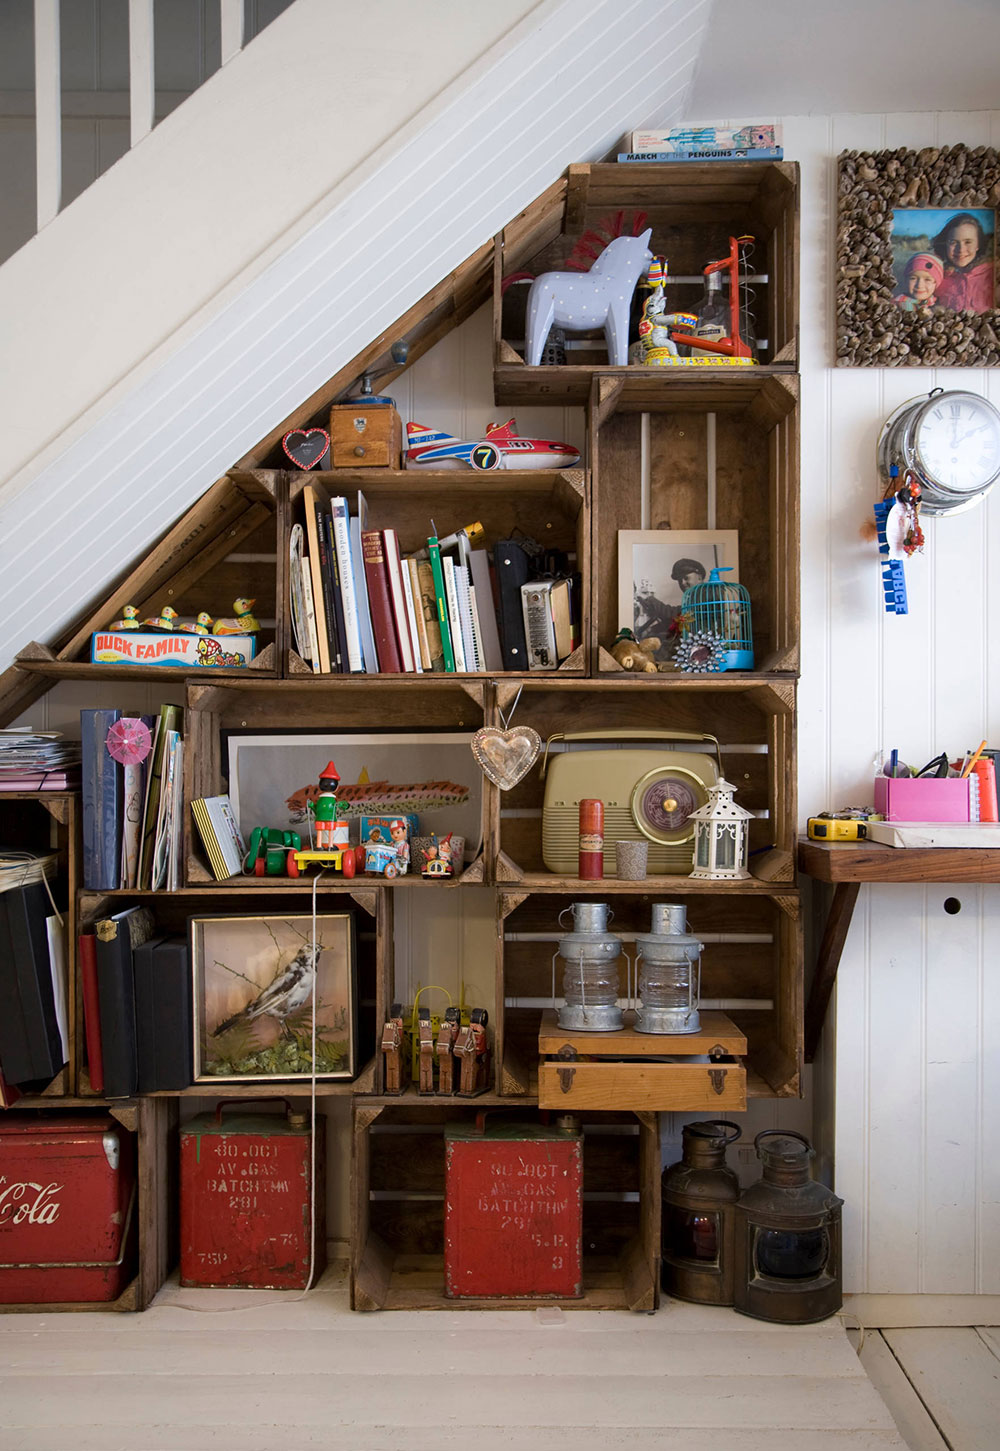
Country-house-by-Juliette-Byrne Under Stairs Storage: How to Maximize the Space from Your HouseImage source: Juliette Byrne

Although at first glance we may not understand very well the difference between this and the previous point, the truth is that they are very different. A cupboard is usually simply closed rooms where we store our objects.

On the other hand, when we use draws or open shelving, what we are looking for is what we store mixes with the set since we are showing it to the public.

As these will be part of the home’s decoration, we can play with the heights and positions in which we install them.

Install a mudroom and keep your home clean
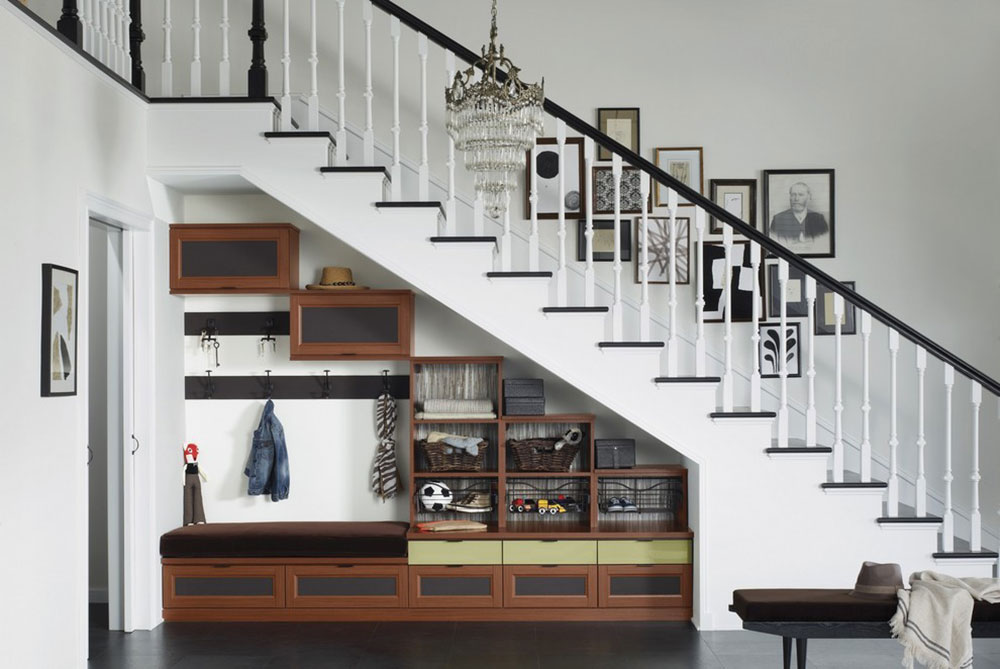
Asheville-Entryway-by-California-Closets-of-Michigan Under Stairs Storage: How to Maximize the Space from Your HouseImage source: California Closets of Michigan

A mudroom, for those who do not know the concept, is a room of small dimensions that receives us when entering the house, and whose utility is not more than to prevent dirty garments from entering the home.

The concept originates from the United States, but there are more examples around the world such as the porch on Great Britain or the houses’ entrances in Japan. In general, its construction consists of a gap between the street’s slab and the house’s slab, and in that space we find different cabinets and hooks to store clothes and shoes.

If our staircase is near the entrance, a mudroom may be the option we are looking for storage. With a little design, we will be able to completely change the way we enter our home.

Use combinations of drawers and trunks; create cubist designs where stepped distributions are important. Also, place some hooks to hang jackets or hats, and maybe a special drawer for shoes.

If there are several people who live in the house, everyone should have their personal space to store their clothes in the mudroom. That includes children, who can use it to deposit their school supplies, such as handbags, or those occasional items such as scarves.

Treat your pet as another member of the family with its own room
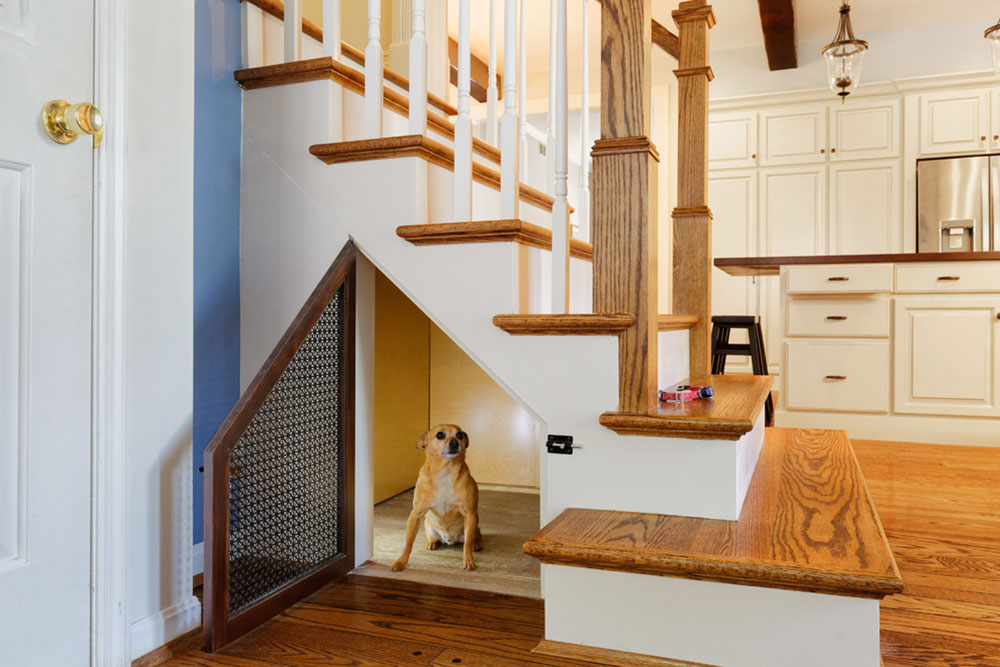
Cooks-Copper-Hood-Kitchen-by-Michaelson-Homes-LLC Under Stairs Storage: How to Maximize the Space from Your HouseImage source: Michaelson Homes LLC

Pets are another member of our family. That is why it is fair to treat them in the same way as any other person. A room for them is an excellent gift, but since we are not going to build a full-size one, a room under the staircase is a practical solution.

It does not matter if it is about dogs or cats (or rabbits, or any other animal), this small space that we will dedicate will be to keep all of their toys, a bed, even the bowls of food and water.

Among the benefits of this room, we can list that now our pet will have a fixed place to rest. It will also know where to get its toys and food.

A game room that will grow with your child
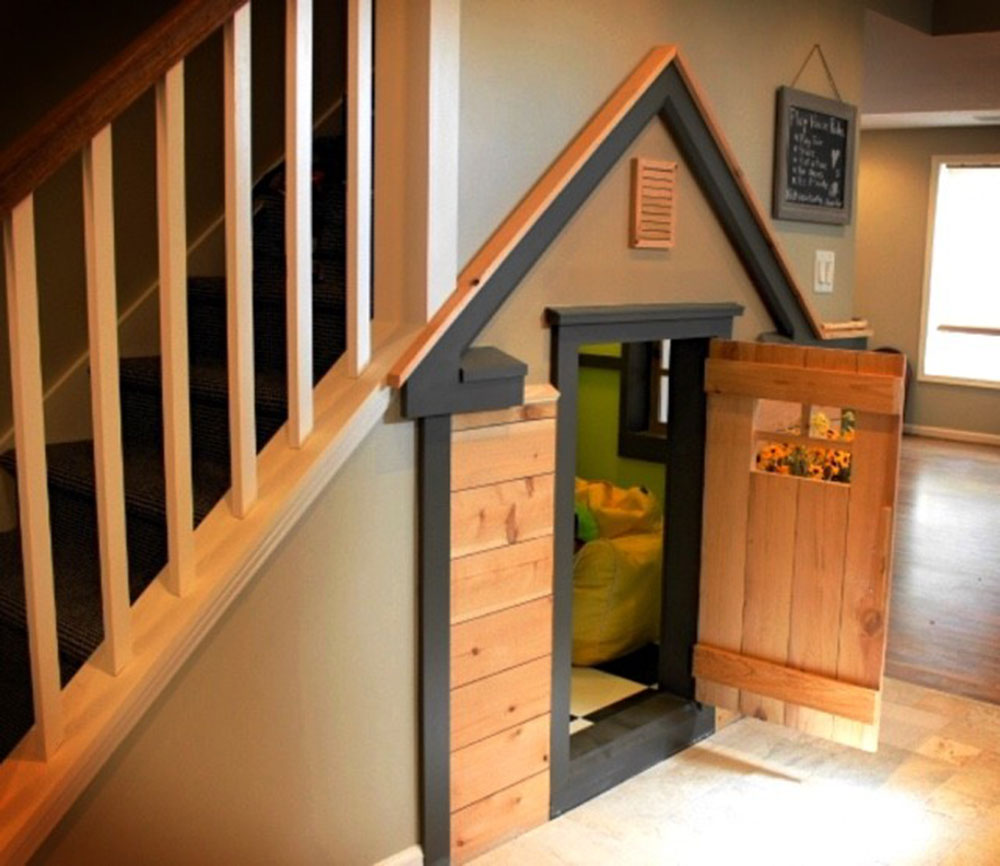
Kids-Playhouse-in-Gainesville-VA-by-Bianco-Renovations Under Stairs Storage: How to Maximize the Space from Your HouseImage source: Bianco Renovations

What to do with the space under the stairs? Well, if we have a child; why not give him/her a small personal space where he/she can spend hours playing?

A game room specially designed for the little one in the house can save us more than one headache. Of course, it should be spacious enough to place cushions, toys, blankets, and some lights that give that childish touch.

The only “disadvantage” is that eventually the child will grow up and the room may lose its current usefulness. However, we can solve this by updating its purpose, since it could become a personal study area for your child, especially in the stages of the GCSE and the A- Levels.

Think carefully about this possibility, and remember that the limits will be your budget, and of course, your child’s imagination.

It’s time to store our finances understair
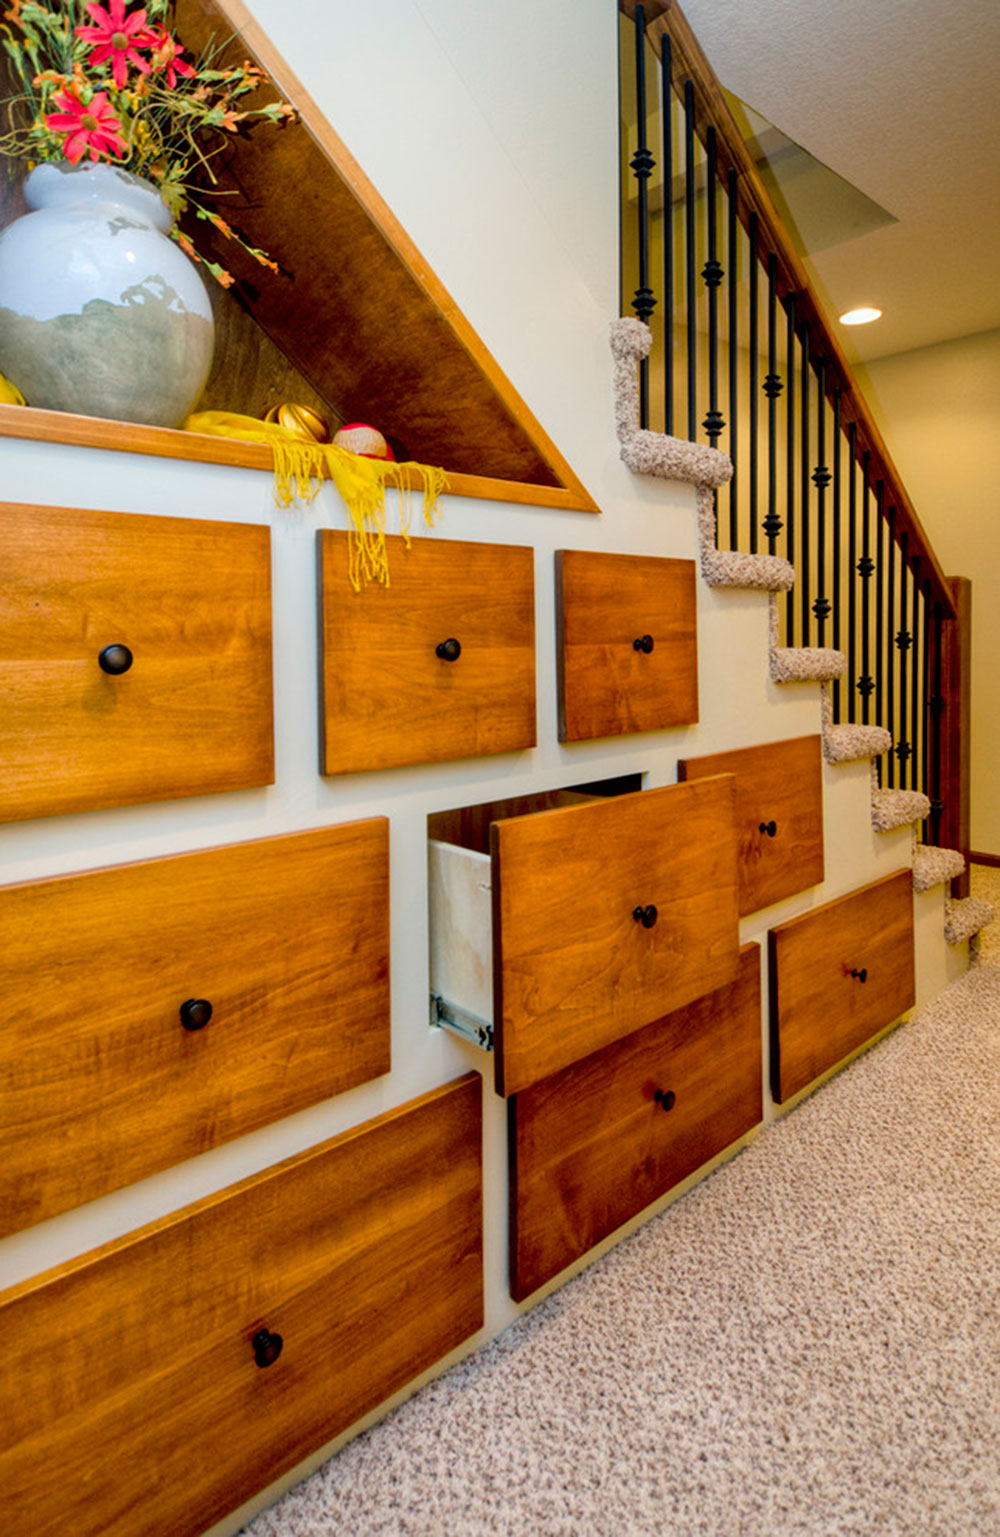
Under-Stair-Storage-by-Red-House-Remodeling Under Stairs Storage: How to Maximize the Space from Your HouseImage source: Red House Remodeling

Use the under stairs storage for storing papers and documents is common. However, a smarter way to use it is if we turn it into an entire office where we can work.

If we look for an area where we can place a computer to manage our finances, this confined space may be the silent area you are looking for.

Although many people are not thrilled by the idea of taking work home, the truth is that an office in our house is always ideal.

Structure a couple of shelves to store documents, place a desk where you can use at least one laptop, and leave enough free space for a comfortable chair. Of course, consider that, if the stair area is very busy, it may not be the best place for an office.

Create a personal corner to read
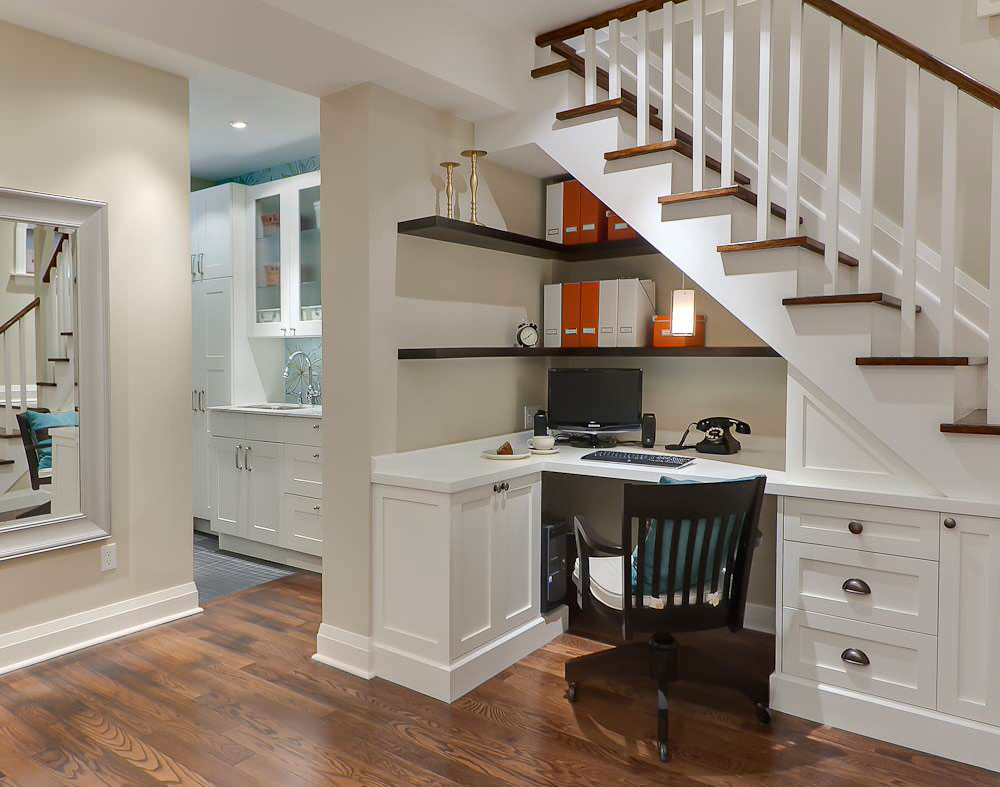
Basement-Desk-Under-The-Stairs-by-Leslie-Goodwin-Photography Under Stairs Storage: How to Maximize the Space from Your HouseImage source: Leslie Goodwin Photography

This option is as simple as locating a small shelf with books, a comfortable chair and our desire to have a quiet time. A bookshelf under stairs alone is good, but we can improve the bet by turning it into a space of personal comfort.

A way to maximize space under stairs if we are going to install seats is through furniture that has drawers. Install full built-in chairs to the wall that have lower drawers. You can also embed small shelves in the wall to gain additional space.

Another daring option to create a rest area is to simply forget about the chairs and place cushions in the room. Apply sconces and paint the walls with pastel colors, and you will have a cheerful room with a tranquility air.

Elevate the party with a dry or wet bar
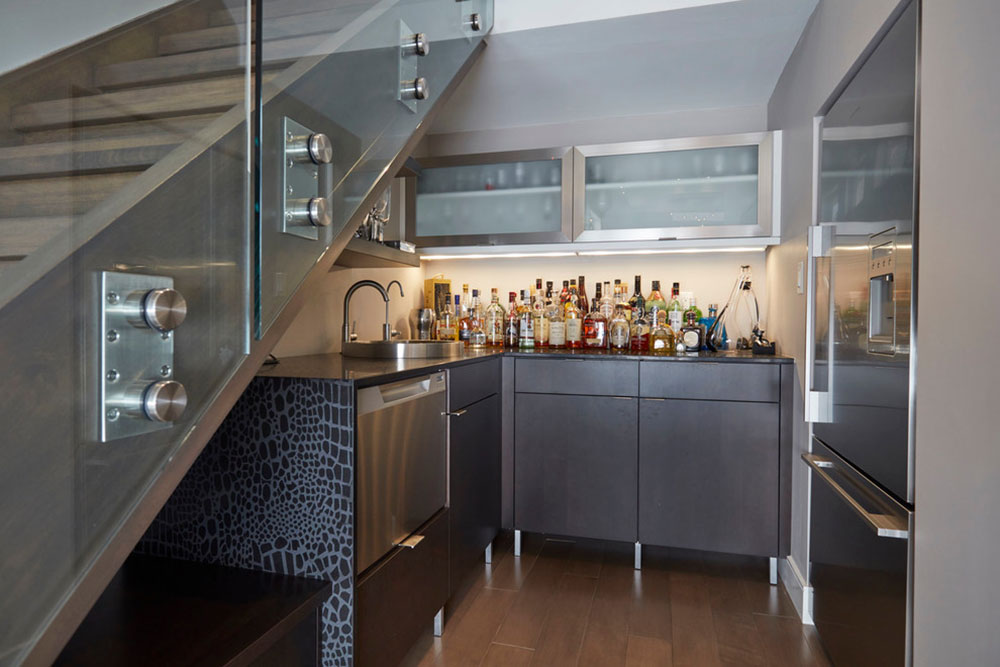
Carriage-Crossing-Waterloo-by-Caseys Under Stairs Storage: How to Maximize the Space from Your HouseImage source: Casey’s

Your home can be the soul of the party with the proper implements and salons. Many people decide to install a full liquor bar in their homes, but size can be a problem. However, there are more compact solutions.

An option of under stairs storage is the installation of a dry or wet bar. The difference between them is easy: the wet bar includes a sink to be able to wash the dishes and glasses, while the dry one totally dispenses with this.

The choice of the type of bar will depend on whether it is necessary to install an additional sink or if we can save those pipes. For example, if the kitchen is very close to it, what is the need to add another sink?

The space required for the bars is not as large as you would think. You just need a counter where you can prepare cocktails. But it is not the only thing that we must consider if this is our dream choice.

The stairs may not be the best location for the bar if, for example, you need a sink and the installation of pipes is very complicated. Additionally, will the location of the bar be ideal for parties?

All this we must ask ourselves in a personal way. If we also want to continue with this idea and select the wet bar, we have a series of additional tips for its installation.

An aquatic eccentricity
Oakmount-by-Domiteaux-Architects Under Stairs Storage: How to Maximize the Space from Your HouseImage source: Domiteaux Architects

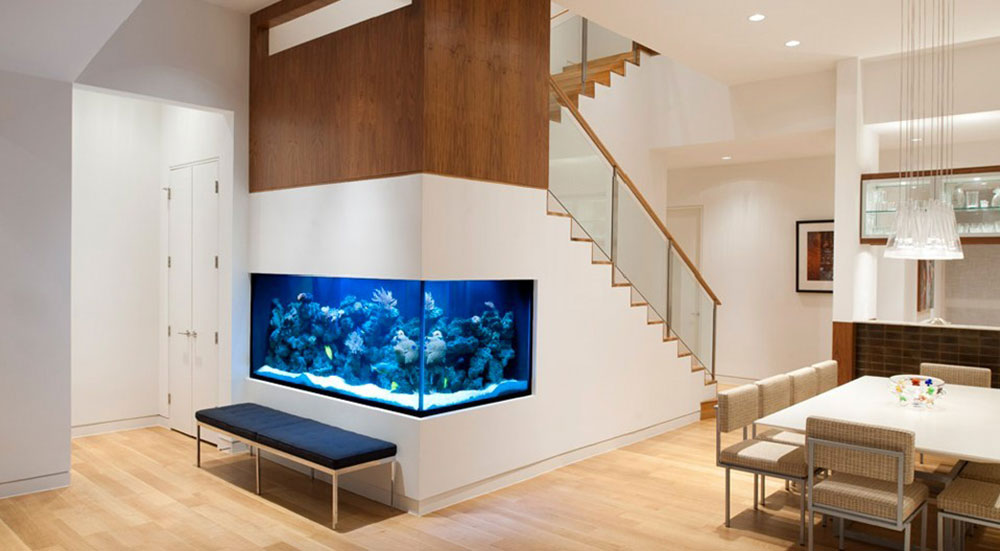
This last option on the list is crazy, but it’s definitely something worth to see. If we do not want to create an under stairs storage, but we definitely want to occupy that space, why not consider a giant fish tank?

A series of large well-sealed glass panels or a glass molded to the shape of our staircase, and we can have a fish tank unique in its style. Its decoration is already part of each one, like using lights, but we must remember the pumping systems that are required to keep the fish happy.

Find the option that best suits your taste

As we said at the beginning of the article, these are just some of all the creative options that you can implement in that small space that remains understairs.

The list offers some of the most ingenious and popular options among users, and we seek to serve as an inspiration to motivate you to one of these projects.

We would be delighted if you tell us some of your ideas and solutions for this very useful space. Has any recommendation escaped us? Then do not be shy and share your opinion. Remember that at the end of the day, the only limit in the decoration of our home is our imagination.

If you enjoyed reading this article about under stairs storage, you should read these as well:

The post Under Stairs Storage: How to Maximize the Space from Your House appeared first on Impressive Interior Design.


source https://www.impressiveinteriordesign.com/under-stairs-storage/

Kitchen Sinks: How to Choose the Best Style for Your Needs

In terms of functionality, the sink is a vitally important part of your kitchen. It’s an important consideration in the design of your kitchen, and is essential in the hallowed kitchen work triangle.

However, with so many styles to choose from, are homeowners choosing style over function? How can you determine which type of kitchen sink is best for your needs? Freshome asked experts from Kohler, Moen, Delta and Franke Kitchen Systems for tips on understanding the function of various kitchen sink styles.

The aesthetic appeal of the kitchen sink

2 island faucets

When one sink is not enough. Image courtesy of Delta Faucets.

“With the evolving role of the kitchen leading to tasks beyond traditional cooking and cleaning, people are often selecting more secondary sinks,” explains Peggy Gallagher, Senior Product Manager at Delta. When choosing the right sink, Gallagher tells Freshome that there are several factors to consider, but she believes style is the main driver.

“Consumers are primarily looking for the right kitchen sink to complement their personal style,” Gallagher says. “More and more, people are not only cooking and eating in the kitchen, but also socializing, entertaining and using the space as a place to work.” In fact, she says that two-thirds of consumers are spending at least three hours per day in the kitchen. 

kitchen island

An additional island sink doubles the kitchen’s functionality. Image courtesy of Moen.

“The sink is the workhorse of the kitchen,” according to Chris Nealon, Product Manager of Disposals and Sinks at Moen. “From making morning coffee to scrubbing dishes at night, not to mention all of the hand washing, cup filling and cleaning that goes on in between, the faucet and sink area see a lot of traffic every day.” With so much going on, Nealon tells Freshome that it’s important to find a kitchen sink that fits homeowners’ needs while still providing an appealing aesthetic.

Kitchen sink styles

red sink

Add a pop of color with this red dual-bowl, undermount sink. Image courtesy of Elkay.

“Large, single-bowl designs are convenient for washing oversize cookware, while dual-bowl sinks allow for quick wash-ups and offer multi-tasking functionality for the home chef,” Nealon says.

Stainless steel farmhouse sinks are durable and stylish.

Stainless steel farmhouse sinks are durable and stylish. Image courtesy of Moen.

“Regarding design, undermount sinks offer an appealing aesthetic, make cleanup a breeze and are the ideal complement to popular natural stone and solid surface countertops,” Nealon explains. “The exposed front wall of farmhouse sinks complements traditional kitchens well, whereas drop-in sinks offer added convenience with a quick and easy installation process,” he says. 

blue kitchen

When only three sinks will do. Image courtesy of Kohler.

Another consideration when choosing sinks is determining which style will work best with your countertop material. “Top-mount, which is installed flush with the countertop, is often used with laminate counters,” explains Eric Moore, Senior Interior Designer at the Kohler Design Center.

With enough room for 2 faucets, this sink makes prep and clean up fast and easy.

With enough room for 2 faucets, this sink makes prep and clean up fast and easy. Image courtesy of Kohler.

Moore tells Freshome that undermount sinks, which are installed below the countertop, pair well with stone and quartz counter surfaces. “Apron-front sinks, which feature a farmhouse style, are available in undermount, top-mount and tile-in models,” he adds.

Durability

stainless steel

An apron front, stainless-steel, double-bowl sink. Image courtesy of Moen.

Stainless steel remains a popular choice among homeowners. In fact, according to the NKBA design trends report, it’s the most popular kitchen sink material. Nealon attributes some of this popularity to the fact that stainless steel matches commercial style appliances.

“Also, stainless steel sinks offer many benefits including resistance to chipping, cracking or peeling, and they also help reduce noise from dishes and vibrations,” Nealon says. For example, Moen’s SoundShield technology, standard on all stainless steel sinks, reduces vibration and noise caused by clanging dishes and the drumming sounds produced by running water.

farmhouse sink

This elegant Farmstead sink is conveniently located. Image courtesy of Kohler.

“We also recommend that homeowners seek out a sink with an evergreen look and durable construction that will stand the test of time both in style and in quality,” Moore says. Kohler’s Farmstead sink is a contemporary twist on the traditional apron-front sink crafted from durable cast iron. “Its unparalleled durability ensures beauty to withstand everyday wear and tear for years to come.

Multitasking kitchen sinks

wide basin

A wide basin makes it easy to clean large pots and pans. Image courtesy of Franke Kitchen Systems.

“Whether cooking for dozens or hosting an intimate gathering for cocktails, the kitchen is an entertaining hub,” says Heather Jach, Retail Marketing Manager of Franke Kitchen Systems. “As the sink is a central element of this busy room, making the most of the space at hand is important no matter the design style. Today’s homeowner selects their sink based on both usage and aesthetic.”

Keeping your accessories nearby makes prep a lot easier.

Keeping your accessories nearby ensures efficiency. Image courtesy of Franke Kitchen Systems.

When you need to maximize workspace, functional sinks like the Franke Chef Center XL can be a lifesaver. “It has a wide basin that accommodates large pots and pans and a wide range of custom accessories — including a cutting board, colander, sink grid, mobile drainer board and Franke’s exclusive Roller Mat.” In addition, the two removable compartments can serve as a wine bucket, storage bin or place to compost, Jach adds.


The post Kitchen Sinks: How to Choose the Best Style for Your Needs appeared first on Freshome.com.


source https://freshome.com/kitchen-sinks-style-needs/

How to Organize an Attic Once and for All

The prospect of organizing an attic can be a surprisingly daunting one. Unfinished attic spaces can be dark, cavernous areas where you’d rather not venture. They’re right up there with unfinished basements late at night, root cellars and dark crawlspaces under very old homes.  But by taking the time to organize an attic, you can breathe new life into the space. Your attic can go from being a dark, cobwebbed area best suited for ghost stories to a well-lit, organized and even multifunctional space.

As far as a timeline for this project goes, it can range from a single afternoon to several weeks. You might simply have items you need to organize and store more efficiently. Or you might want to look into getting less usable attics completely refinished, which could require a professional remodeler.

Costs to organize an attic can have a wide range as well. It can be free. It could even make you money if you clean out clutter from the attic and sell it. But if you have enough junk, you might consider renting a dumpster, which can run in the low to mid hundreds of dollars by the week. Refinishing an attic can cost in the mid to high tens of thousands if you wish to make the space livable.

Below we’ll cover several ideas for finally getting that attic in top shape, whether your goals are to have a well-lit, livable space or just a well-organized storage area.

Organize an Attic Cluttered Space

Sorting things into piles can help take care of even the most formidable mess. Image: ChiccoDodiFC/Shutterstock

Sort and Get Rid of What You Don’t Need

If your attic is currently the place where you dump anything that doesn’t belong anywhere else, your first step is to sort and get rid of what you don’t need. It can be hard to look at the mess and know where to begin. However, there are several decluttering tips you can follow to get a handle on the chaos:

  • Start by sorting things into piles. For instance, you might have a pile for holiday decorations, another for children’s artwork or class projects and maybe even a miscellaneous pile.
  • After you have things in more manageable piles, sort between what you want to keep and what you can throw out. Have a garbage bag with you to immediately toss what you don’t need.
  • Some of us struggle with what to throw out and what to keep. A rule of thumb is that if you forgot you owned it, it can probably be thrown out. Also, if you haven’t used it or looked at it in two or three years and it has no emotional significance, it can probably get tossed.
  • As touched on above, consider renting a dumpster if you have a lot of junk to clear out.

If you can follow these rules to organize an attic, you may be surprised how much bigger the space feels when uncluttered.

Organize an Attic Refinished Room

Refinishing an attic could be your answer to getting an organized, usable space once and for all. Image: foamfoto/Shutterstock

Make Plans for the Space

A more involved way to organize an attic is to think about how to arrange the attic for multiple or new uses. When you think about it, the attic has the potential to be a whole other room or more. Several ideas of what to do with the attic include:

  • A child’s play area
  • An extra bedroom
  • A reading nook or library
  • A walk-in closet space
  • A more intricate storage area

The attic could even be separated into different spaces if it’s large enough. You might want to sketch out what role different areas could play.

If you plan to make the space livable, you’ll need to consult with a professional remodeler. You’ll need to know about building codes, heating the space, electrical setups and other complex details.

Organize an Attic Cabinet System

Built-in shelving and drawer units are a great way to organize an attic. Image: Photographee.eu/Shutterstock

Add Permanent Systems to Organize an Attic

If you’re just looking to organize an attic, another idea is to add organizational systems to your attic space. Ideas include:

  • Built-in shelving
  • Clothing racks
  • Built-in cabinets
  • Wall-mounted organizational units

Also, if there’s anything that requires protection from aging, you’ll want to get plastic, air-tight containers to store it. You can store anything else in bins, which fit especially well with added shelving.

And remember, label any bins while you organize an attic. It can also help to have those bins in organized sections, like a section for holiday decorations.

The post How to Organize an Attic Once and for All appeared first on Freshome.com.


source https://freshome.com/how-to-organize-an-attic/

How to Add an Outdoor Bar

outdoor bar - pottery barn bar

Set up an outdoor bar to make the most of the summer. Pieces like the Abbott Brown Ultimate Bar can make it super simple. Image courtesy of Pottery Barn.

We hope you like the products we recommend. Just so you are aware, Freshome may collect a share of sales from the links on this page.

Summer is about to kick our outdoor time up a notch. And you know what that means: drinks al fresco. And yes, sure, you probably have a few bars and restaurants nearby that would happily serve you drinks on their patio — for a price. But why not shrink the expense of enjoying your beverage en plein air (and worrying about parking or a ride) by setting up your own outdoor bar? Want to seize the summer? Use this guide to set up an outdoor bar you can enjoy from the comfort of your own home.

Find your spot

First things first, you need to pick out a place for your bar. Ideally, it should be somewhere where both sun and shade are available. That could mean adding a patio umbrella or two, or it could mean positioning your bar under a tree, awning or pergola. You want to give yourself options to keep drinks in the shade but be able to enjoy the sun’s warmth if you want it.

Then, look for level ground. Drinks spill. It’s important to have somewhere flat to set up your bar to keep things as stable as possible.

Stock your outdoor bar

Now, let’s get into the fun stuff! Setting up your outdoor bar can transform your outdoor space, give you extra room for entertaining and help you grab some extra vitamin D and fresh air during the temperate months. But you’ll only use it if it’s got what you need to quickly and easily fix yourself a drink. Here’s what you should gather for a well-stocked bar.

outdoor bar - wayfair bar cart

A simple but sturdy bar cart, like the Bucksport Bar Serving Cart, could be all you need to get your bar started. Image courtesy of Wayfair.

Serving surface

First, you’re going to need a place to put everything. You can buy a weather-resistant bar (like these options from Wayfair) if you want to really set yourself up for success, but a simple serving cart can do the trick. Ultimately, you just want somewhere you can put a few bottles and pitchers without anything toppling over.

Weather-safe storage space

That said, you do need to consider where you’ll put everything when you’re not using your outdoor bar. And, sure, you could lug it all out from inside, but you’re much more likely to use your bar on a regular basis if it’s easy. A small, weather-safe cabinet could be all you need to keep any breakables or spillable items protected when your bar isn’t in use.

Cold storage

No one wants a lukewarm beverage. Make sure you have a place where you can keep things cold and where you can grab ice. That could be a mini fridge, cooler or even just a bucket that you stock with ice when you’re using your bar. If you go with the cooler or bucket route, consider adding an ice bucket into the mix so you can easily grab clean ice when you’re making a cocktail.

outdoor bar - acrylic glass anthropologie

Stemless and in break-resistant acrylic, the Valencia Wine Glasses are perfect for outdoor use. Image courtesy of Anthropologie.

Break-resistant barware

Even if your outdoor bar is mere feet from your house, it’s still exposed to the elements. Wind can wreck even the best-laid plans, especially when glass is involved. Consider plastic or metal cups to give your barware some durability (and save yourself the hassle of trying to sweep up broken glass from uneven outdoor surfaces). Moscow mule mugs — like these ones from Crate & Barrel, which come in metal finishes well beyond the standard copper — can be a stylish and long-lasting addition to your bar.

Seating

To really make the most of your bar, you’re going to want to be able to get comfortable. Whether you add bar stools around a high-top table, Adirondack chairs or a couple of benches, adding some thoughtful seating touches can make all the difference. Outdoor pillows and a few throw blankets (Mexican blankets are ideal for their warmth and durability) can extend the hours of use for your outdoor bar well into the evening. If your outdoor bar is fairly exposed, choose a weather-safe storage space that can fit a basket of these comfort-adding touches to protect them and keep them clean.

Lighting and more

Speaking of evening enjoyment of your bar, don’t forget lighting. There are tons of solar options that prevent you from needing to have electricity at your bar. Citronella candles can add a nice ambient glow and keep pests away. You’ve got options, but don’t forget to think about how your bar will transition from day to night. Because, sure, we all love socializing during the day on a summer weekend, but the bulk of your bar’s use will probably fall later in the day.

Now that you’ve started setting the ambiance, we’ve got some more tips to help you make your outdoor bar feel like it’s set in an oasis.

outdoor bar - west elm bar

With a built-in ice compartment, the Portside Outdoor Bar Cart can make entertaining extremely easy. Image courtesy of West Elm.

Serve it up

It’s time for the fun part! You’ve put in the work to get your bar dialed in. Now, you can kick back and enjoy it. If you’re hosting friends or family, make entertaining extra easy on yourself by taking a few steps to prepare.

  • If you don’t have a fridge at your outdoor bar, get drinks on ice a couple of hours before people arrive. Even if you do, make sure you have clean ice accessible for cocktails. Pair it with a scoop or tongs for easy serving.
  • Consider making a large pitcher of a signature cocktail to minimize the amount of bartending you’ll have to do. Then, offer wine, beer and hard alcohol with staple mixers like soda water, tonic, lemons and limes and you’re all set!
  • If you have outdoor candles, set a reminder to light them on your phone to go off ten minutes before people arrive.
  • Drape blankets over your seating so people know they’re free to use.

Then, kick back and enjoy! One of the best things about an outdoor bar is how easy it makes hosting — and cleanup. Someone makes a mess? No worries. You can just hose everything down later.

Cheers to the summer!

The post How to Add an Outdoor Bar appeared first on Freshome.com.


source https://freshome.com/outdoor-bar/

Tuesday, May 28, 2019

The Difference Between A Cornice And A Valance

They may seem the same before inexperienced eyes, but the truth is that in the world of interior decoration it is very important to differentiate each element. One of the most confusing names is the upper window decoration, which can be valances or cornices.

Although both serve the same purpose, the way they do it is different. Look at it in this way; in a chess game, it is important to know the difference between a bishop and a pawn, although all of them are ultimately pieces of the game.

The confusion between a valance and a window cornice is more common than you think. They have a marked difference, but time has made the concepts confused.

Both seek to decorate the upper part of your window where usually there are tubes or systems for blinds and curtains. They can be used separately or together since one does not eliminate the possibility of the other.

So, what’s the difference between a cornice and a valance?

Let’s briefly look at the definition of valances and cornices before moving on to more tangible differences.

Valance definition: a length of decorative drapery hung above a window to screen the curtain fittings.

Basically, a valance is no more than a short curtain that rests on the top of the window, so that it hangs. In general, being fabrics of moderate extensions, we can get them in the curtain manufacturers.

Cornice definition: is an ornamental framework of wood or composition to which window curtains are attached by rods with rings or hooks

A window Cornice, in contrast, is a rigid piece that covers the entire top of the window, as if it were a drawer. This is made mostly of wood for its decorative properties.

Clarified the definitions of window valances and cornices on a literal level, we proceed to leave you at the bottom some of the most popular options when using them.

Valances

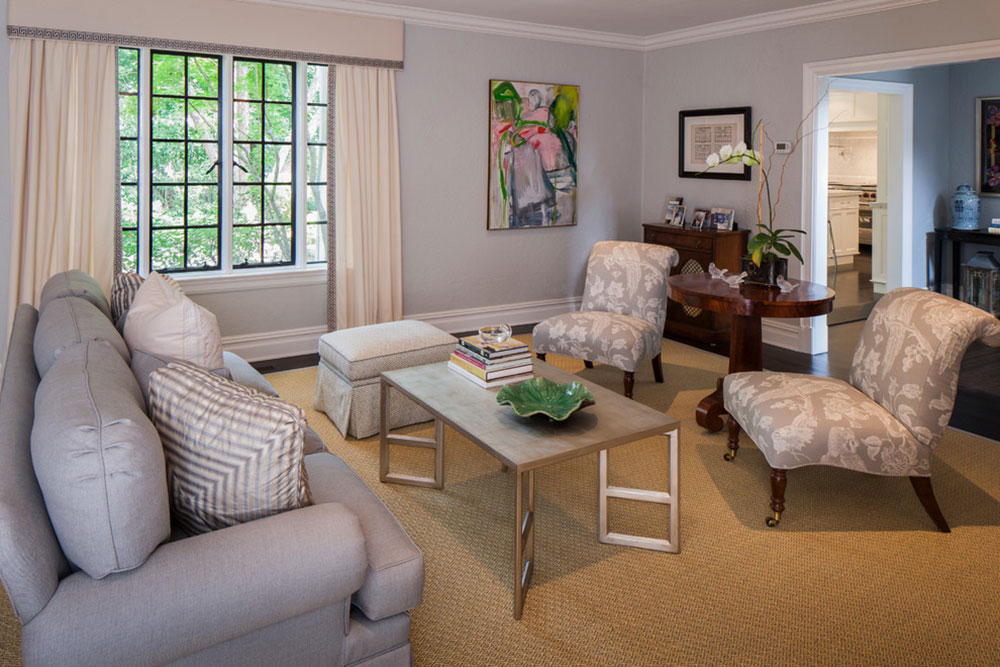
Clyde-Hill-Estate-by-DME-Construction The Difference Between A Cornice And A Valance
Image source: DME Construction

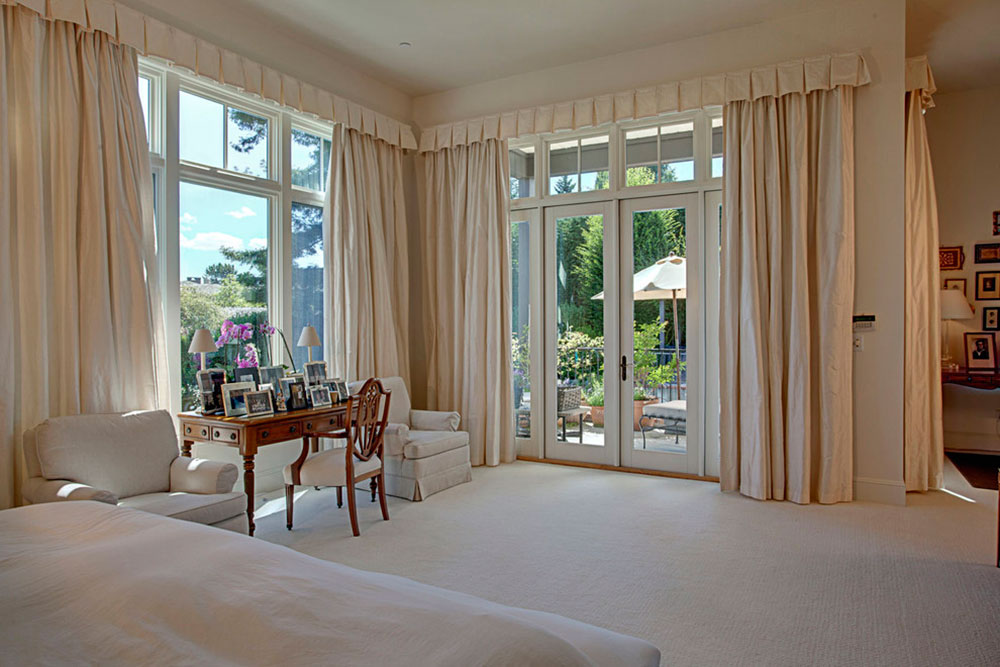
We started the list with the most flexible. The Valances are useful for almost any situation, since depending on how we place it, we can create formal or casual environments. Additionally, by not being rigid, we can move them when we need a clear view of the window.

At the time of use, there are certain points that we can customize to our liking, such as the way in which it holds the upper tube and if the ends will be hanging freely. According to your needs, we can then divide them into the following valances types:

When you’re looking for a fast decoration, use Simple Valances

It is usually a fabric valance that simply joins to the upper support using clip rings. It will be enough to place it to generate a casual and homelike atmosphere.

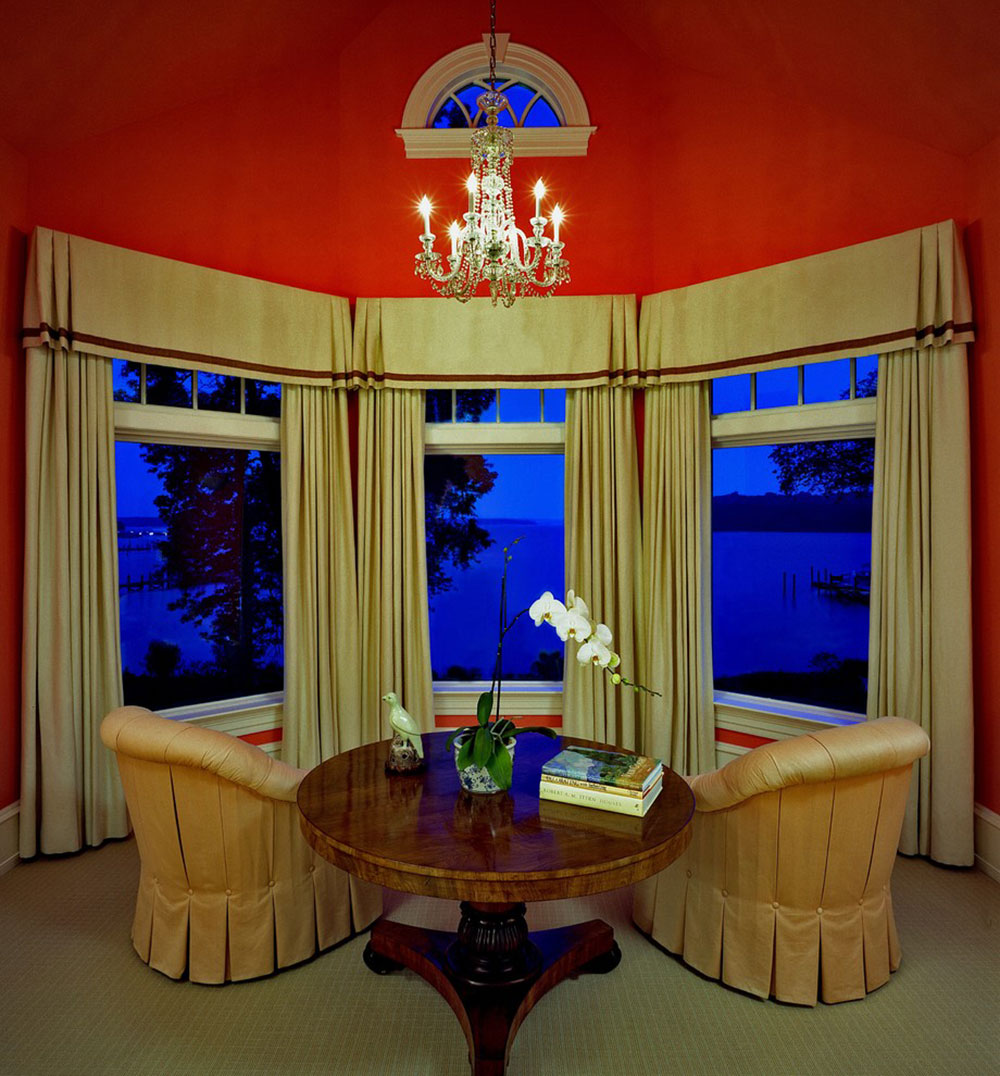
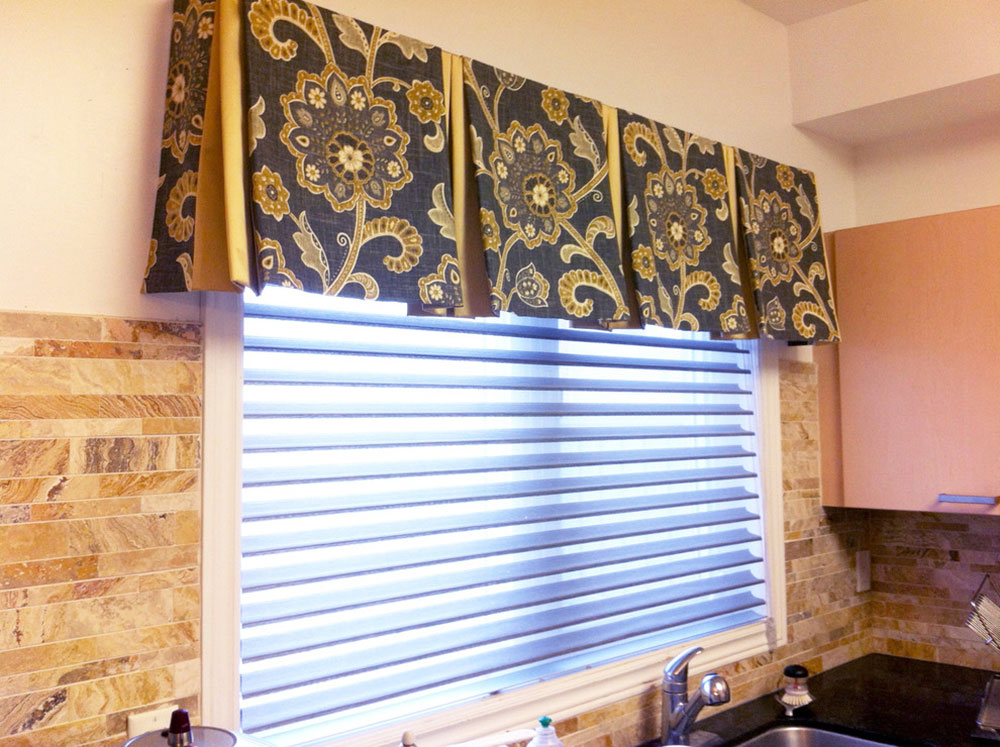
A more permanent and formal solution, the Pleated Valances

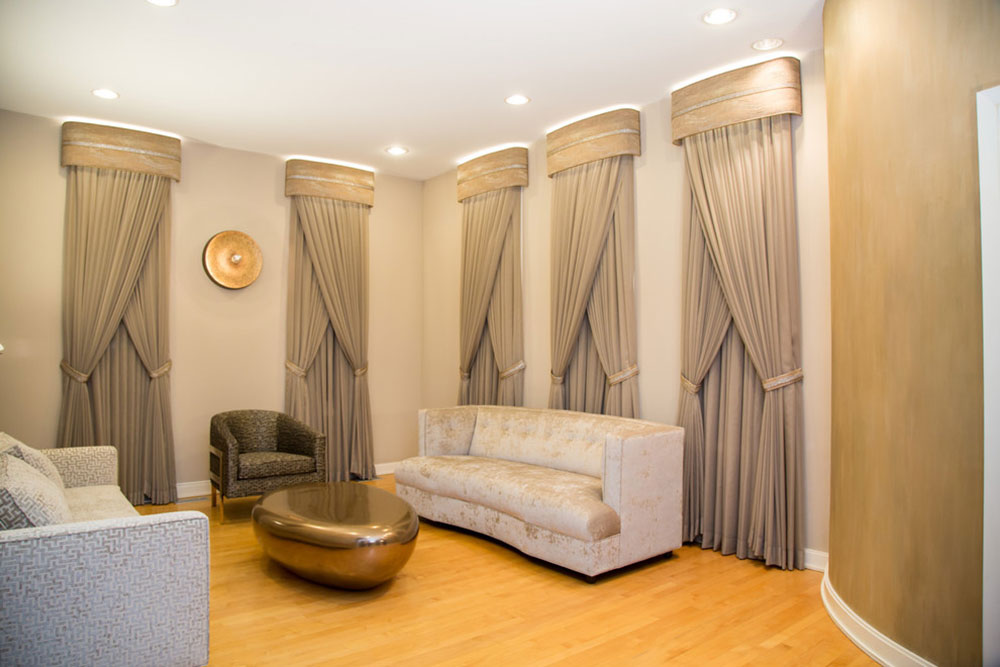
Mercer-House-by-BROWN-DAVIS-ARCHITECTURE-n-INTERIORS The Difference Between A Cornice And A ValanceImage source: BROWN DAVIS ARCHITECTURE & INTERIORS

These are pieces sewed to upper rods with an L shape. Due to their hanging, they tend to be rectangular pieces of cloth, which suffer a fold that is then sewed all along so that there is an opening through which the support passes.

These valances offer a more formal and simple touch to the windows, besides that, among the benefits, they hide the superior support.

To put together our own pleated valance, we need to follow the next steps:

  1. Locate the piece of cloth that you will use for the valance on a wide flat surface where we can work.
  2. Depending on our choice, we will fold a section of the cloth all the way to sew it and make it like a tube, or we can install a series of rings at an approximate distance of 4 inches between each one.
  3. We will insert the upper support through our valance. If we decide to use the rings method, we will have to locate them properly and uniformly so as not to create large sheets of fabric that damage our design.

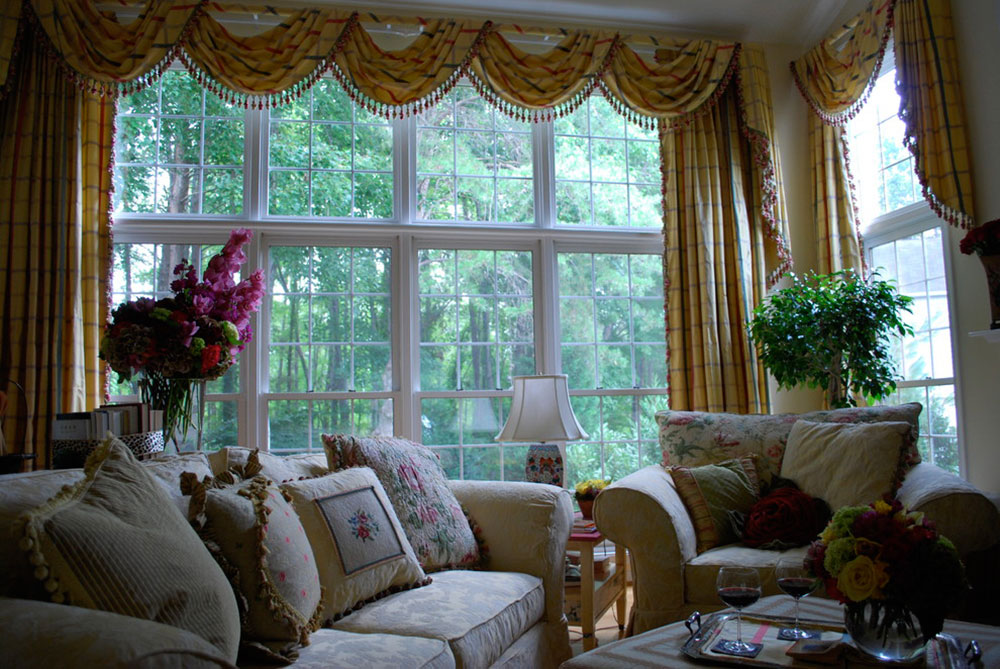
Create a luxurious atmosphere with a Scarf Valance

Thinking-about-scale-by-Amelia-Bennett The Difference Between A Cornice And A ValanceImage source: Amelia Bennett

This option is the most formal and extravagant of all. A scarf valance creates the feeling of lightly wrapping the stand while moving freely over it. Usually, they end up in the form of a waterfall with the ends falling through the window.

To assemble this valance, it is recommended that someone else help us. The steps for its preparation are the following:

  1. We stretch the valance all along its horizontal on a flat surface.
  2. Next, we begin to fold the fabric with lines that go from the right to the left, until we have a kind of elongated accordion. We mark the midpoint with the use of a pin or tape, which will serve us later to center it on the support.
  3. To maintain the accordion shape, we will proceed to make a series of moorings all along with the valance. Using paper strips, we will hold the ends and some central part with enough force, and we will use tape on the rolls of paper so that they do not get loose.
  4. Now, with the help of another person, each will proceed to grab one end of the valance to rise it to the support. Whether you use stairs or chairs for this task, be careful not to hinder the work among you or you could fall.
  5. With the fabric on the top support of the window, we will let the valance rest by zigzag or spiral movements. We must pay attention to the location of the midpoint we previously marked, plus we have to leave enough cloth to create a tie on each side.
  6. Additionally, once the valance is held, we can let the ends fall.
  7. Now we remove the paper ties and simply pull the lower folds slightly to create that rippling effect. Be careful not to apply excessive force.
  8. Finally, and as an extra safety mechanism, use small nylon strips to create transparent tie-downs at the ends, so that our valance does not move.

Shows freedom with a lightweight fabric valance

Fabric-Valance-Top-Treatments-for-Windows-by-Trendy-Blinds-Inc The Difference Between A Cornice And A ValanceImage source: Trendy Blinds Inc

This last option does not require the use of large tubular supports along with our window. On the contrary, a pair of hooks on the windows corners (or a handful depending on the length) will be enough. The steps are very simple:

  1. Install a wall hook in each upper corner of the window.
  2. As if we were going to make a scarf valance, we proceed to fold the fabric in the accordion form.
  3. Now you just have to mount each of the ends of the fabric on the hooks, so that there is a large central fold that we can stretch to create a kind of bridge or ripple.

If we wish, instead we can keep the centerpiece straight to gain additional fabric at the ends.

Cornices

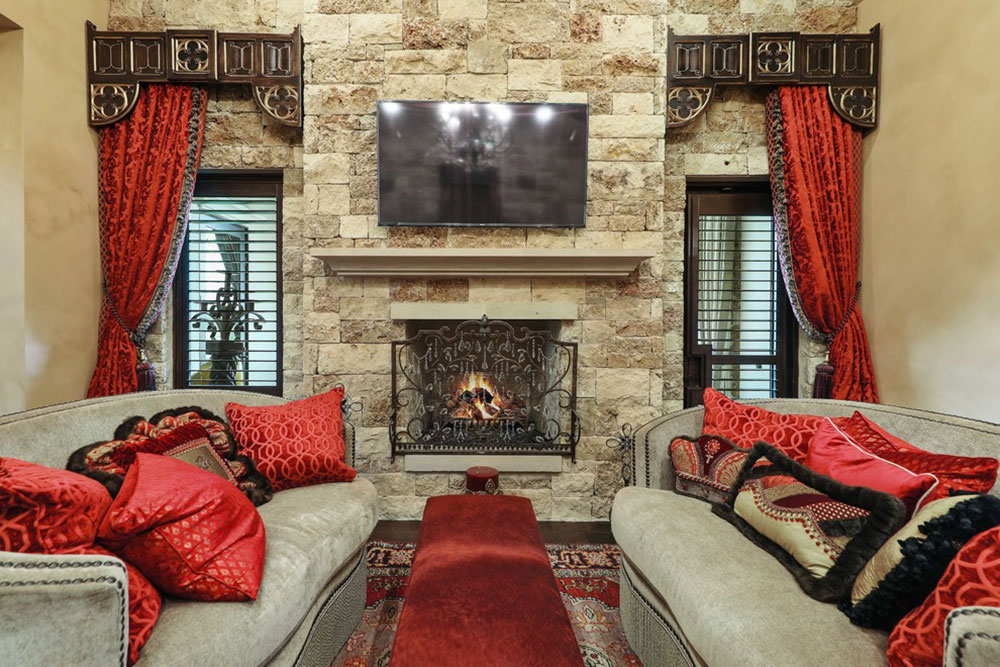
Tutor-renovation-by-Patricia-Knox-Designs The Difference Between A Cornice And A ValanceImage source: Patricia Knox Designs

After the stage of the valances, and looking for a more rigid solution, the windows cornices arrive. When it is made of plastic, it is usually upholstered with the use of fabrics. However, the real charm of them is that we can mold them as we wish, so much so that some of them, like wood, do not use tapestries.

In wood, we can get them in many shapes and materials, from those made of bamboo or oak to those with stunning moldings that break the classic rectangular design.

And it is precisely, a cornice board does not have to follow the strict meaning of the word. It is good that it is a table, but it can have different shapes and styles, so much that most resemble colonial or neoclassical figures, similar to those seen in antique furniture.

Usually, the cornices boards are carved in the lower part, since the upper part fulfills more a functional purpose.

Another big difference between valances and cornices is that most likely we need an expert hand to make the latter since they are not just a piece of cloth, but a complete piece of craftsmanship.

If you do not find the cornice box you want, we suggest you hire a carpenter to do it, you just have to take the design you want. Also, keep in mind that the names change between manufacturer, so it is always good to have an image at hand.

Here are some of the most popular designs used in cornices around the world

Curved lines can create multiple shapes

Window-treatment-with-illumination-Burr-Ridge-IL-by-Gailani-Designs-Inc The Difference Between A Cornice And A ValanceImage source: Gailani Designs Inc.

Through the exclusive use of curves, we can create elegant shapes and patterns. In this case, simply carving a rectangular piece of wood with the use of a round cardboard template we can create very curious internal patterns.

An example is if we make a cut that goes from the lower right end of the cornice, going up to the upper central part and down again to the lower left corner, the final result is a kind of a bridge.

If we now do the same process, but in an inverted way (upper corner, lower center, upper corner), we will have created a kind of eye with rounded triangles at the edges.

Notches and openings with triangles

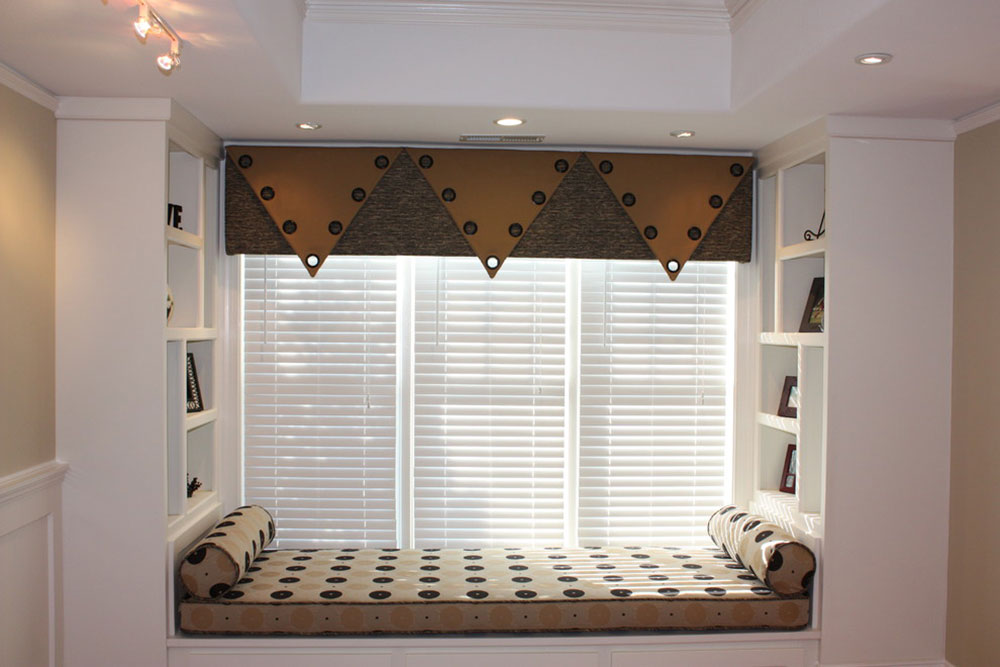
Contemporary-Basement-by-Hanging-In-Style-Designs The Difference Between A Cornice And A ValanceImage source: Hanging In Style Designs

Have you heard of the sawtooth pattern? It is simply a zigzag line that resembles the cutting part of a saw. It is a pattern made up of triangles that go up and down.

In cornices, it is very common to see it. To do this, we will simply have to cut out a triangle template that measures a little less than ¼ of the total height of the cornice board.

With our template made, we will proceed to mark it throughout the lower part. Another option if you do not want the sawtooth design is to lower the template a little more so that it exceeds the wood a couple of inches. If we draw the template in this way, the final result will be a kind of notch.

You can try different patterns that resemble classic furniture designs. Combine the use of triangles with curves for more striking results.

A step pyramid for the most symmetrical

VILLA-EL-SUENO-by-OSCAR-E.-FLORES-DESIGN-STUDIO-LLC The Difference Between A Cornice And A ValanceImage source: OSCAR E. FLORES DESIGN STUDIO, LLC

The stepped pyramid design will test our pulse. We will start by drawing a horizontal line from either end of the cornice.It will not be very large, one or two inches maximum.

Later we will make a similar cut, but in a vertical direction, starting from where we finish the horizontal line. In the end, we go back to carving horizontally, and repeat the process as many times as we want.

The difficulty of this style is that, in general, it is done symmetrically. That is, everything we do in one half, we must repeat it in the other.

The selection depends on us, but we already know what they are called

It does not matter if we are people of cornices or valances, we both seek to decorate the upper part of our window. Now that we know the differences between them, we can make better decision making in whether we look for a more free and loose style, or something more traditional and rigid.

If you enjoyed reading this article about valances and cornices, you should read these as well:

The post The Difference Between A Cornice And A Valance appeared first on Impressive Interior Design.


source https://www.impressiveinteriordesign.com/cornice-valance/